Saturday, January 3, 2015

Liskov Substitution Principle (LSP)


The fourth article in the SOLID Principles series describes the Liskov Substitution Principle (LSP). The LSP specifies that functions that use pointers of references to base classes must be able to use objects of derived classes without knowing it.


The Principle

The Liskov Substitution Principle (LSP) can be worded in various ways. The original wording was described by Barbara Liskov as, "If for each object o1 of type S there is an object o2 of type T such that for all programs P defined in terms of T, the behaviour of P is unchanged when o1 is substituted for o2 then S is a subtype of T". Robert Cecil Martin's simpler version is, "Functions that use pointers or references to base classes must be able to use objects of derived classes without knowing it". For languages such as C#, this can be changed to "Code that uses a base class must be able to substitute a subclass without knowing it".

Case and Implementations 

The LSP applies to inheritance hierarchies. It specifies that you should design your classes so that client dependencies can be substituted with subclasses without the client knowing about the change. All subclasses must, therefore, operate the same manner as their base classes. The specific functionality of the subclass may be different but must conform to the expected behaviour of the base class. To be a true behavioural subtype, the subclass must not only implement the base class' methods and properties but also conform to its implied behaviour. This requires compliance with several rules.
The first rule is that there should be contravariance between parameters of the base class' methods and the matching parameters in subclasses. This means that the parameters in subclasses must either be the same types as those in the base class or must be less restrictive. Similarly, there must be covariance between method return values in the base class and its subclasses. This specifies that the subclass' return types must be the same as, or more restrictive than, the base class' return types.
The next rule concerns preconditions and postconditions. A precondition of a class is a rule that must be in place before an action can be taken. For example, before calling a method that reads from a database you may need to satisfy the precondition that the database connection is open. 

Postconditions describe the state of objects after a process is completed. For example, it may be assumed that the database connection is closed after executing a SQL statement. The LSP states that the preconditions of a base class must not be strengthened by a subclass and that postconditions cannot be weakened in subclasses.

Next the LSP considers invariants. An invariant describes a condition of a process that is true before the process begins and remains true afterwards. For example, a class may include a method that reads text from a file. If the method handles the opening and closing of the file, an invariant may be that the file is not open before the call or afterwards. To comply with the LSP, the invariants of a base class must not be changed by a subclass.

The next rule is the history constraint. By their nature, subclasses include all of the methods and properties of their superclasses. They may also add further members. The history constraint says that new or modified members should not modify the state of an object in a manner that would not be permitted by the base class. For example, if the base class represents an object with a fixed size, the subclass should not permit this size to be modified.

The final LSP rule specifies that a subclass should not throw exceptions that are not thrown by the base class unless they are subtypes of exceptions that may be thrown by the base class.
The above rules cannot be controlled by the compiler or limited by object-oriented programming languages. Instead, you must carefully consider the design of class hierarchies and of types that may be subclassed in the future. Failing to do so risks the creation of subclasses that break rules and create bugs in types that are dependent upon them.

One common indication of non-compliance with the LSP is when a client class checks the type of its dependencies. This may be by reading a property of an object that artificially describes its type or by using reflection to obtain the type. Often a switch statement will be used to perform a different action according to the type of the dependency. This additional complexity also violates the Open / Closed Principle (OCP), as the client class will need to be modified as further subclasses are introduced.

To demonstrate the application of the LSP, we can consider code that violates it and explain how the classes can be refactored to comply with the principle. The following code shows the outline of several classes:

public class Project
{
public Collection ProjectFiles { get; set; }
public void LoadAllFiles()
{
foreach (ProjectFile file in ProjectFiles)
{
file.LoadFileData();
}
}
public void SaveAllFiles()
{
foreach (ProjectFile file in ProjectFiles)
{
if (file as ReadOnlyFile == null)
file.SaveFileData();
}
}
}

public class ProjectFile
{
public string FilePath { get; set; }
public byte[] FileData { get; set; }
public void LoadFileData()
{
// Retrieve FileData from disk
}
public virtual void SaveFileData()
{
// Write FileData to disk
}
}

public class ReadOnlyFile : ProjectFile
{
public override void SaveFileData()
{
throw new InvalidOperationException();
}
}
The first class represents a project that contains a number of project files. Two methods are included that load the file data for every project file and save all of the files to disk. The second class describes a project file. This has a property for the file name and a byte array that contains file data once loaded. Two methods allow the file data to be loaded or saved.

The third class may have been added to the solution at a later time to the other two classes, perhaps when a new requirement was created that some project files would be read-only. The ReadOnlyFile class inherits its functionality from ProjectFile. However, as read-only files cannot be saved, the SaveFileData method has been overridden so that an invalid operation exception is thrown.
The ReadOnlyFile class violates the LSP in several ways. Although all of the members of the base class are implemented, clients cannot substitute ReadOnlyFile objects for ProjectFile objects. This is clear in the SaveFileData method, which introduces an exception that cannot be thrown by the base class. Next, a postcondition of the SaveFileData method in the base class is that the file has been updated on disk. This is not the case with the subclass. The final problem can be seen in the SaveAllFiles method of the Project class. Here the programmer has added an if statement to ensure that the file is not read-only before attempting to save it. This violates the LSP and the OCP as the Project class must be modified to allow new ProjectFile subclasses to be detected.

Refactored Code

There are various ways in which the code can be refactored to comply with the LSP. One is shown below. Here the Project class has been modified to include two collections instead of one. One collection contains all of the files in the project and one holds references to writeable files only. The LoadAllFiles method loads data into all of the files in the AllFiles collection. As the files in the WriteableFiles collection will be a subset of the same references, the data will be visible via these also. The SaveAllFiles method has been replaced with a method that saves only the writeable files.
The ProjectFile class now contains only one method, which loads the file data. This method is required for both writeable and read-only files. The new WriteableFile class extends ProjectFile, adding a method that saves the file data. This reversal of the hierarchy means that the code now complies with the LSP.

The refactored code is as follows:


public class Project
{
public Collection AllFiles { get; set; }
public Collection WriteableFiles { get; set; }
public void LoadAllFiles()
{
foreach (ProjectFile file in AllFiles)
{
file.LoadFileData();
}
}
public void SaveAllWriteableFiles()
{
foreach (WriteableFile file in WriteableFiles)
{
file.SaveFileData();
}
}
}

public class ProjectFile
{
public string FilePath { get; set; }
public byte[] FileData { get; set; }
public void LoadFileData()
{
// Retrieve FileData from disk
}
}

public class WriteableFile : ProjectFile
{
public void SaveFileData()
{
// Write FileData to disk
}
}
Thursday, January 1, 2015

The Open/Closed Principle


The third article in the SOLID Principles series describes the Open / Closed Principle (OCP). The OCP states that all classes and similar units of source code should be open for extension but closed for modification.

The Principle

The Open / Closed Principle (OCP) states that classes should be open for extension but closed for modification. "Open to extension" means that you should design your classes so that new functionality can be added as new requirements are generated. "Closed for modification" means that once you have developed a class you should never modify it, except to correct bugs.

The two parts of the principle appear to be contradictory. However, if you correctly structure your classes and their dependencies you can add functionality without editing existing source code. Generally you achieve this by referring to abstractions for dependencies, such as interfaces or abstract classes, rather than using concrete classes. Such interfaces can be fixed once developed so the classes that depend upon them can rely upon unchanging abstractions. Functionality can be added by creating new classes that implement the interfaces.
Applying the OCP to your projects limits the need to change source code once it has been written, tested and debugged. This reduces the risk of introducing new bugs to existing code, leading to more robust software. Another side effect of the use of interfaces for dependencies is reduced coupling and increased flexibility.

Example Code

To demonstrate the application of the OCP, we can consider some C# code that violates it and explain how the classes can be refactored to comply with the principle:

public class Logger
{
public void Log(string message, LogType logType)
{
switch (logType)
{
case LogType.Console:
Console.WriteLine(message);
break;
case LogType.File:
// Code to send message to printer
break;
}
}
}

public enum LogType
{
Console,
File
}
The above sample code is a basic module for logging messages. The Logger class has a single method that accepts a message to be logged and the type of logging to perform. The switch statement changes the action according to whether the program is outputting messages to the console or to the default printer.

If you wished to add a third type of logging, perhaps sending the logged messages to a message queue or storing them in a database, you could not do so without modifying the existing code. Firstly, you would need to add new LogType constants for the new methods of logging messages. Secondly you would need to extend the switch statement to check for the new LogTypes and output or store messages accordingly. This violates the OCP.

Refactored Code

We can easily refactor the logging code to achieve compliance with the OCP. Firstly we need to remove the LogType enumeration, as this restricts the types of logging that can be included. Instead of passing the type to the Logger, we will create a new class for each type of message logger that we require. In the final code we will have two such classes, named "ConsoleLogger" and "PrinterLogger". Additional logging types could be added later without changing any existing code.
The Logger class still performs all logging but using one of the message logger classes described above to output a message. In order that the classes are not tightly coupled, each message logger type implements the IMessageLogger interface. The Logger class is never aware of the type of logging being used as its dependency is provided as an IMessageLogger instance using constructor injection.

The refactored code is as follows:

public class Logger
{
IMessageLogger _messageLogger;
public Logger(IMessageLogger messageLogger)
{
_messageLogger = messageLogger;
}
public void Log(string message)
{
_messageLogger.Log(message);
}
}

public interface IMessageLogger
{
void Log(string message);
}

public class ConsoleLogger : IMessageLogger
{
public void Log(string message)
{
Console.WriteLine(message);
}
}

public class PrinterLogger : IMessageLogger
{
public void Log(string message)
{
// Code to send message to printer
}
}

Wednesday, December 31, 2014

Single Responsibility Principle

A brief Intro

The SOLID Principles series describes the Single Responsibility Principle (SRP). The SRP states that each class or similar unit of code should have one responsibility only and, therefore, only one reason to change.


The Principle

The Single Responsibility Principle (SRP) states that there should never be more than one reason for a class to change. This means that every class, or similar structure, in your code should have only one job to do. Everything in the class should be related to that single purpose. It does not mean that your classes should only contain one method or property. There may be many members as long as they relate to the single responsibility. It may be that when the one reason to change occurs, multiple members of the class may need modification. It may also be that multiple classes will require updates.

Application of the SRP can change your code considerably. One key change is that the classes in your projects become smaller and cleaner. The number of classes present in a solution may increase accordingly so it is important to organise them well using namespaces and project folders. The creation of classes that are tightly focussed on a single purpose leads to code that is simpler to understand and maintain.

A further benefit of having small, cohesive classes is that the chances of a class containing bugs is lowered. This reduces the need for changes so the code is less fragile. As the classes perform only one duty, multiple classes will work together to achieve larger tasks. Along with the other principles this permits looser coupling. It can also make it easier to modify the overall software, either by extending existing classes or introducing new, interchangeable versions.
Example Code
To demonstrate the application of the SRP, we can consider an example C# class that violates it and explain how the class can be refactored to comply with the principle:
  1. public class OxygenMeter
  2. {
  3. public double OxygenSaturation { get; set; }
  4. public void ReadOxygenLevel()
  5. {
  6. using (MeterStream ms = new MeterStream("O2"))
  7. {
  8. int raw = ms.ReadByte();
  9. OxygenSaturation = (double)raw / 255 * 100;
  10. }
  11. }
  12. public bool OxygenLow()
  13. {
  14. return OxygenSaturation <= 75;
  15. }
  16. public void ShowLowOxygenAlert()
  17. {
  18. Console.WriteLine("Oxygen low ({0:F1}%)", OxygenSaturation);
  19. }
  20. }


code above is a class that communicates with a hardware device to monitor the oxygen levels in some water. The class includes a method named "ReadOxygenLevel" that retrieves a value from a stream generated by the oxygen monitoring hardware. It converts the value to a percentage and stores it in the OxygenSaturation property. The second method, "OxygenLow", checks the oxygen saturation to ensure that it exceeds the minimum level of 75%. The "ShowLowOxygenAlert" shows a warning that contains the current saturation value.


There are at least three reasons for change within the OxygenMeter class. If the oxygen monitoring hardware is replaced the ReadOxygenLevel method will need to be updated. If the process for determining low oxygen is changed, perhaps to include a temperature variable, the class will need updating. Finally, if the alerting requirements become more sophisticated than outputting text to the console, the ShowLowOxygenAlert method will need to be rewritten.

Refactored Code


To refactor the code we will separate the functionality into three classes. The first is the OxygenMeter class. This retains the OxygenSaturation property and the ReadOxygenLevel method. You could decide to split these members into separate classes. In this case we will keep them together as they are closely related. The other methods are removed so that the only reason for change is replacement of the monitoring hardware.
The second class is named "OxygenSaturationChecker". This class includes a single method that compares the oxygen level with the minimum acceptable value. The method is the same as the original version except for the addition of a parameter that injects an OxygenMeter object containing the saturation level to test. The only reason for the class to change is if the test process is changed.
The final class is named "OxygenAlerter". This displays an alert that includes the current oxygen saturation level. Again, the OxygenMeter dependency is injected. The one reason for the class to change is if the alerting system is updated.
NB: The refactored example code below breaks other SOLID principles in order that the application of the SRP is visible. Further refactoring of this example is necessary to achieve compliance with the other four principles.

  1. public class OxygenMeter
  2. {
  3. public double OxygenSaturation { get; set; }
  4. public void ReadOxygenLevel()
  5. {
  6. using (MeterStream ms = new MeterStream("O2"))
  7. {
  8. int raw = ms.ReadByte();
  9. OxygenSaturation = (double)raw / 255 * 100;
  10. }
  11. }
  12. }


  1. public class OxygenSaturationChecker
  2. {
  3. public bool OxygenLow(OxygenMeter meter)
  4. {
  5. return meter.OxygenSaturation <= 75;
  6. }
  7. }


  1. public class OxygenAlerter
  2. {
  3. public void ShowLowOxygenAlert(OxygenMeter meter)
  4. {
  5. Console.WriteLine("Oxygen low ({0:F1}%)", meter.OxygenSaturation);
  6. }
  7. }

Tuesday, December 30, 2014

SOLID Principals

The SOLID Principles


Since its gonna be new year and my gaming article wasn't ready enough to be published,This is the first article in a series of six that will shed some light on the basic concepts of Object Oriented  design and programming.  The SOLID principles provide five guidelines that, when followed, can dramatically enhance the maintainability of software.

SOLID

The SOLID principles are five dependency management for object oriented programming and design. The SOLID acronym was introduced by Robert Cecil Martin, also known as "Uncle Bob". Each letter represents another three-letter acronym that describes one principle.
When working with software in which dependency management is handled badly, the code can become rigid, fragile and difficult to reuse. Rigid code is that which is difficult to modify, either to change existing functionality or add new features. Fragile code is susceptible to the introduction of bugs, particularly those that appear in a module when another area of code is changed. If you follow the SOLID principles, you can produce code that is more flexible and robust, and that has a higher possibility for reuse.
This article gives a high-level overview of the five principles. Future articles in the series will describe each principle in more detail and provide examples of their application with C# code.

Single Responsibility Principle(SRP)

The Single Responsibility Principle (SRP) states that there should never be more than one reason for a class to change. This means that you should design your classes so that each has a single purpose. This does not mean that each class should have only one method but that all of the members in the class are related to the class' primary function. Where a class has multiple responsibilities, these should be separated into new classes.
When a class has multiple responsibilities, the likelihood that it will need to be changed increases. Each time a class is modified the risk of introducing bugs grows. By concentrating on a single responsibility, this risk is limited.

Open / Closed Principle(OCP)

The Open / Closed Principle (OCP) specifies that software entities (classes, modules, functions, etc.) should be open for extension but closed for modification. The "closed" part of the rule states that once a module has been developed and tested, the code should only be adjusted to correct bugs. The "open" part says that you should be able to extend existing code in order to introduce new functionality.
As with the SRP, this principle reduces the risk of new errors being introduced by limiting changes to existing code.

Liskov Substitution Principle (LSP)

The Liskov Substitution Principle (LSP) states that "functions that use pointers or references to base classes must be able to use objects of derived classes without knowing it". When working with languages such as C#, this equates to "code that uses a base class must be able to substitute a subclass without knowing it". The principle is named after Barbara Liskov.
If you create a class with a dependency of a given type, you should be able to provide an object of that type or any of its subclasses without introducing unexpected results and without the dependent class knowing the actual type of the provided dependency. If the type of the dependency must be checked so that behaviour can be modified according to type, or if subtypes generated unexpected rules or side effects, the code may become more complex, rigid and fragile.

Interface Segregation Principle (ISP)

The Interface Segregation Principle (ISP) specifies that clients should not be forced to depend upon interfaces that they do not use. This rule means that when one class depends upon another, the number of members in the interface that is visible to the dependent class should be minimised.
Often when you create a class with a large number of methods and properties, the class is used by other types that only require access to one or two members. The classes are more tightly coupled as the number of members they are aware of grows. When you follow the ISP, large classes implement multiple smaller interfaces that group functions according to their usage. The dependents are linked to these for looser coupling, increasing robustness, flexibility and the possibility of reuse.

Dependency Inversion Principle (DIP)

The Dependency Inversion Principle (DIP) is the last of the five rules. The DIP makes two statements. The first is that high level modules should not depend upon low level modules. Both should depend upon abstractions. The second part of the rule is that abstractions should not depend upon details. Details should depend upon abstractions.
The DIP primarily relates to the concept of layering within applications, where lower level modules deal with very detailed functions and higher level modules use lower level classes to achieve larger tasks. The principle specifies that where dependencies exist between classes, they should be defined using abstractions, such as interfaces, rather than by referencing classes directly. This reduces fragility caused by changes in low level modules introducing bugs in the higher layers. The DIP is often met with the use of dependency injection.

Monday, December 29, 2014

Building games with HTML5 with Construct 2


What's here for you..

The gaming world has surpassed all the expectations since some time now,and people have started choosing game dev and design as a career option.Many gaming studios have emerged and many gaming engines and frameworks have been created in the last decade.Now , today I will walk you through how to build some decent games using an HTML5 framework - 'Construct 2' and also I will tell you how to get it published on the store and also how it can be made cross platform.


What are the things you can choose from..
Based on how much details you want to put into the game , the gaming engines and framework have been divided into 3 major categories.
  • Low Level HTML5 Canvas API
  • Mid Level gaming APIs
    1.ImpactJS
    2.CreateJS
    3.Box2D
  • Game Creation Studios
    1.Scirra Construct 2
    2.Yo Yo Game Studio
    3.GameSalad Creator

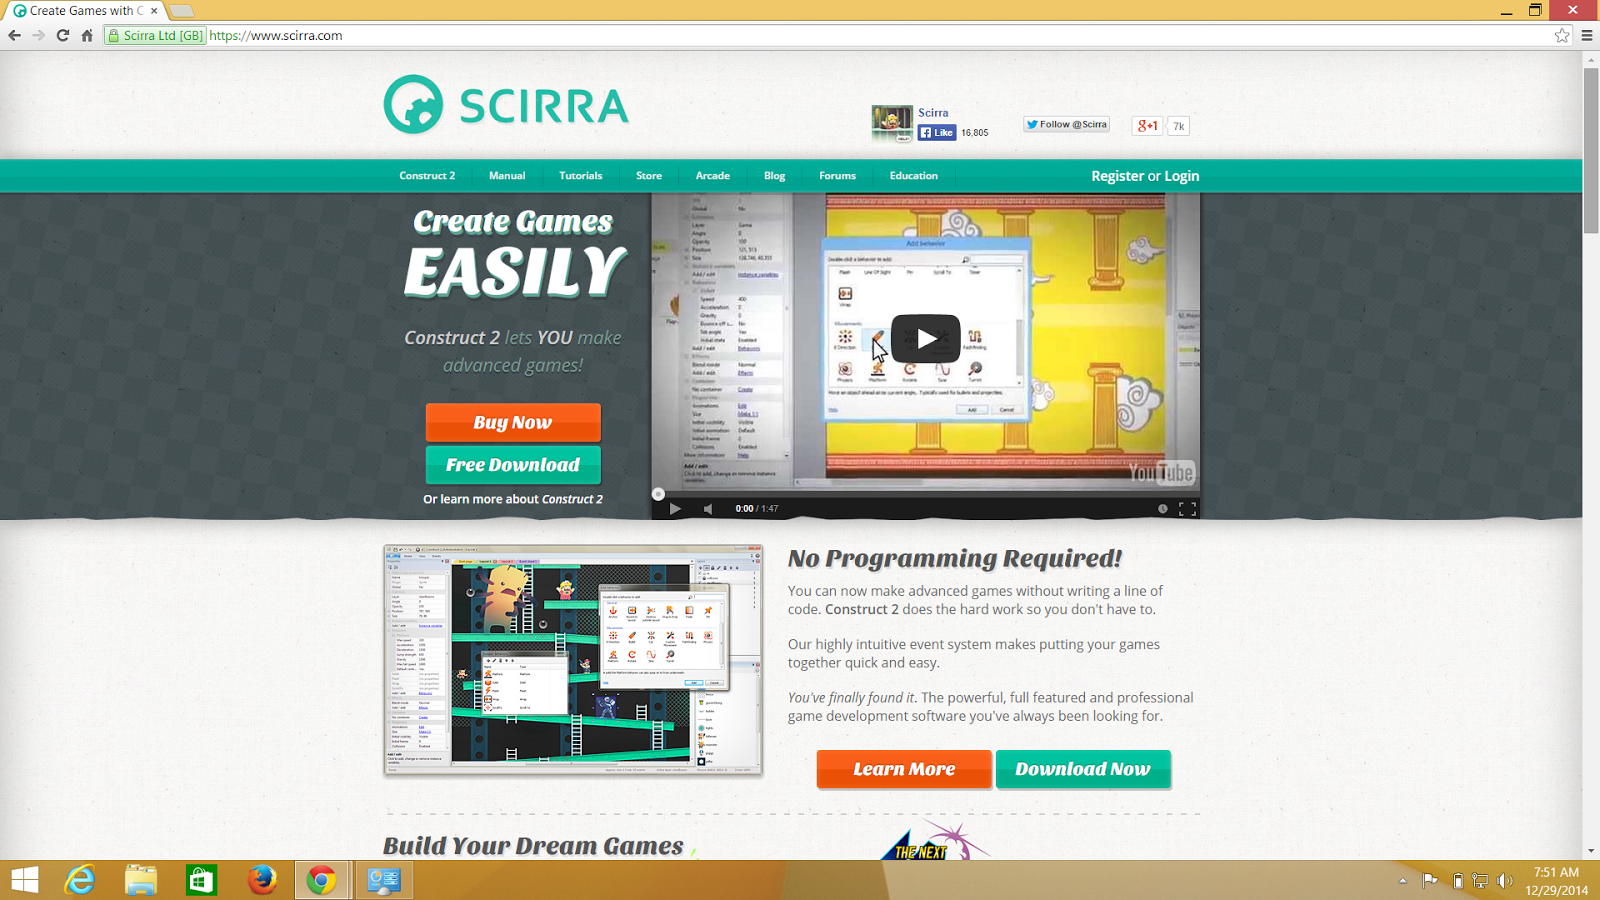
Lets Start with where to download Scirra Contruct 2


So today all whatever Im about to demo will be possible to perform in the free download copy from http://scirra.com/


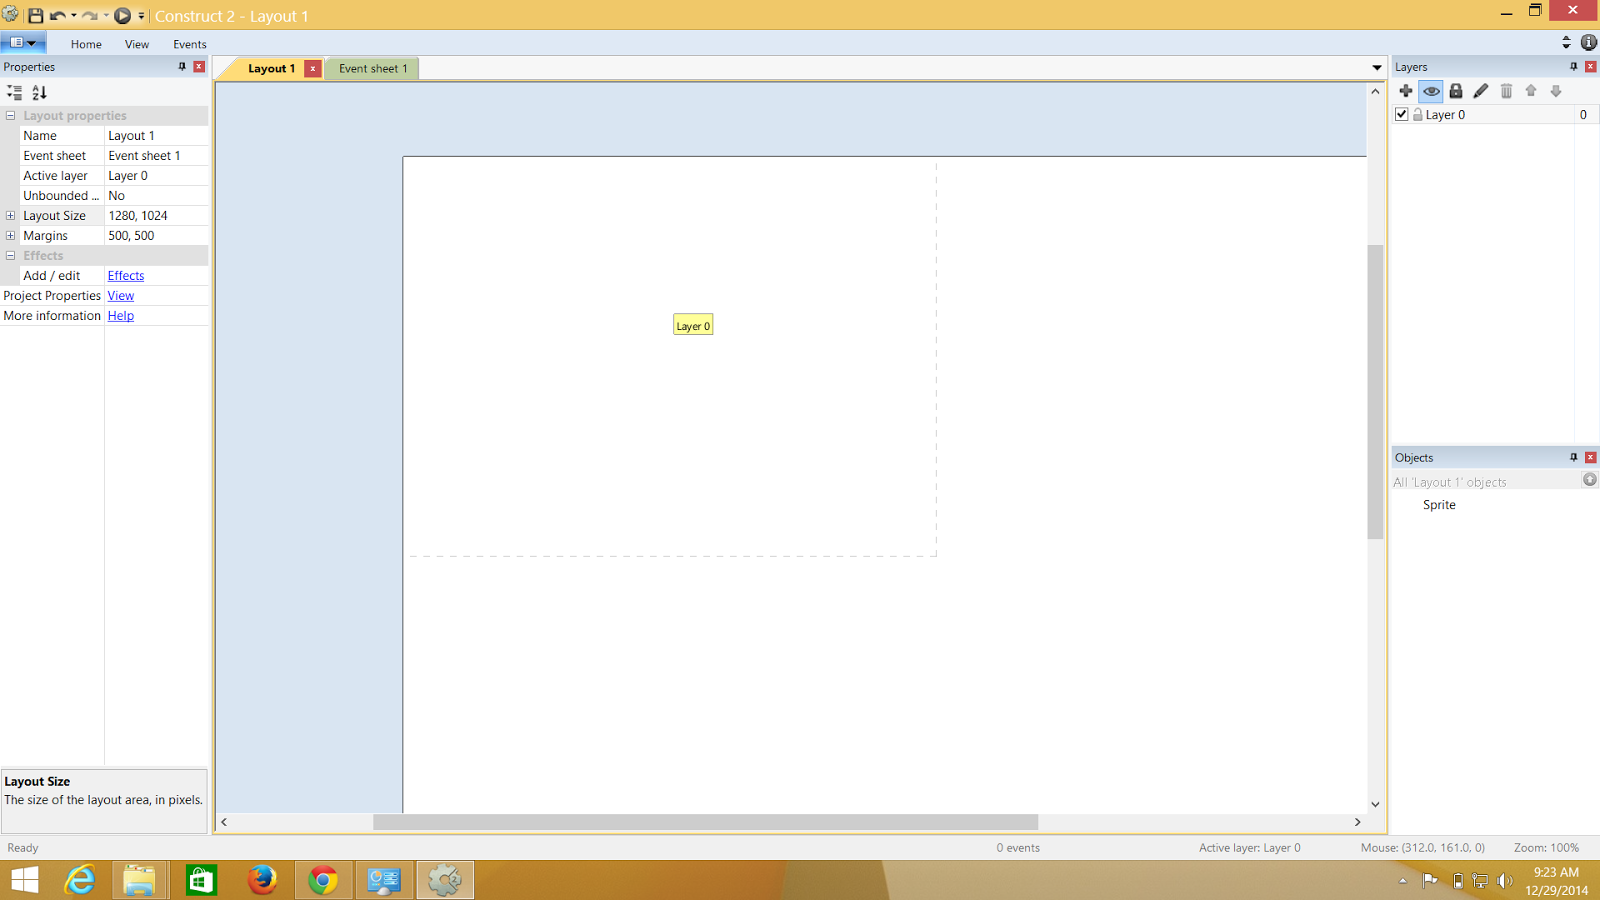
Getting Familiarised with the UI of Contruct2 


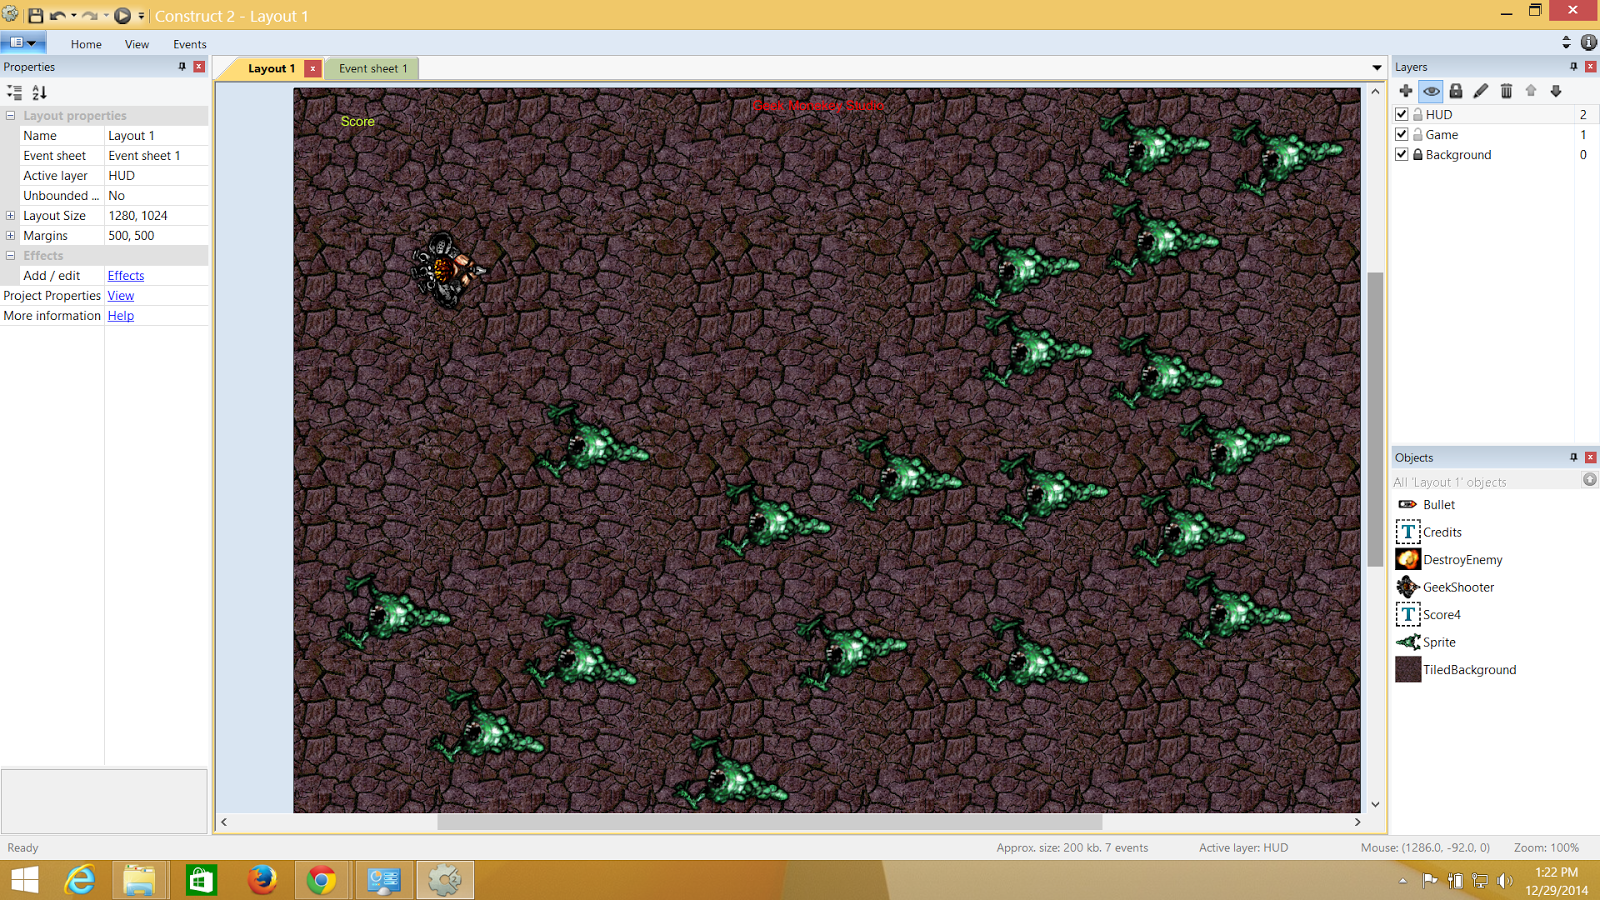
This is the pretty self explanatory picture of what are the different part of IDE 


Some major stuffs one should know before getting their hands dirty are:

  • Projects Pane: Similar to Visual Studio project pane, this shows all the files and assets in the project.
  • Layer Tab: Depicts the different layers in the game Ex. Background and foreground.
  • Objects Pane: On the bottom right the object pae will show you all the objects , you have in the game.
  • Event Sheet: Will help any developer to trigger events and add or remove events to any object in the game.
  • Layout :will deal with the looks and the UI of the game.

Objects


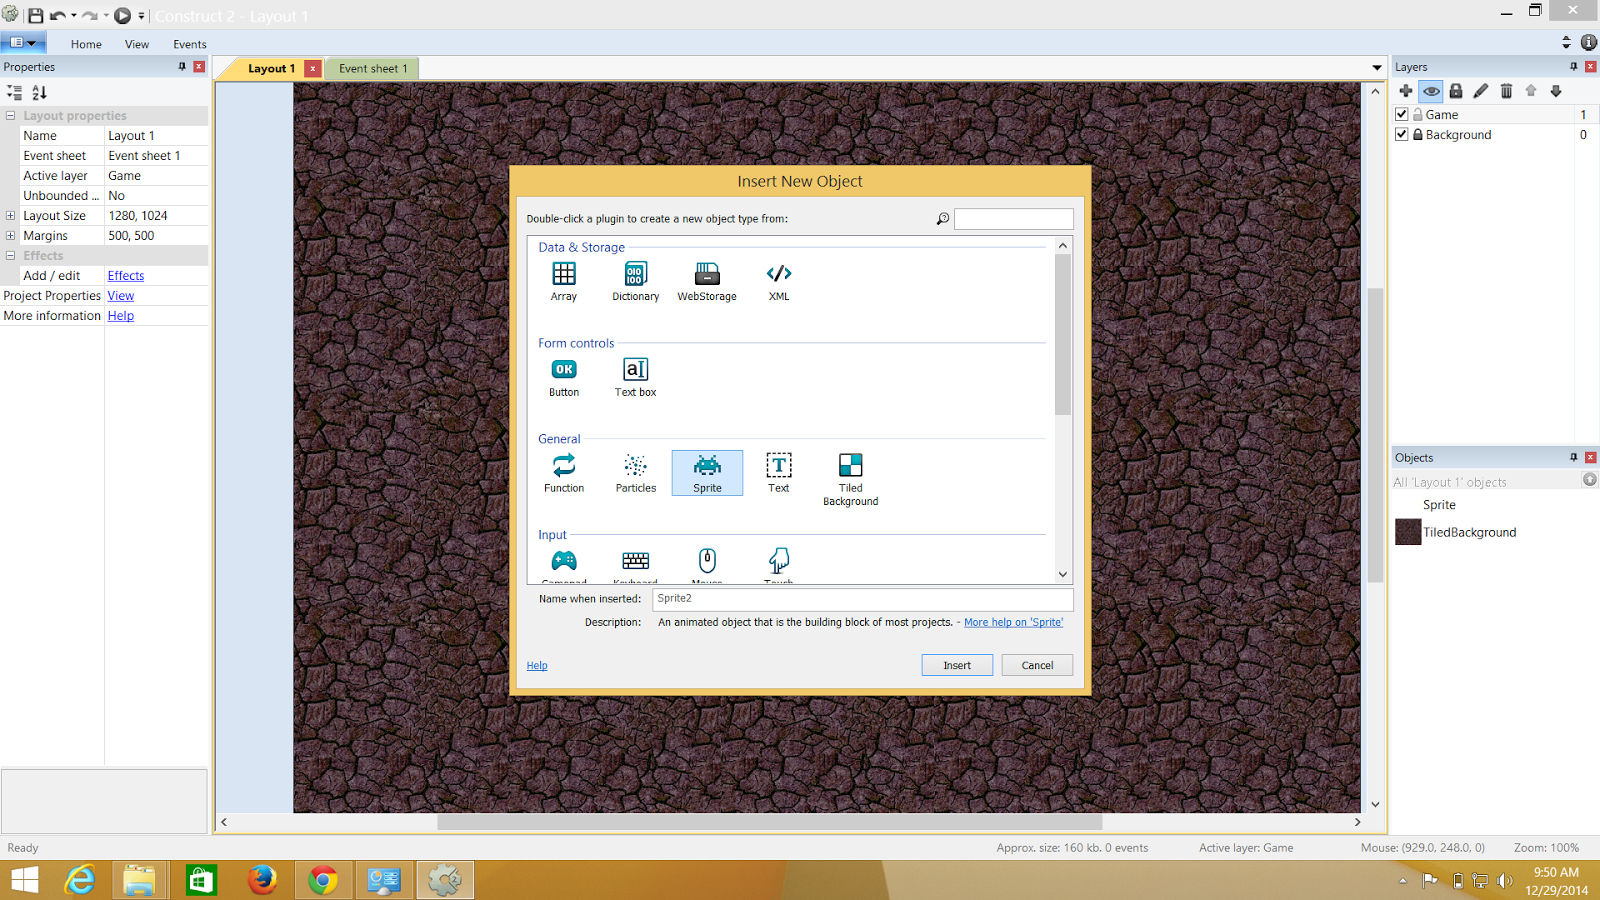
The objects can be loads of different things such as Tiles,Sprites(Image for any character) and Text.To add any object double click "Layout" and select "insert an object".When inserting any new object one should select the "plugin in the dailog box" viz Sprite ; this creates the 'Object Type' and then can be replicated as many times in the project.

Behaviours


The behaviours are to be binded with the objects and these are built in logics for example lets say you fire a bullet and the the bullet goes in one specific angle. So the angle is the bullets property and bullet is the object here.And it can be added from the properties pane of the respective objects.


Layout VS Event Sheet

Layout determines the arrangement of objects and their orientation in the game .This lets you pick the size and where the objects will be placed and are most pre defined.The event sheet is although the list of actions and events which are mapped to all the onjects in the game and in simple terms is the logic of the objects.

Event Sheet  - Events and Actions

To be very precise,The Events and Actions are like If and Else Statements.The Event stands for the condition of If Or Else and the Actions stands for the execution the that specific block where the result is true.


Events


  • A logical block that helps the user decide how the game works 
  • The events are triggered on the arrival or when a particular condition comes true. 
  • We can have nested events.
Actions

  • Appears when a particular even gets executed 
  • Can have multiple actions for one event.


Let the Game Begin

Adding an Background to the layout.


On the Left hand side you will get the value of layout.keep a note of that , we will require it in sometime

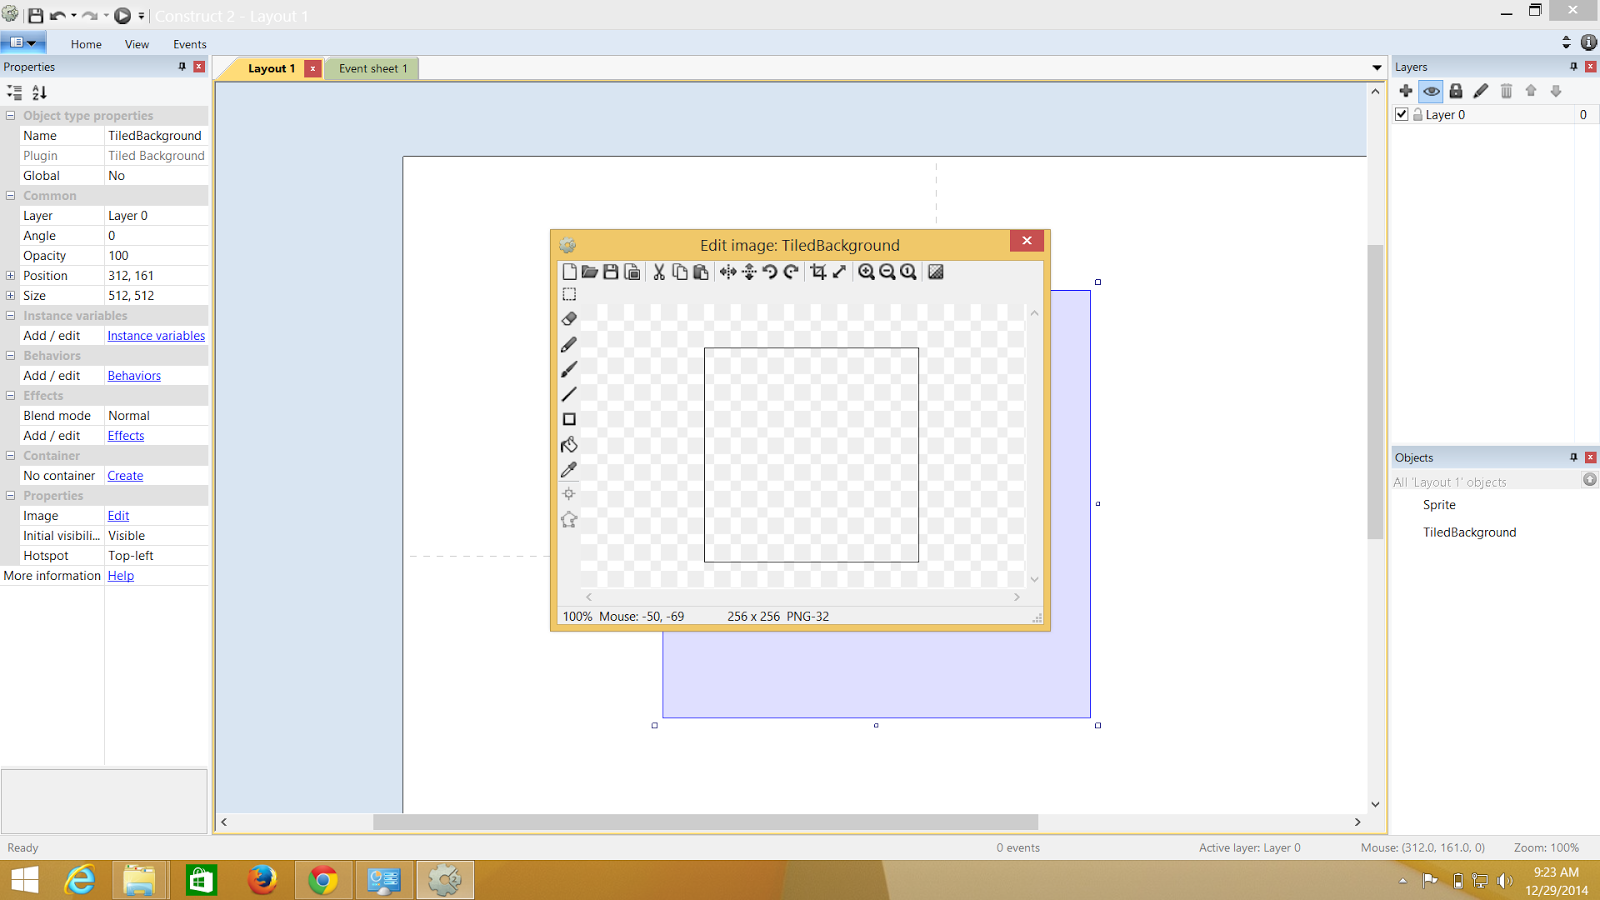
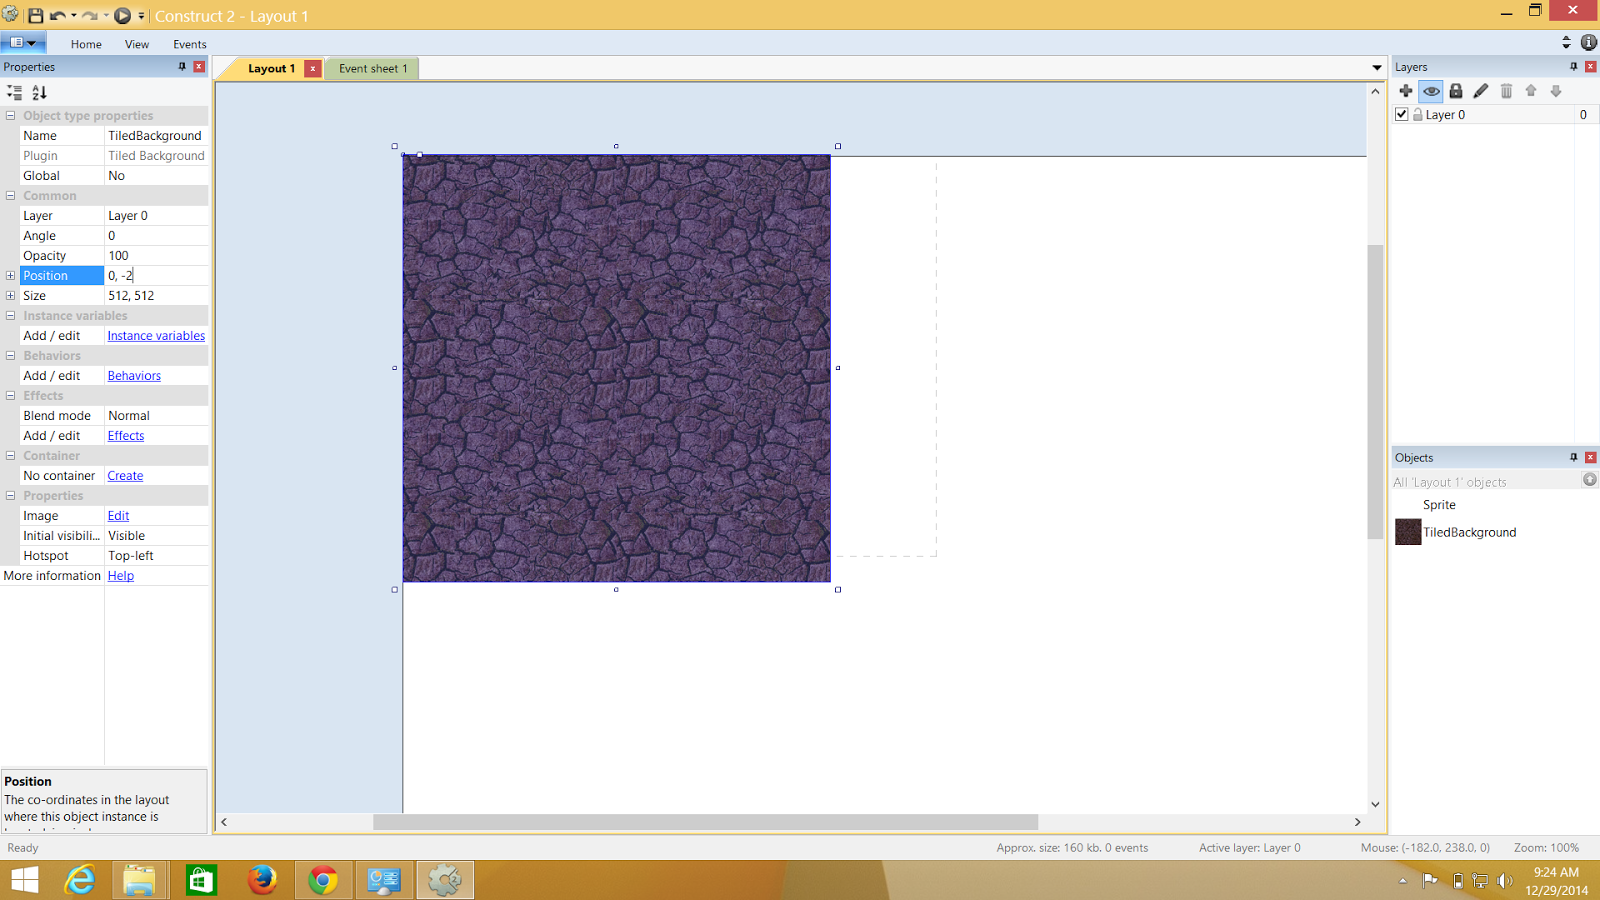
Double Click the Layout and select tiled background.and you will find your pointer turning into a cross.when you click on the layout you will have the same screen that of mine.

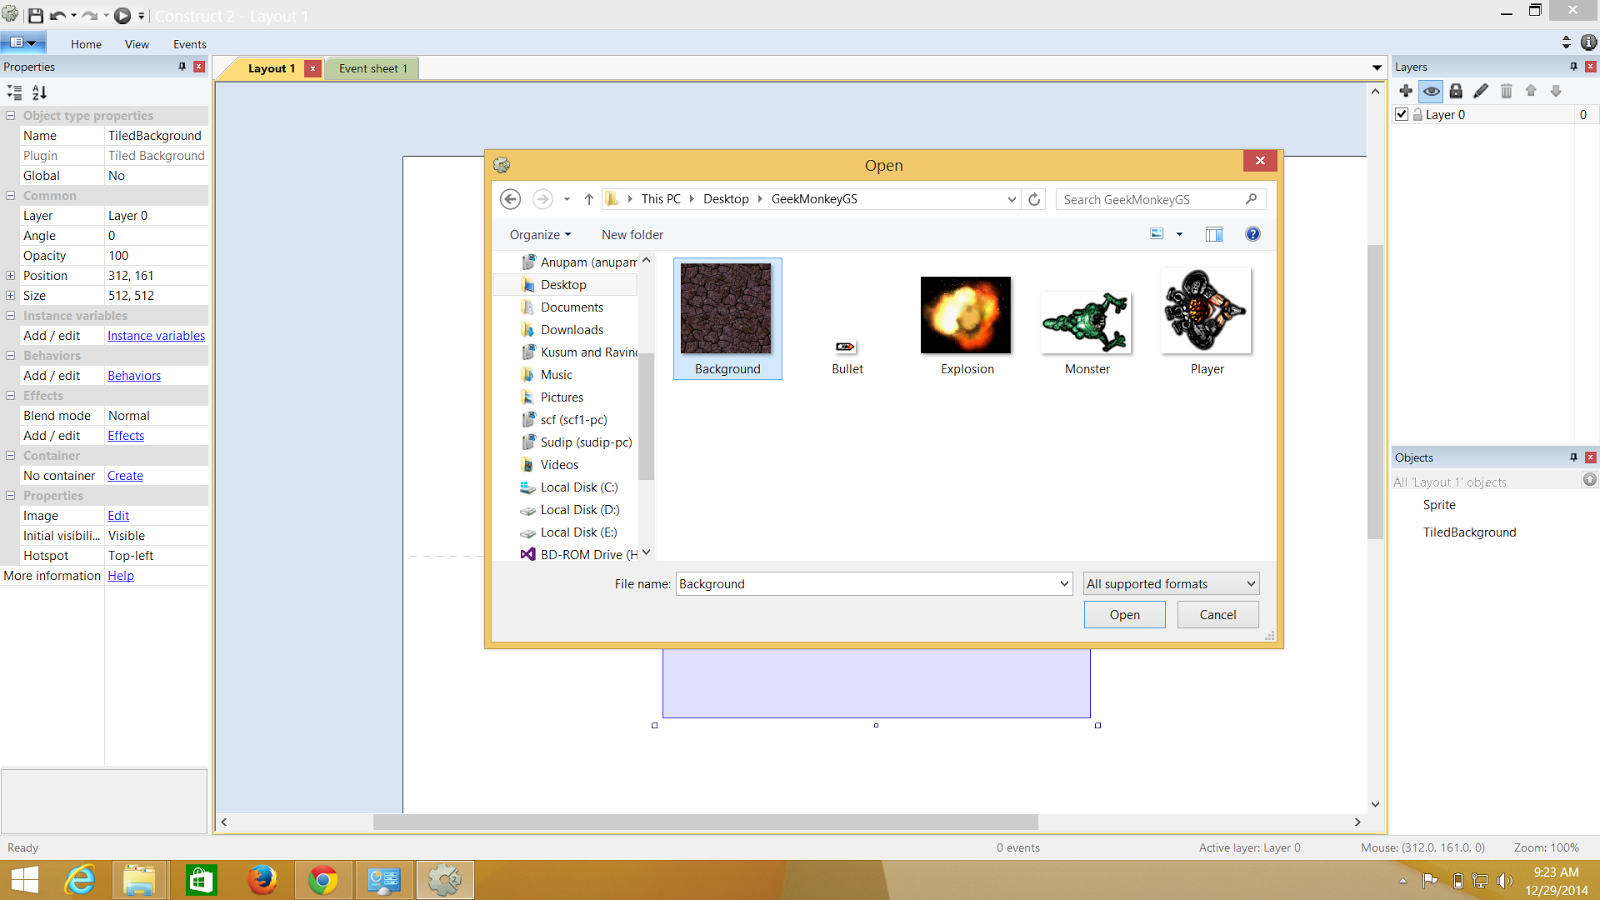
I have Background here and I have browsed it from my explorer.

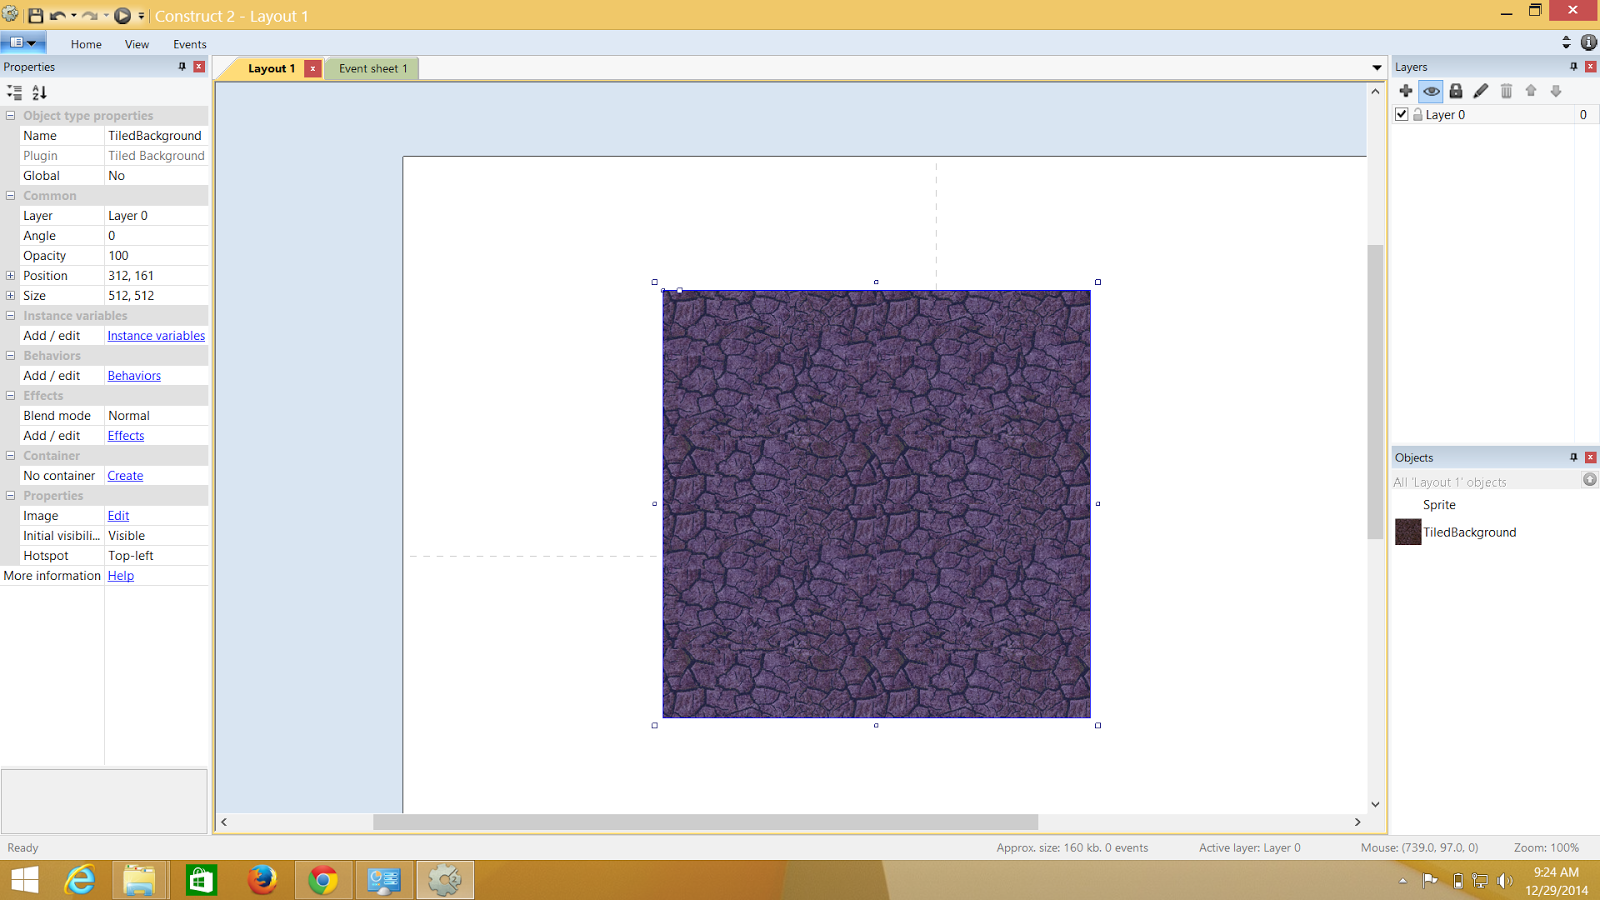
Now I have the background but I need the background to cover the whole layout as well as start from the (0,0) of my layout

I Go ahead an change the values to (0,0) and my titled background starts from the beginning now

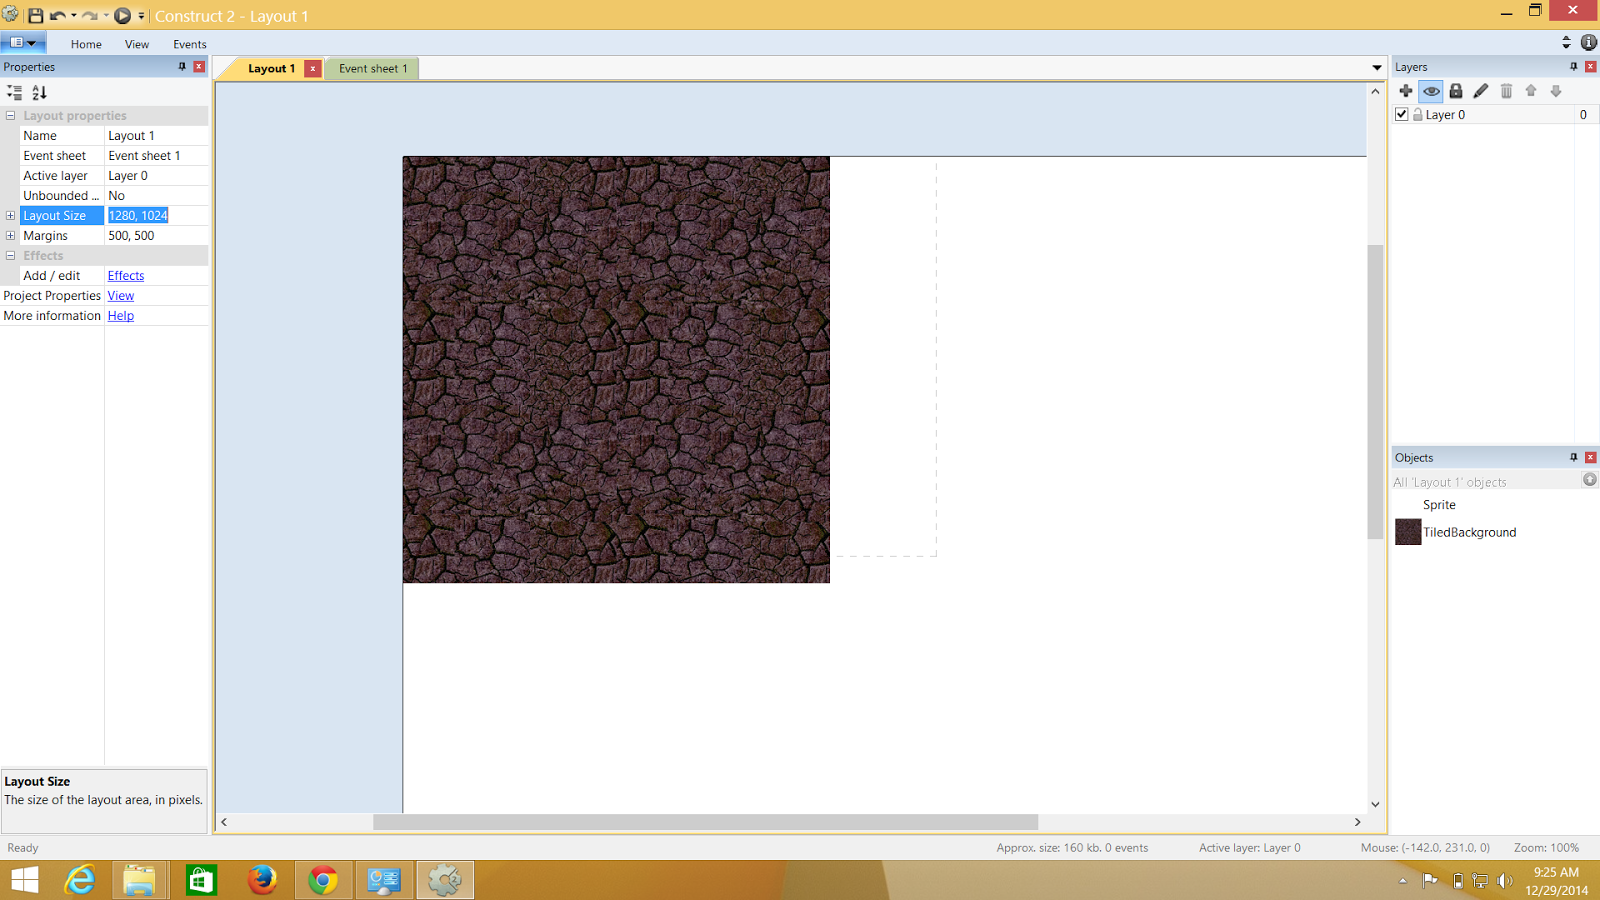
Now I will change the size to the same that of the layout and now finally end up having the  whole screen as background


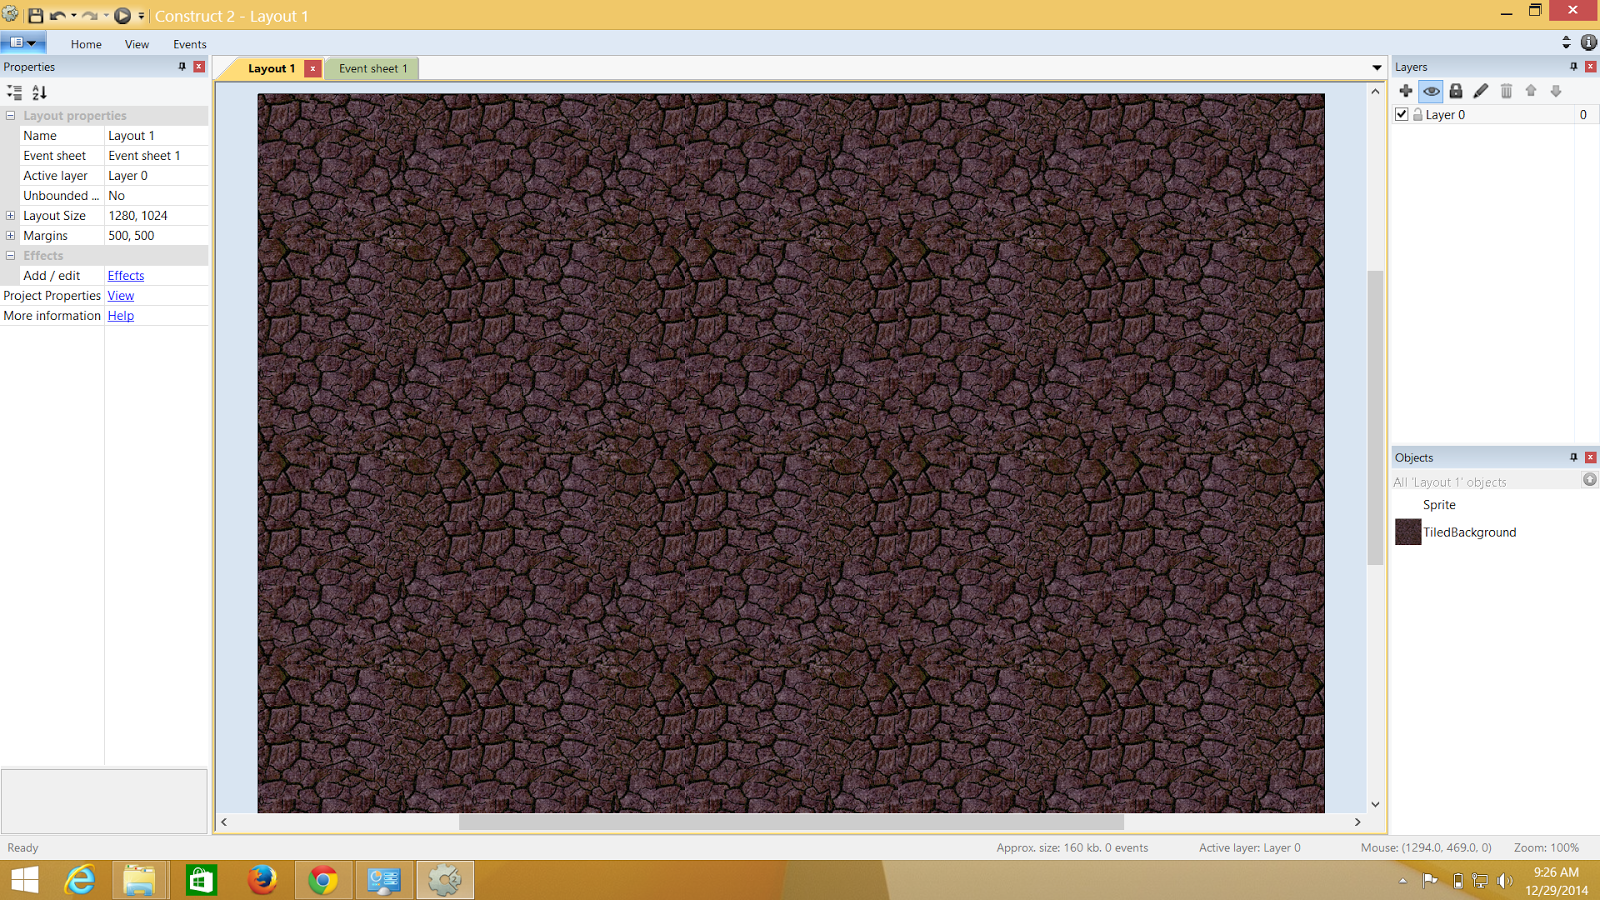
And finally the background is set 


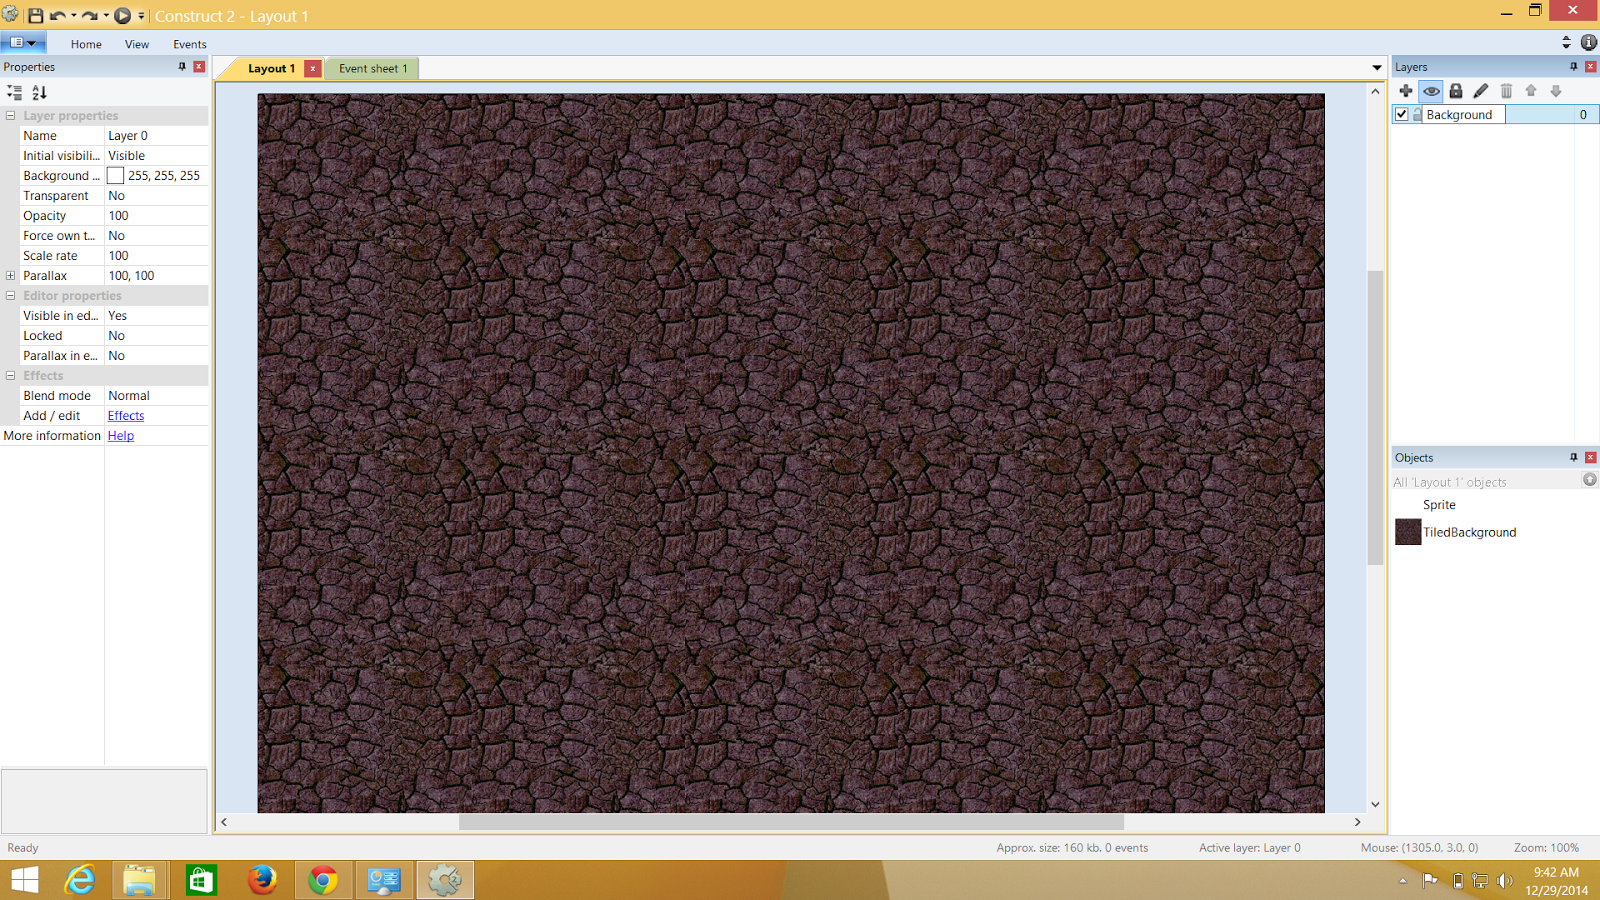
Now lets fix the background to a layer such that when we have multiple objects the background doesnt get funny 


Adding Another Layer 

In this I m going to add a new layer name "game" and this layer will contain 4 different sprites and we will look into how they interact 
  • Player 
  • Monster
  • Bullet
  • Explosion
  • Mouse
  • Keyboard


To add a new Layer just click on the + button situated above the background layer and name it to whatever you want.Here I have named it to "Game". Now you can directly click anywhere in the layout and add sprites to they Game layer or for you guys the new layer

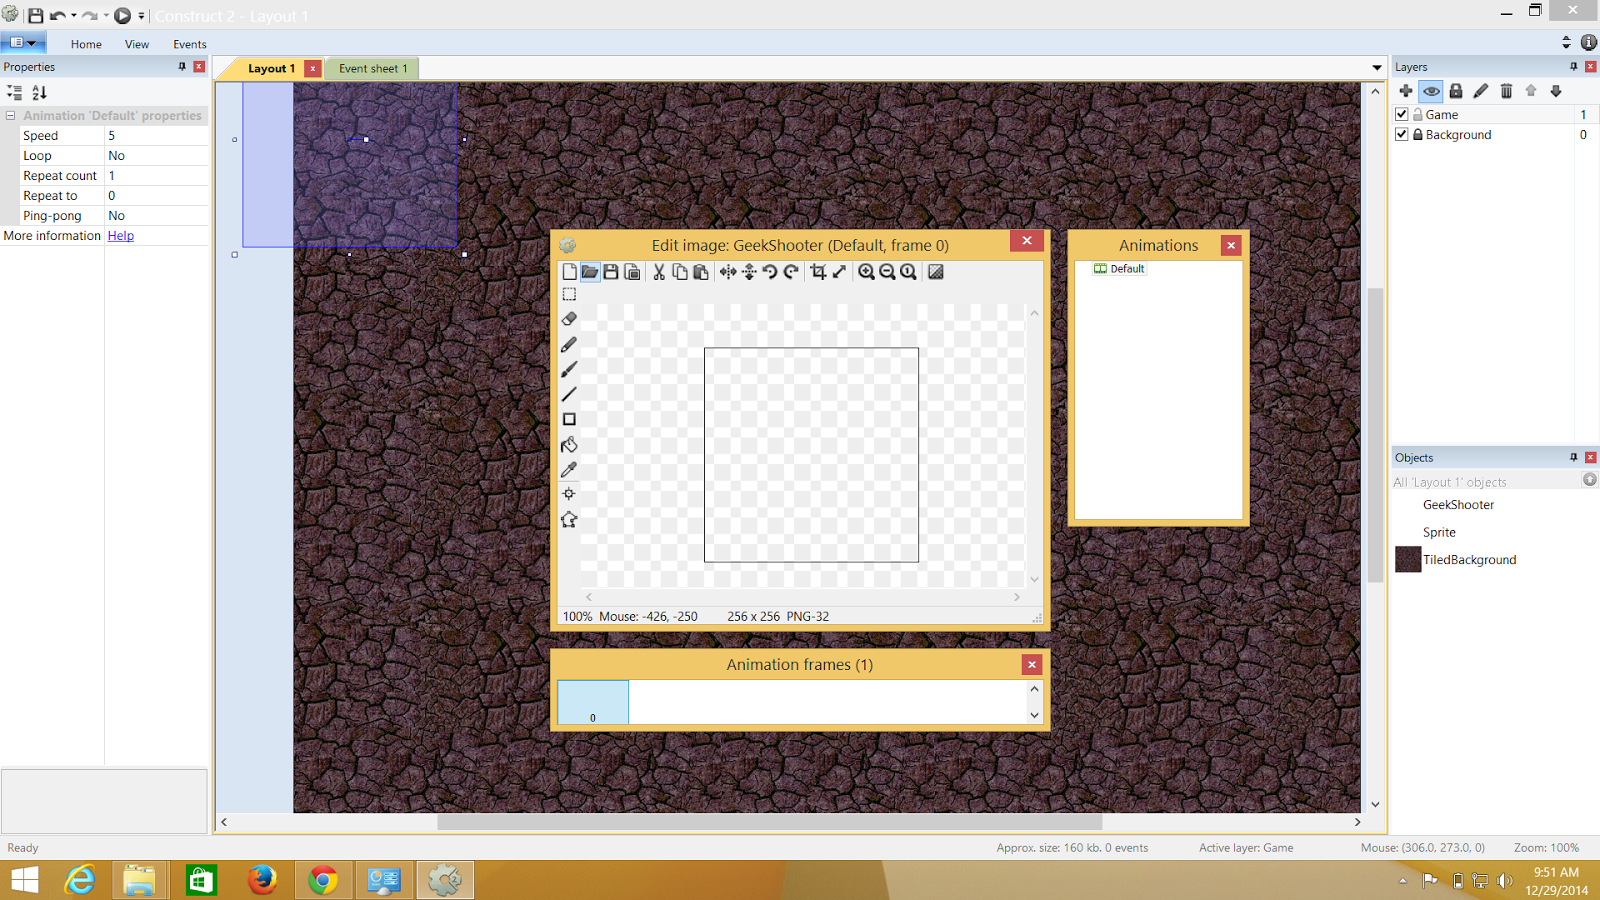
Give the name to the sprite layer and select an image for the character and they drop it anywhere in the layout.

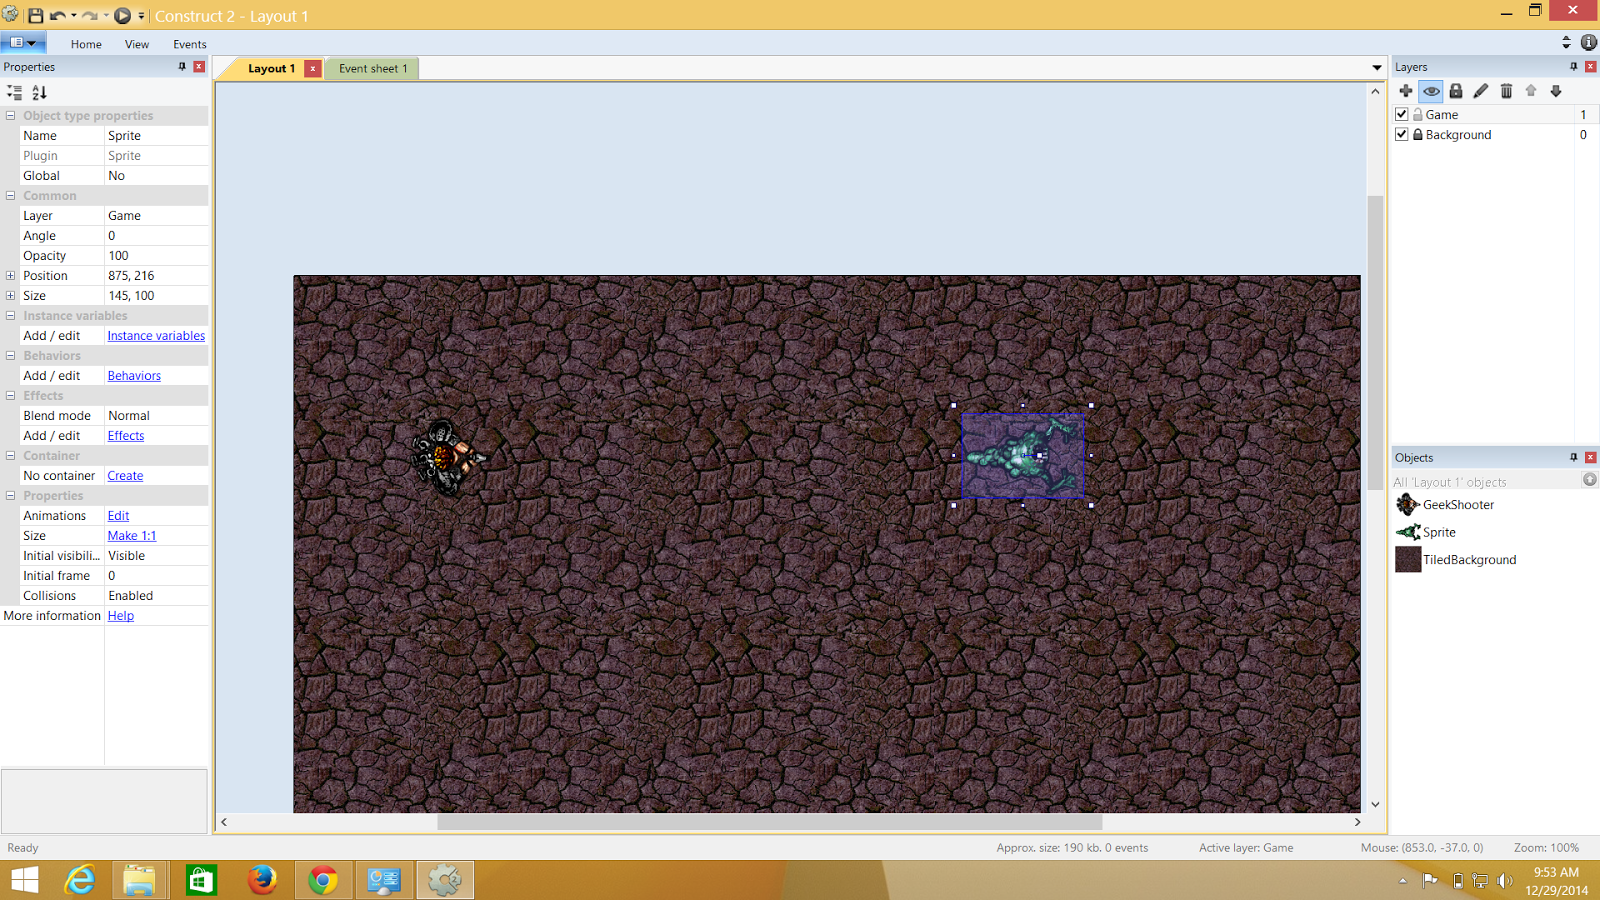
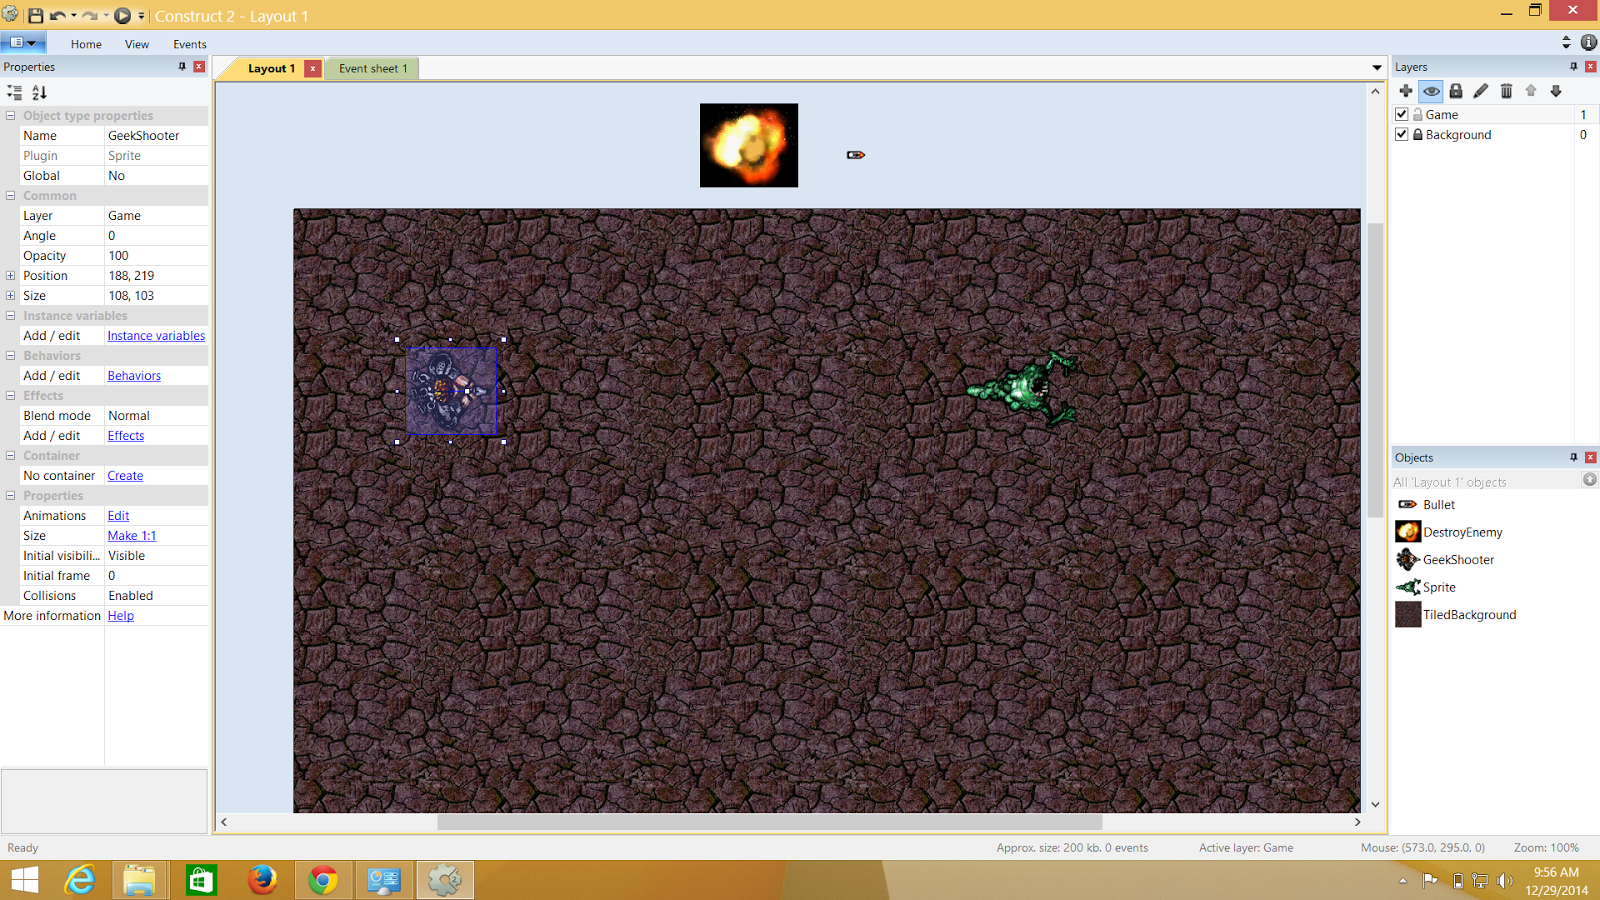
I have added my player .

My monster is also added

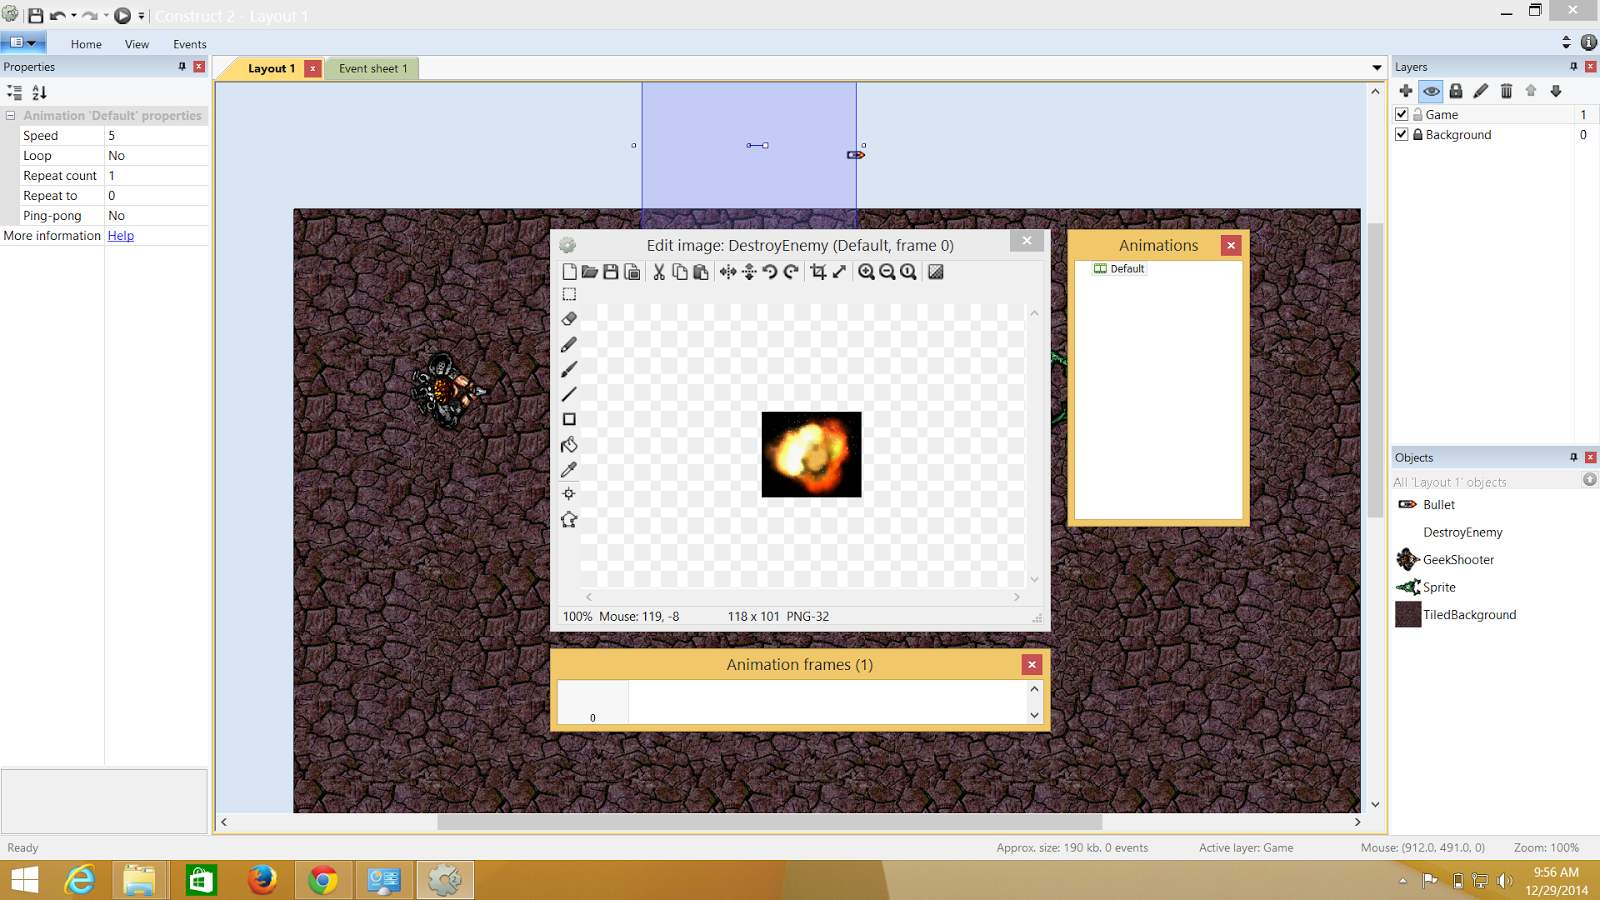
Explosion Added**

**I added a bullet and now the explosion. The thing is whatever is in the layout is visible in the game but i dont want my bullets and explosion to be visible right in the beginning of the game ; rather I want them to appear on some condition or context .Hence are kept outside the layout.

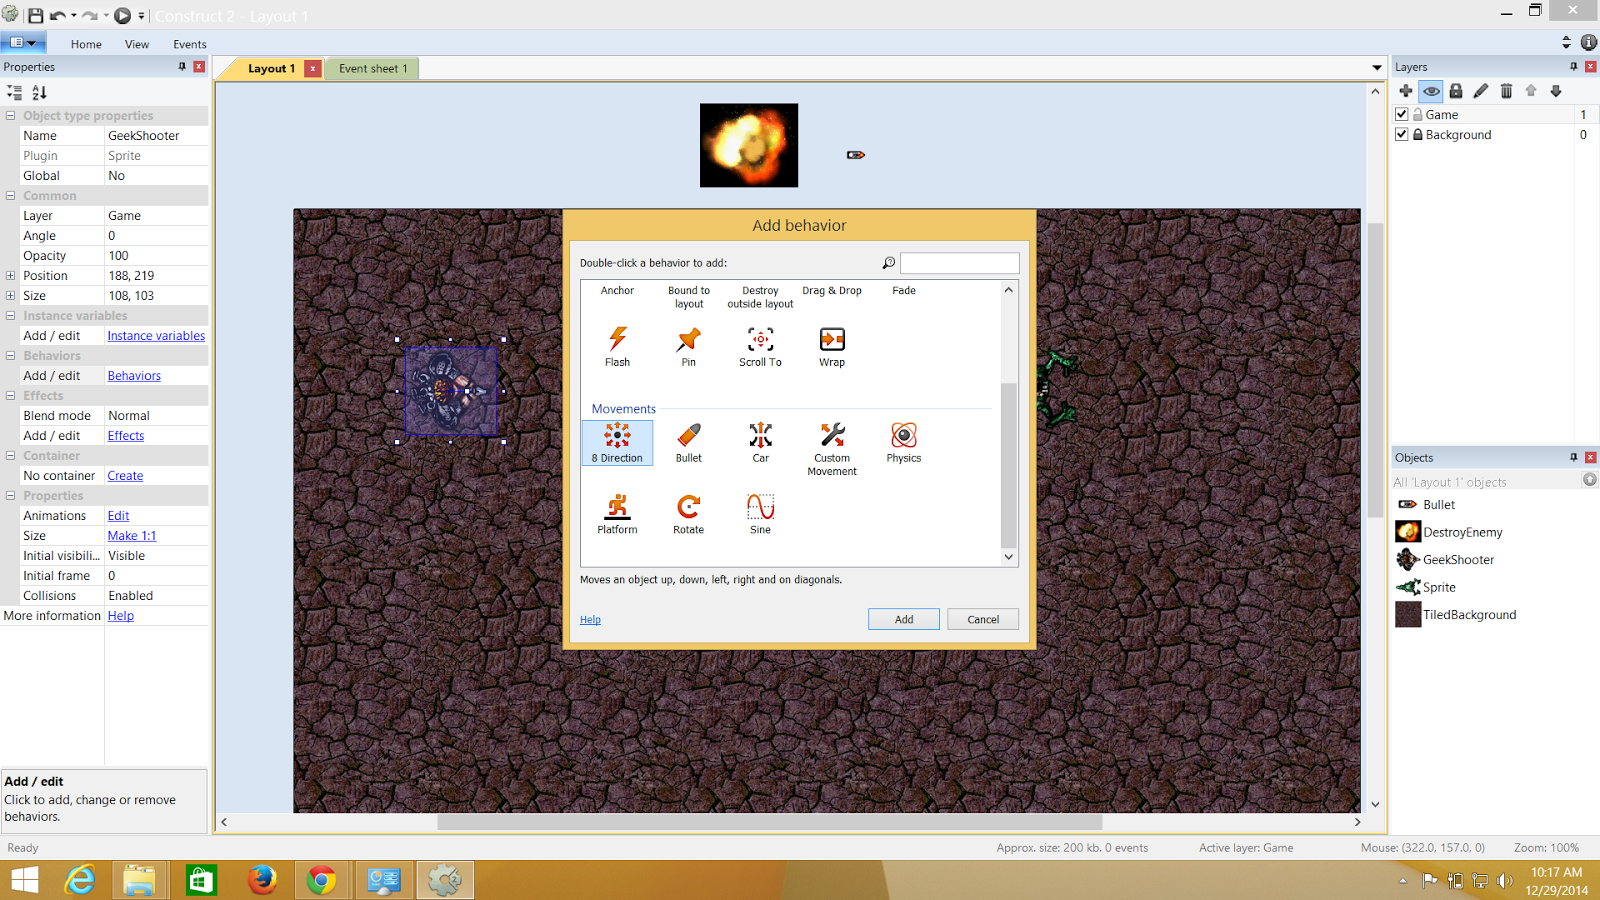
Here is how you get to add behaviours


Adding Behaviours to the Objects..

  • Behaviours
    1.Player : 8 Direction,Scroll To,Bound to layout.
    2.Bullet: Bullet and Destroy outside layer.
    3.Monster- Bullet
    4.Explosion - Fade.

I'm listing showing just the player behaviour here.Make sure you assign all the values to the objects the exact ones that i wrote above ; if you are following this specific demo!


Since I don't want "Mano E Mano"


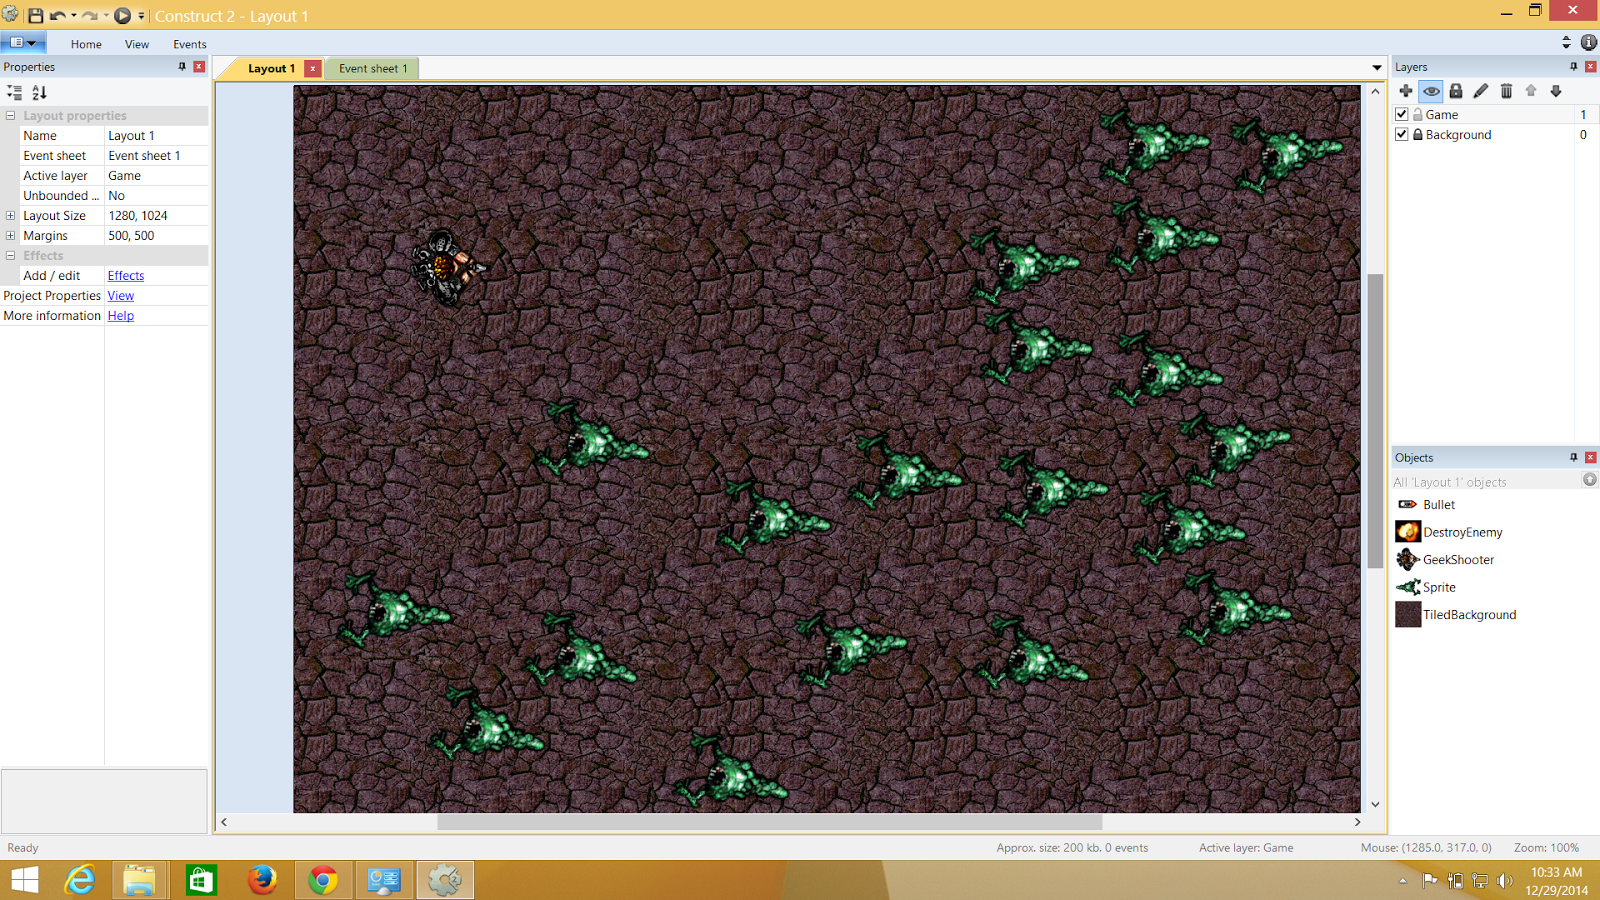
This is some FPS

I can replicate sprites or for that matter any object as many times I want time on the layout.

Events

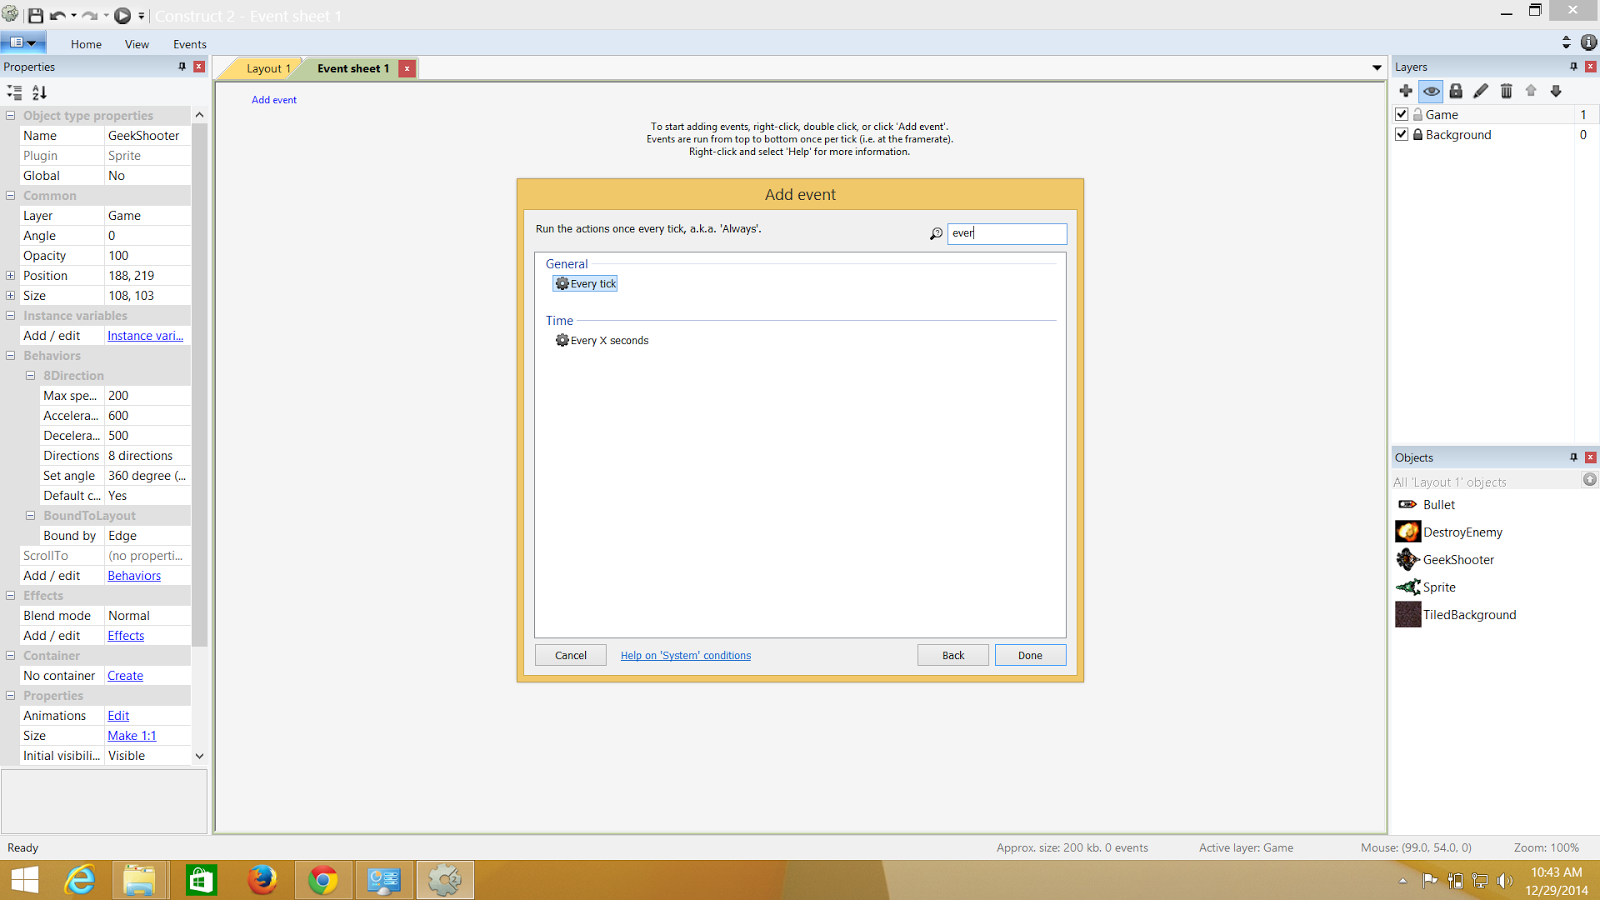
The events are generally triggered as a cause of an condition. So here i m going to take "ticks" and every tick = 60/sec. So wherever, I implement tick,will execute itself in that fashion.

Now I will go and add events to my sprites.

Thats the event sheet and thats where I can add the tick event.

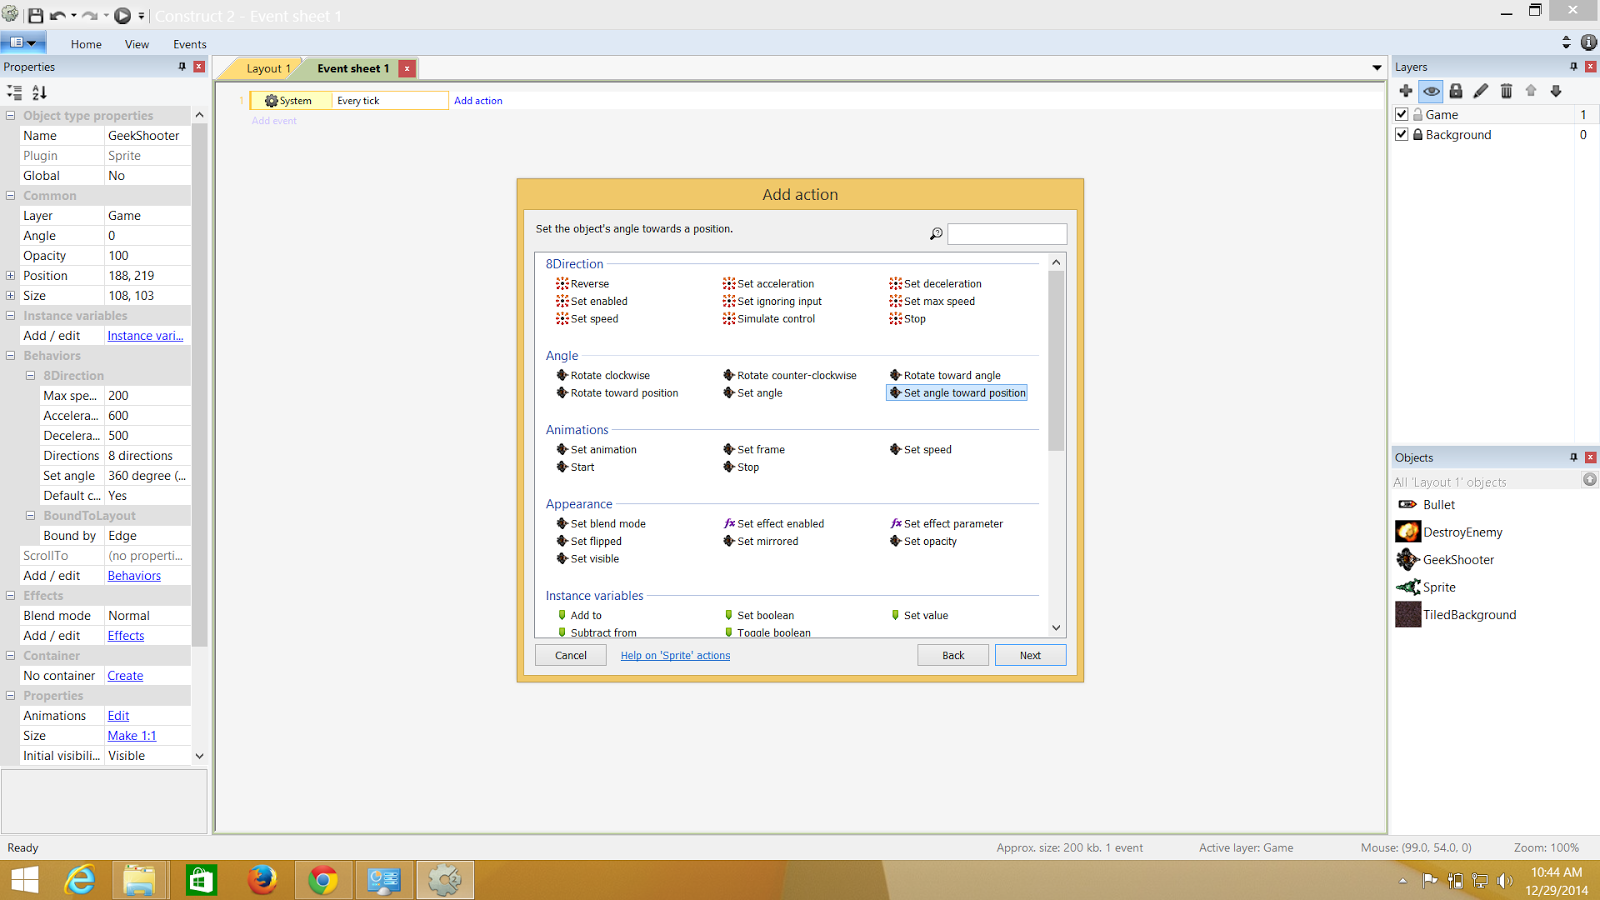
So for 60times/Sec the player should do something and this is where I use the mouse and ask it to move towards the X,Y where the pointer of my mouse is on the layout

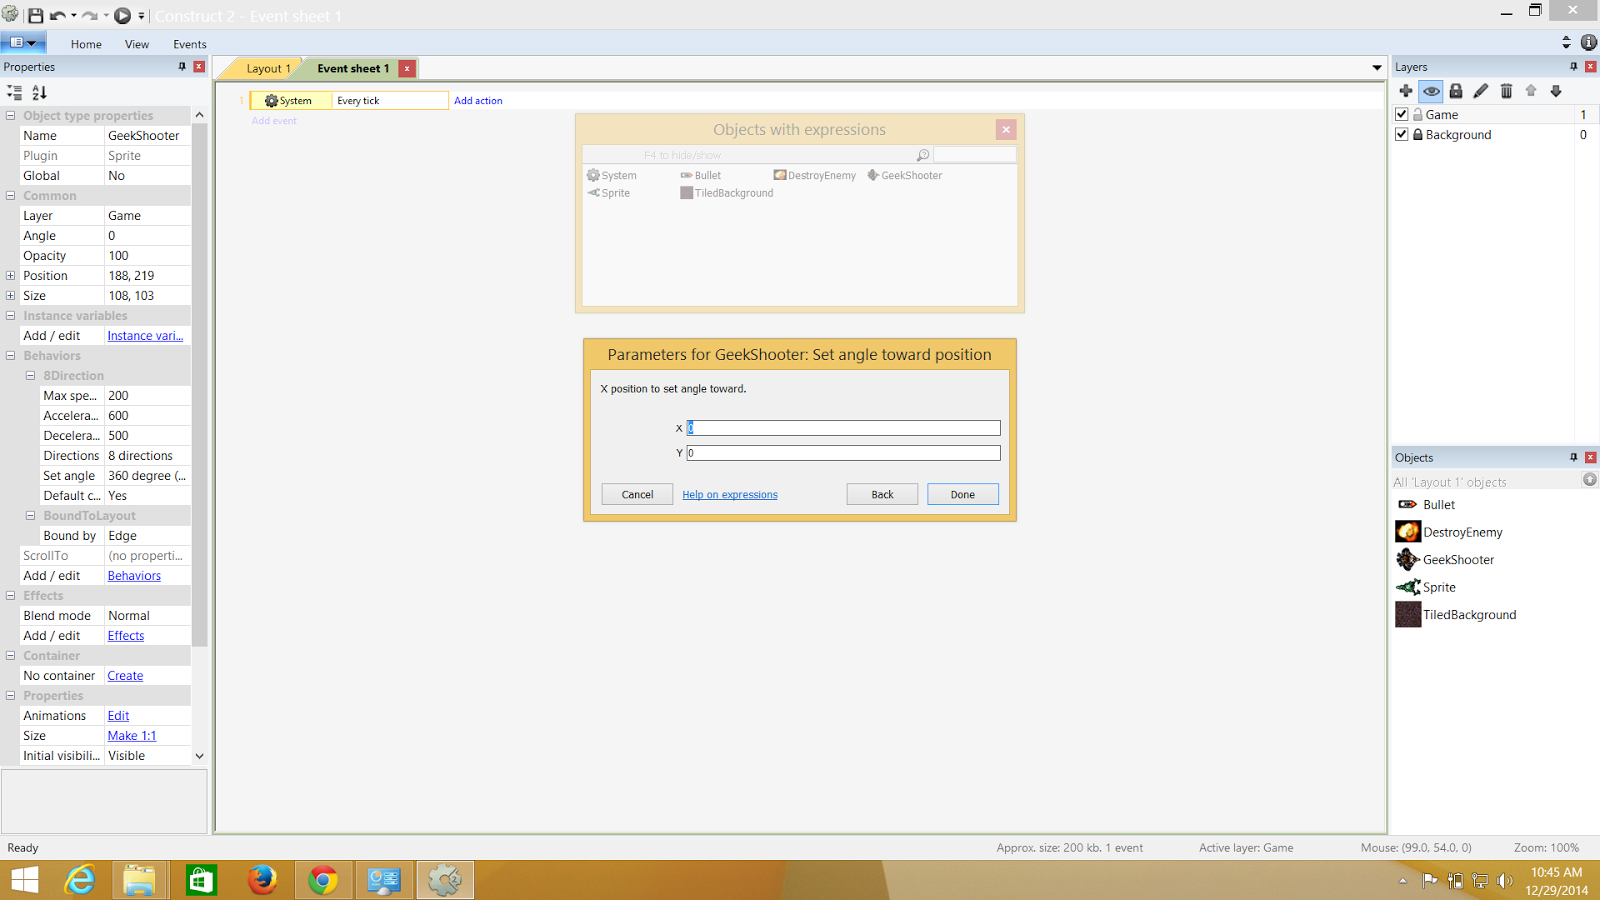
So this is where the person needs to fill in the X,Y values

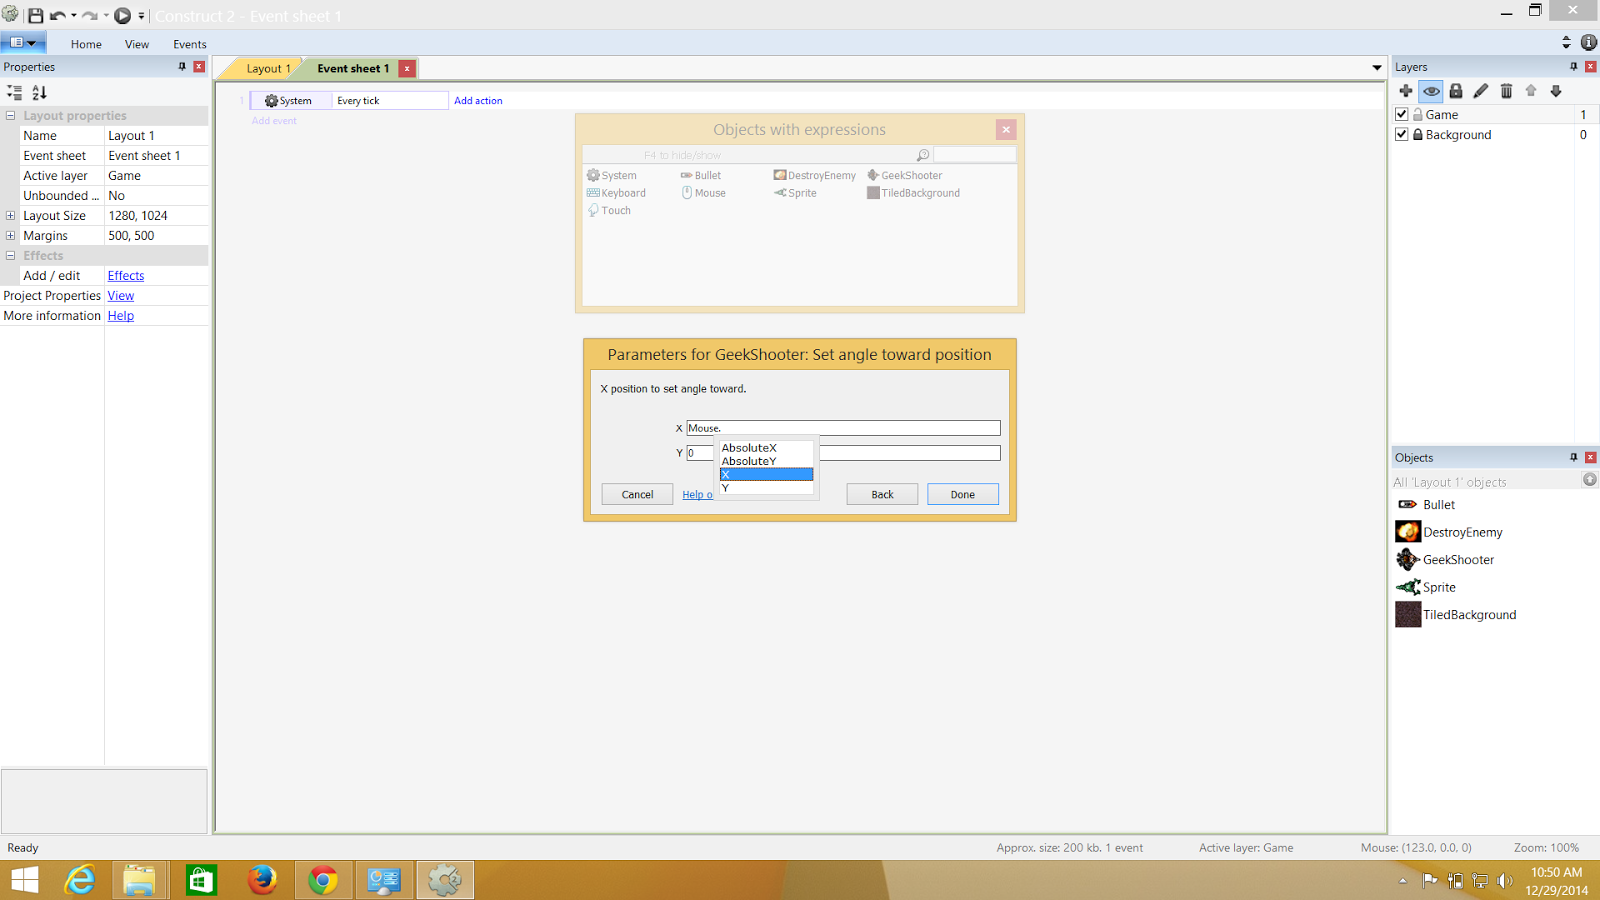
Fetches the value of Mouse X,Y

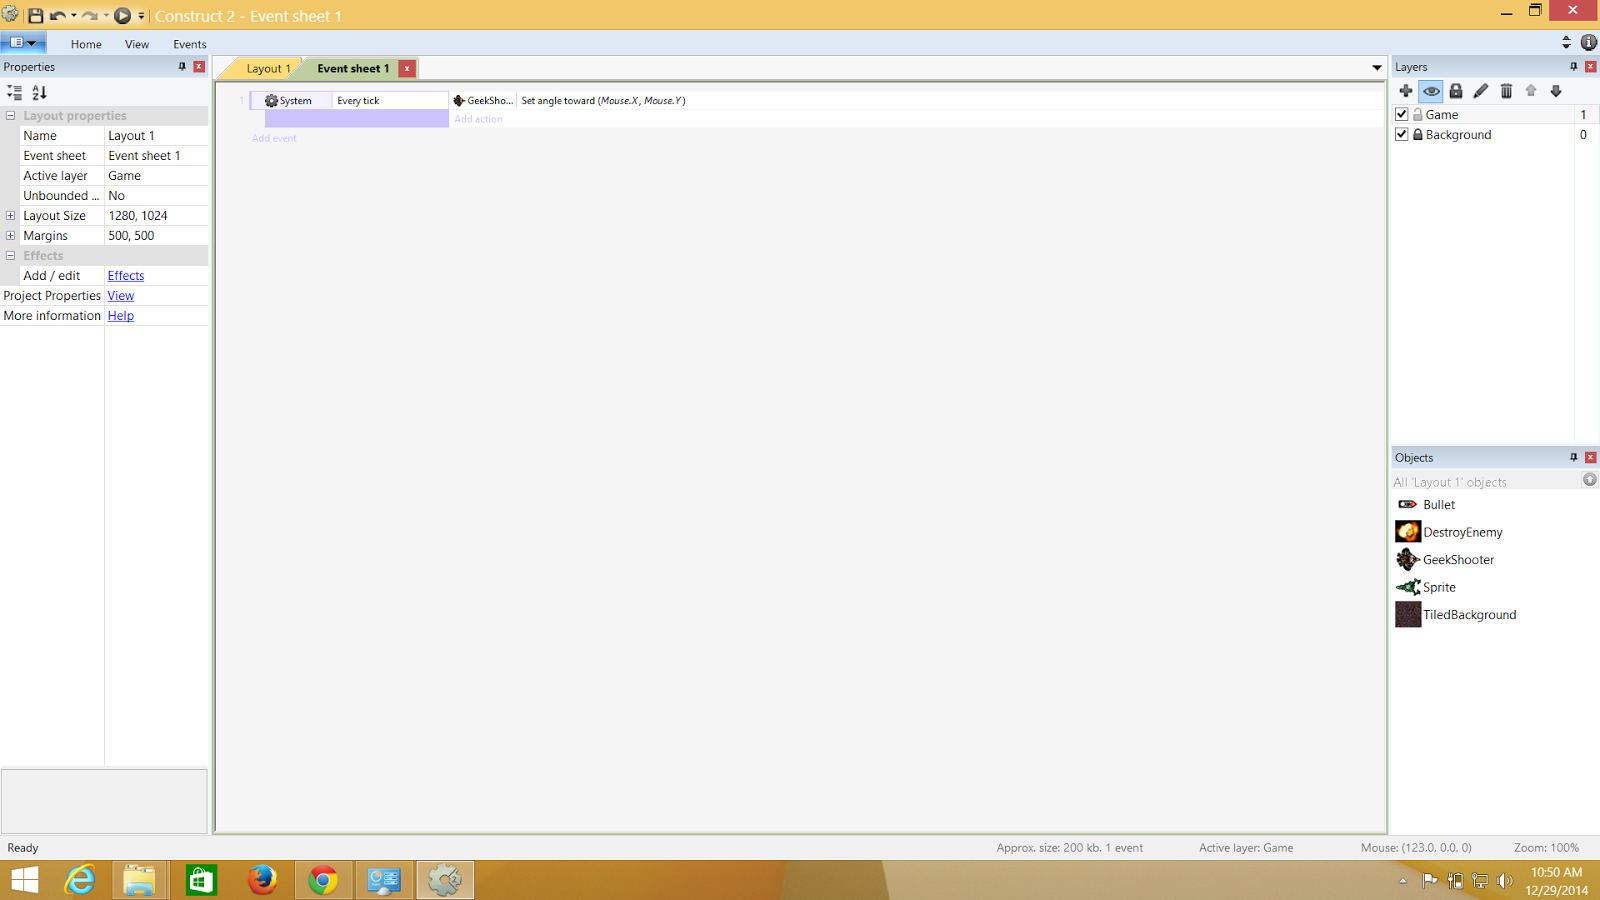
This is how the event sheet will look after the event is complete

Let's Shoot

Well, Now that you know how to add events and I have my character following my mouse pointer. I will simply let is have the ability to shoot as well. Here's how

So first thing is , I need my player's gun to interact with the bullet. Hence, I need a point from where the bullets will be coming out from. I need to create a 'IMAGE POINT'.. and here is how. Select the player on the layout .. Get the properties and select the "Image Point" and create a new Image point . and put it on the Guns's tip.


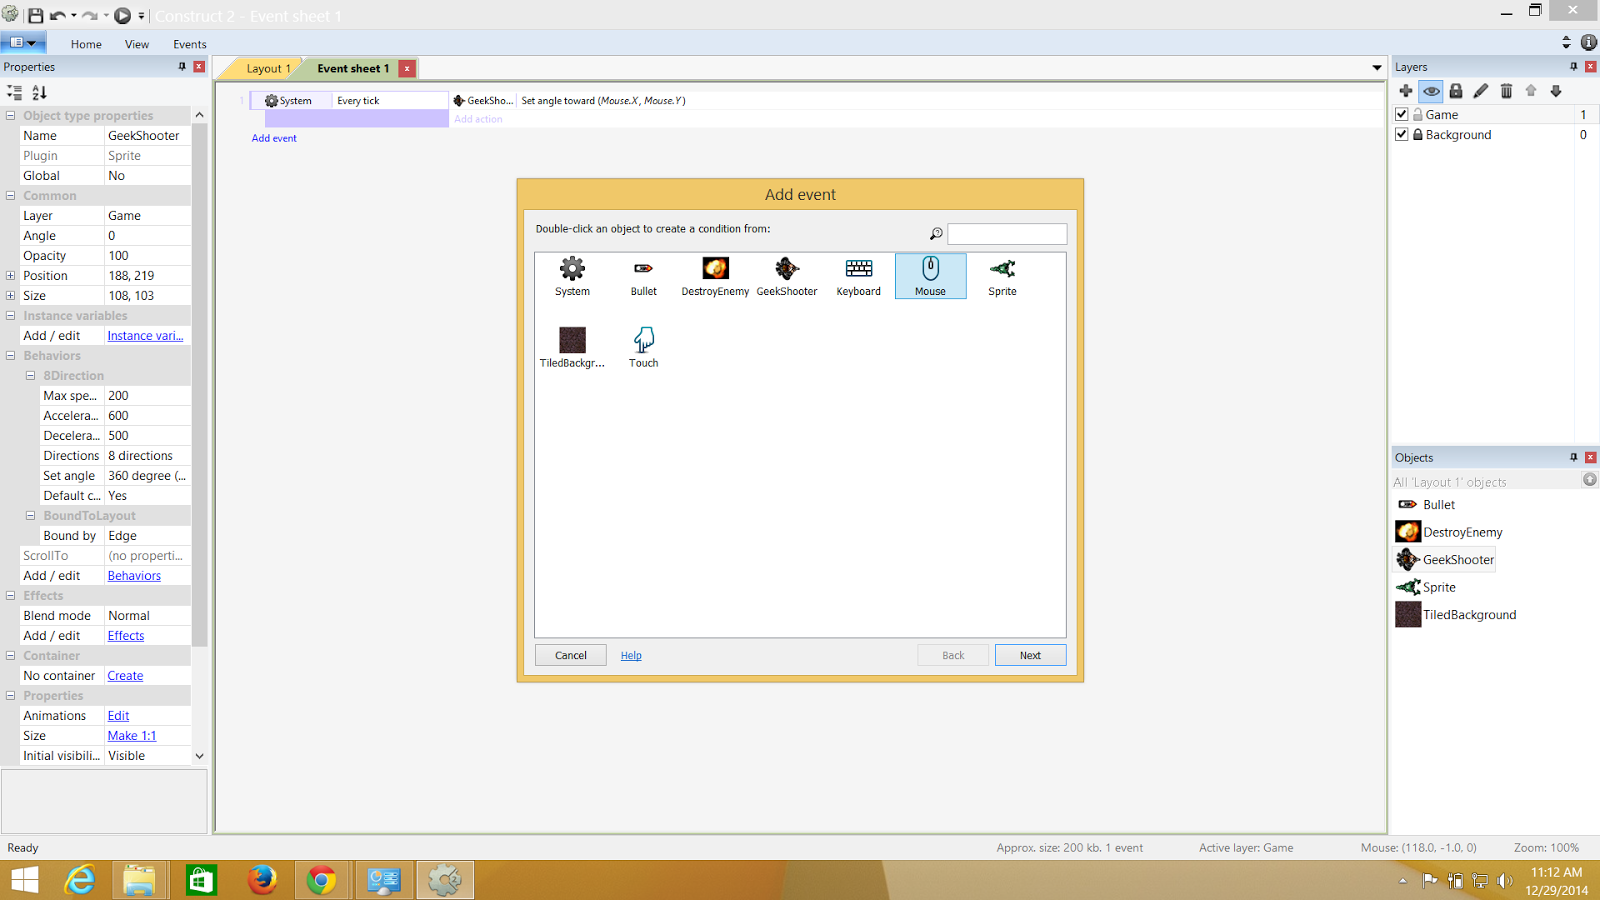
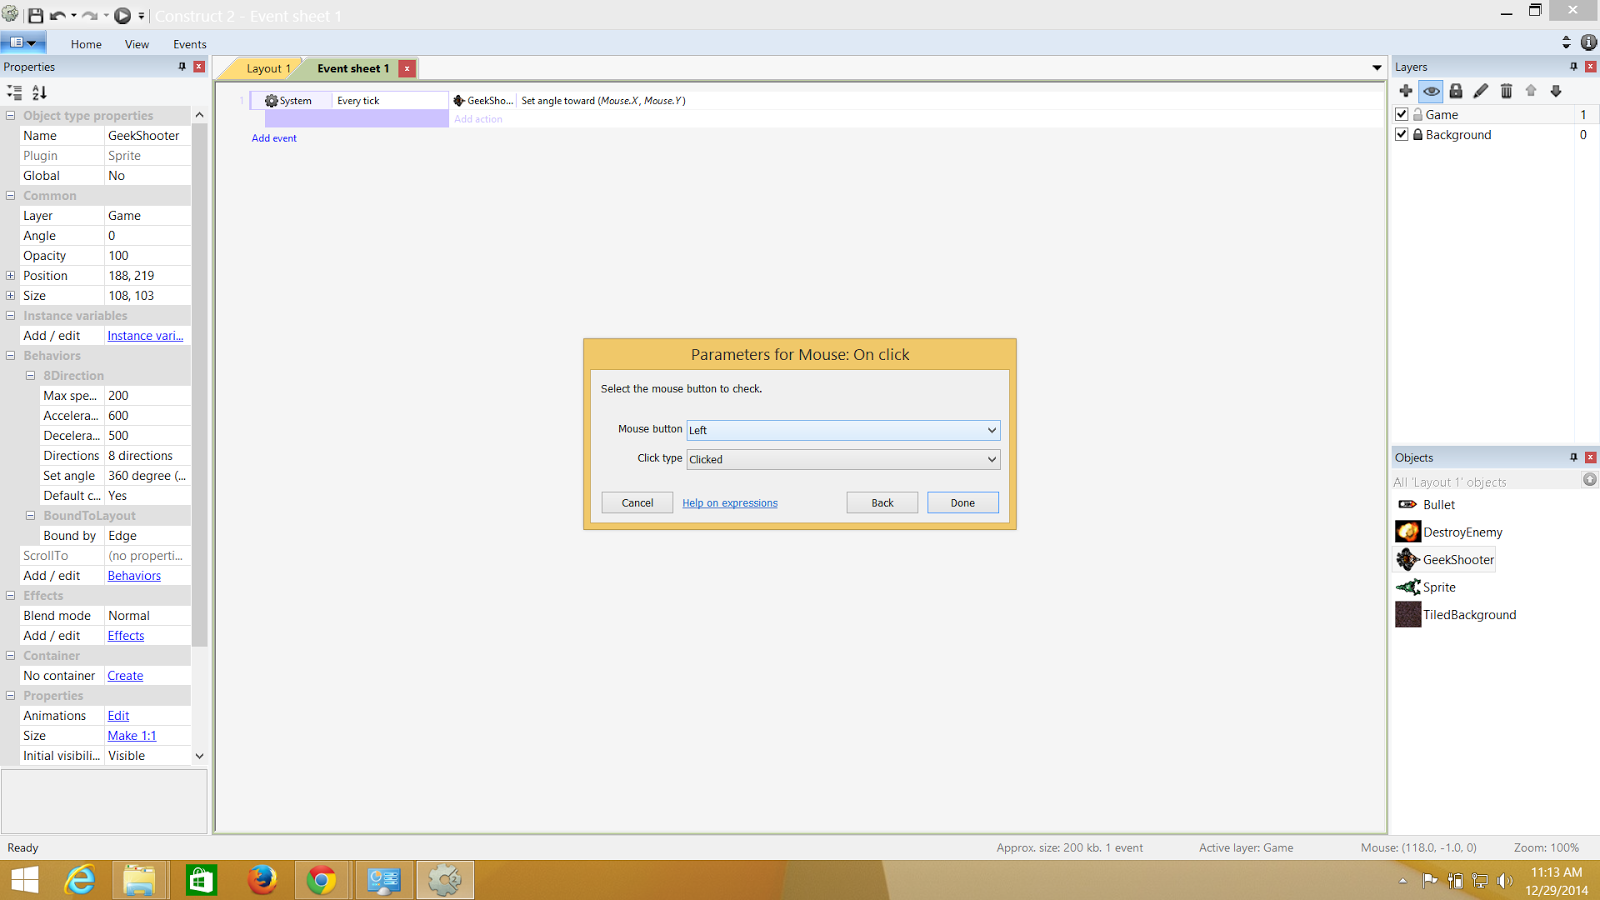
So I m to select mouse and configure its left click to send out a bullet

Configuring my left click

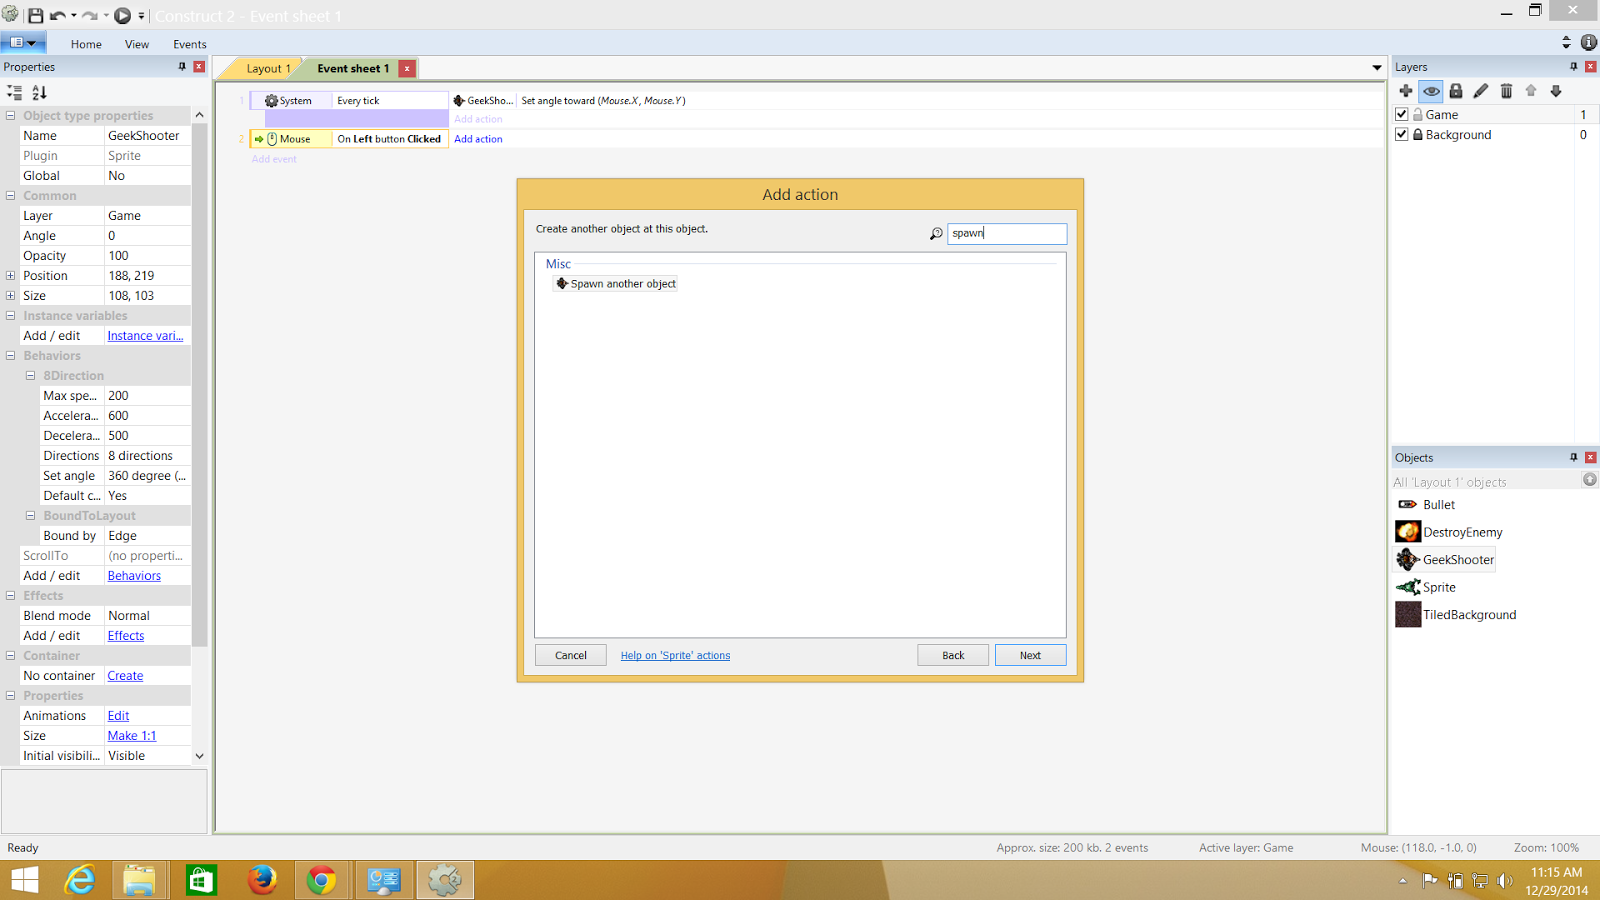
Spawn another object will create another object

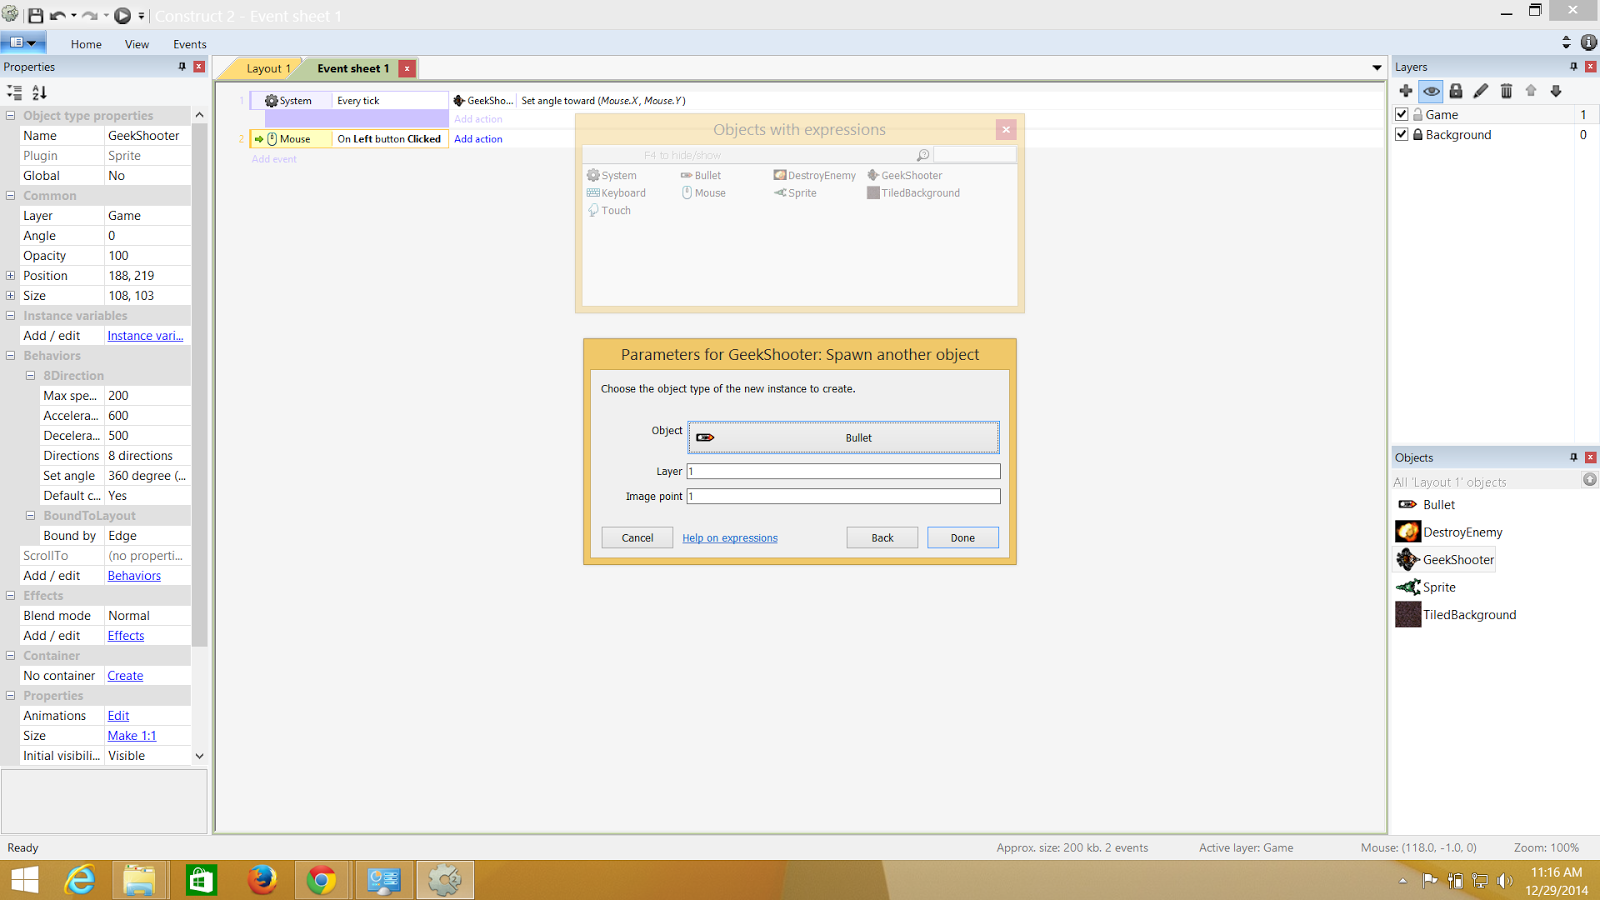
And finally I add the bullet as my new spawn object and image point 1 as where from the bullet will originate when the mouse click happens

The Explosion and The Monster Destruction


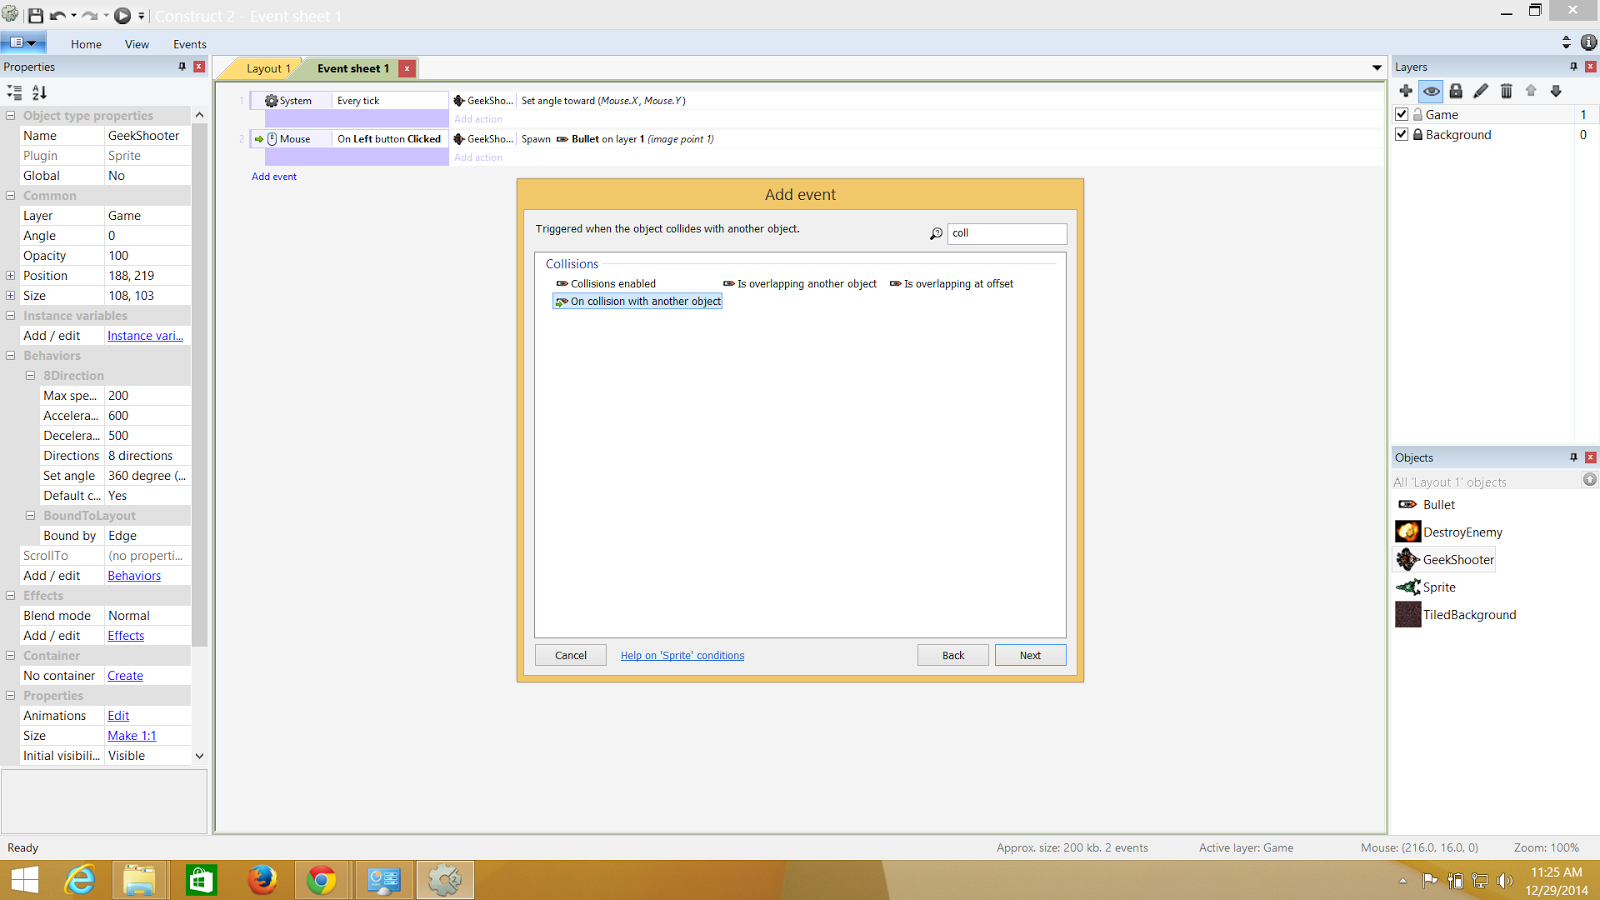
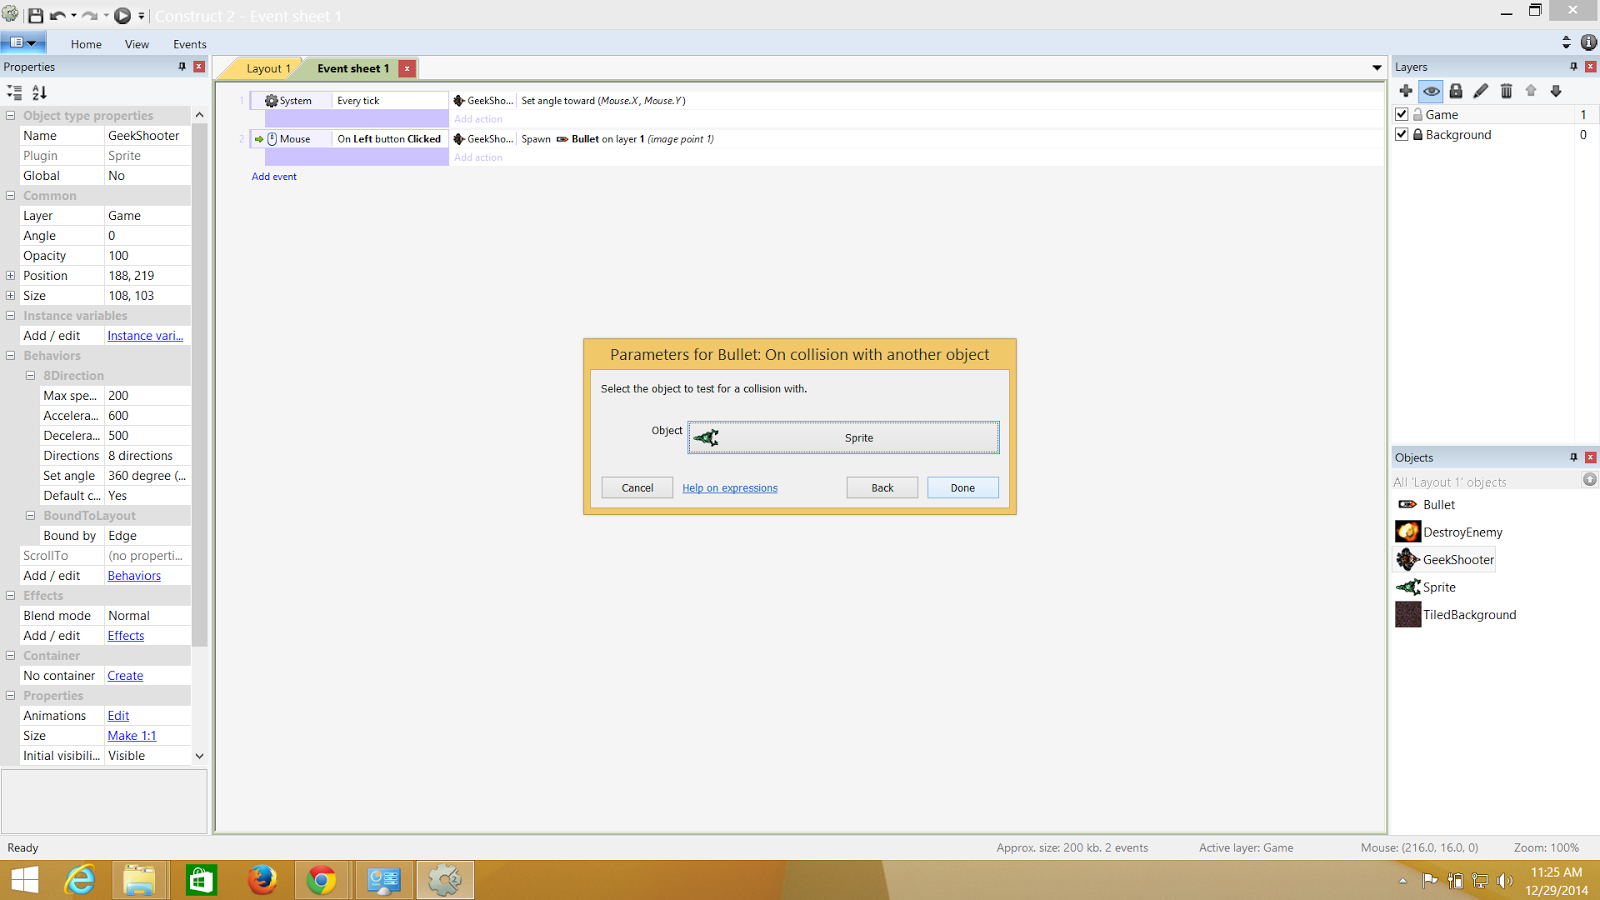
Here I m putting the on collision with the bullet with the monster and which will result in the monster going away

On Collision with the Monster

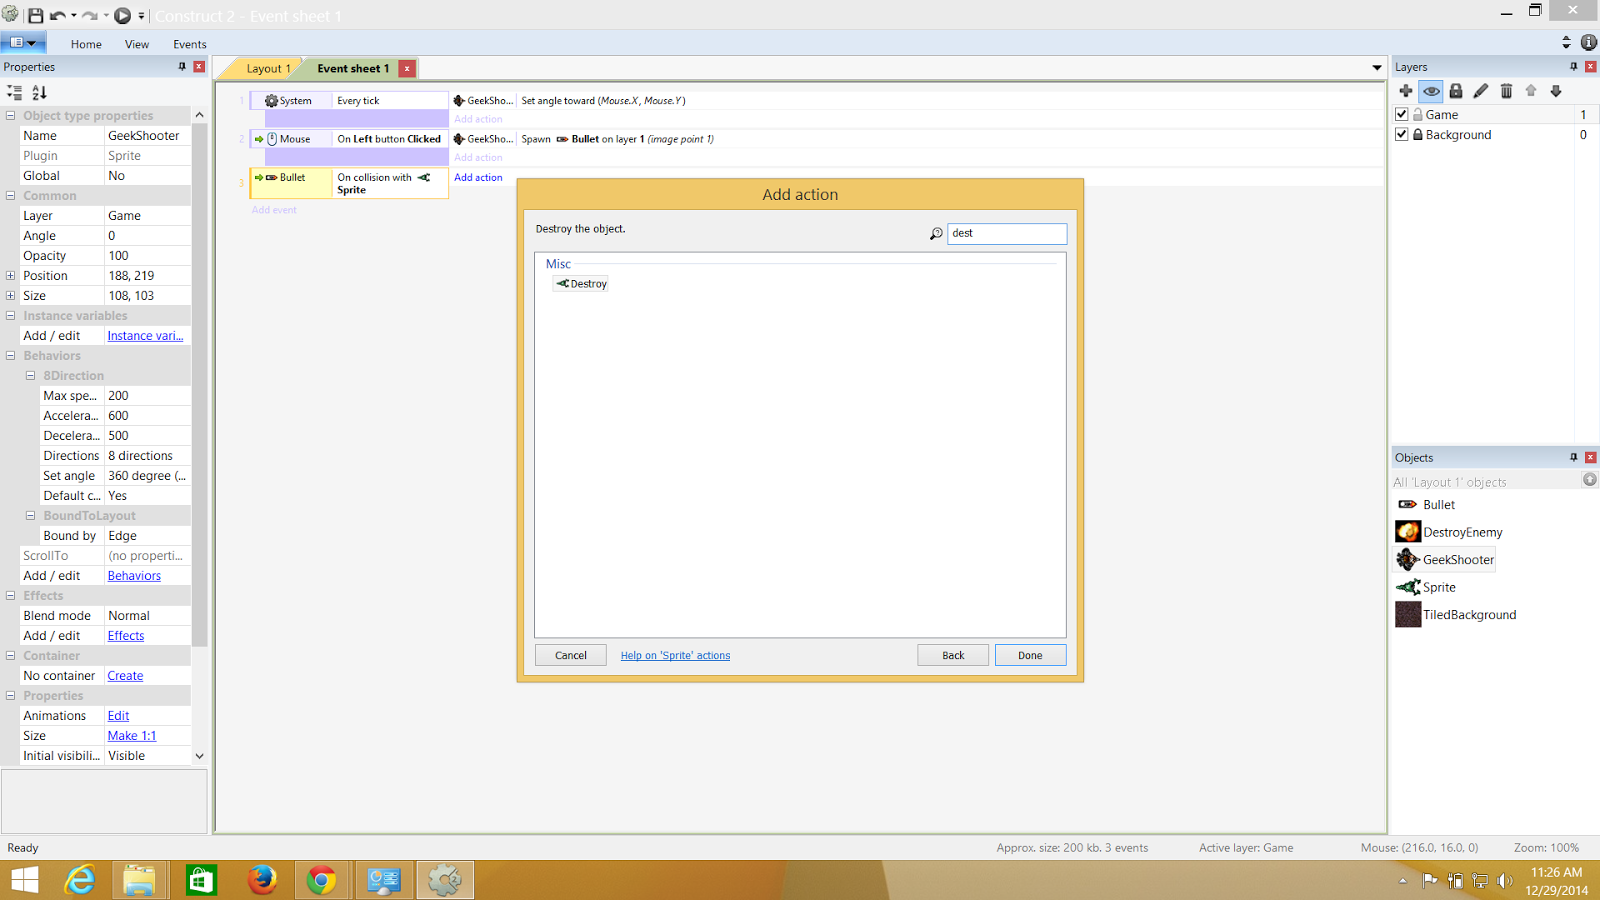
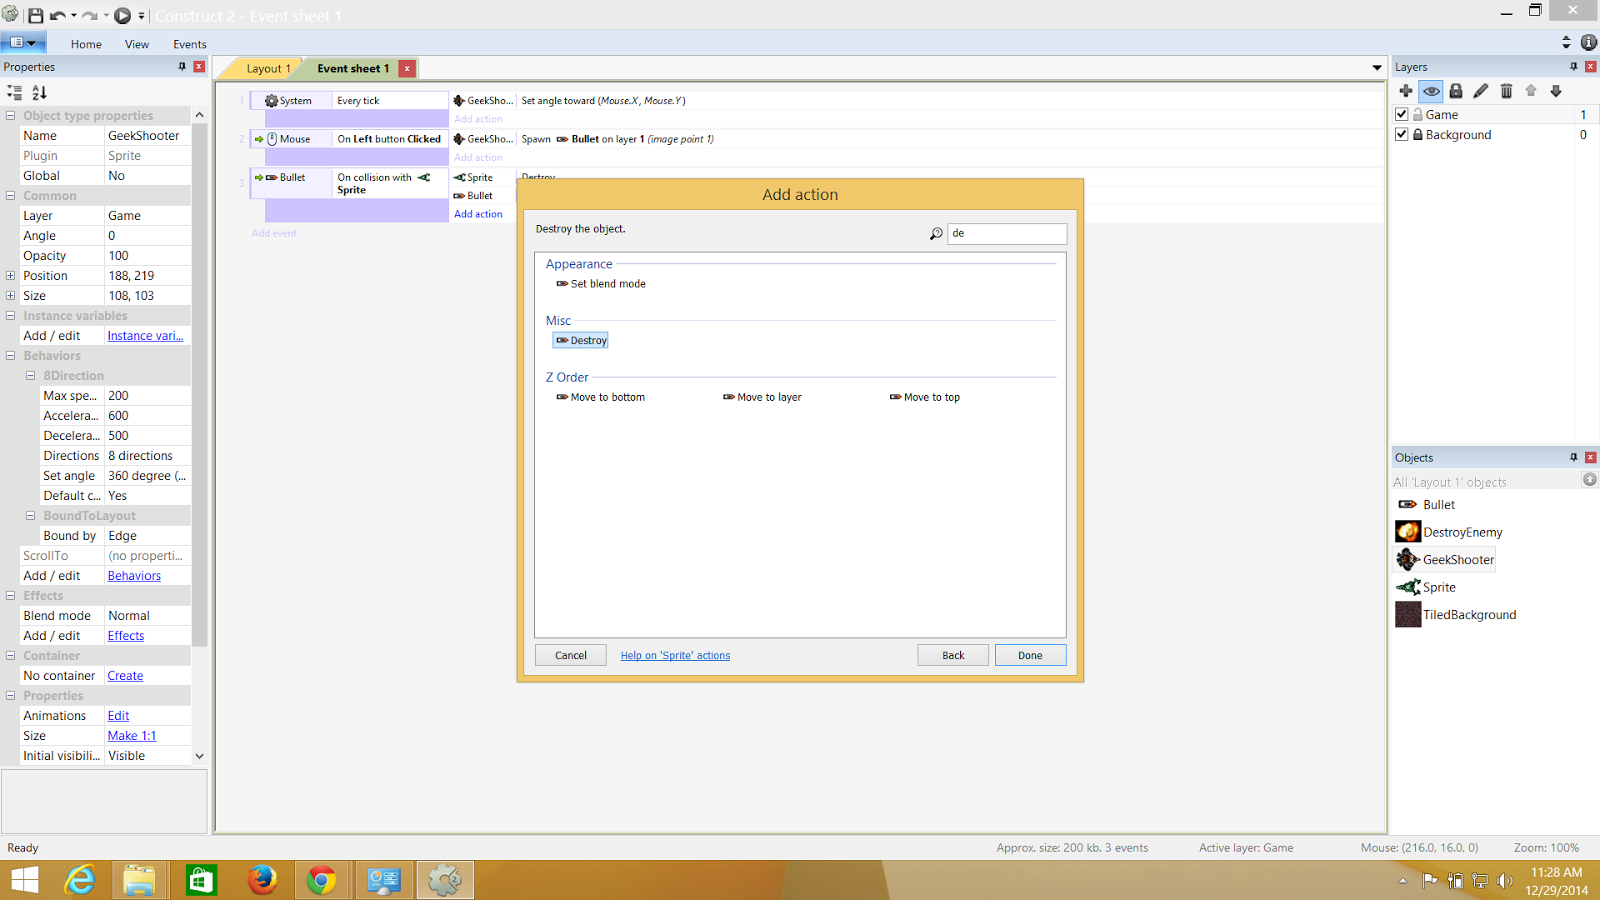
The monster will be destroyed ,so the Destroy property is selected

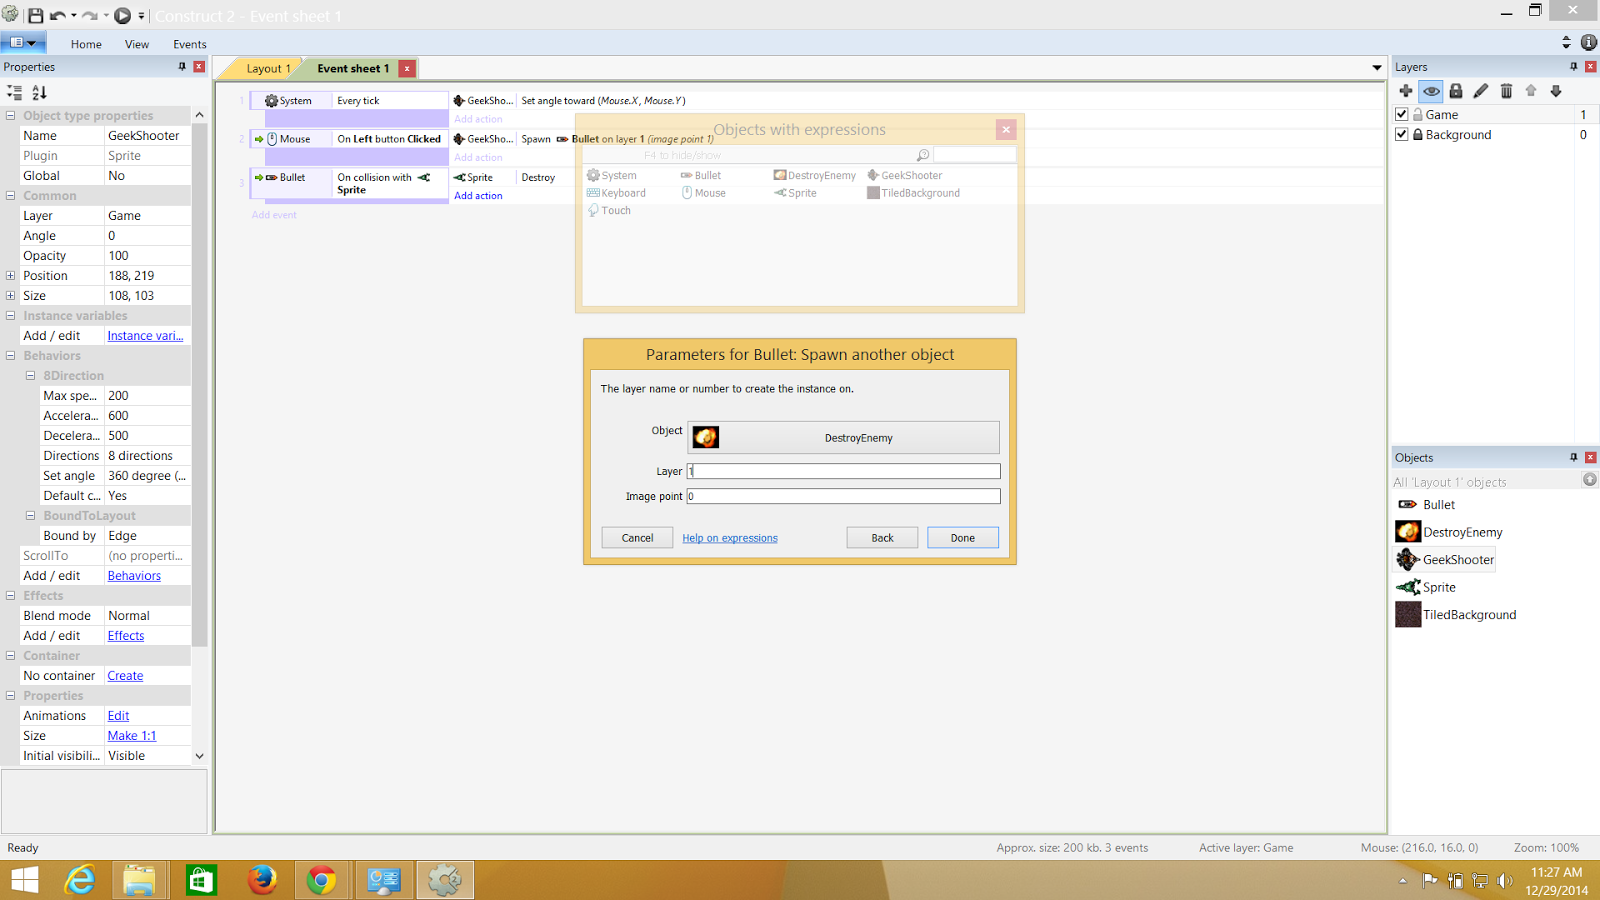
From where the bullet was, the explosion has to be spawned just make sure  you do it in the same layer to that of the game.

And finally the bullet needs to be destroyed

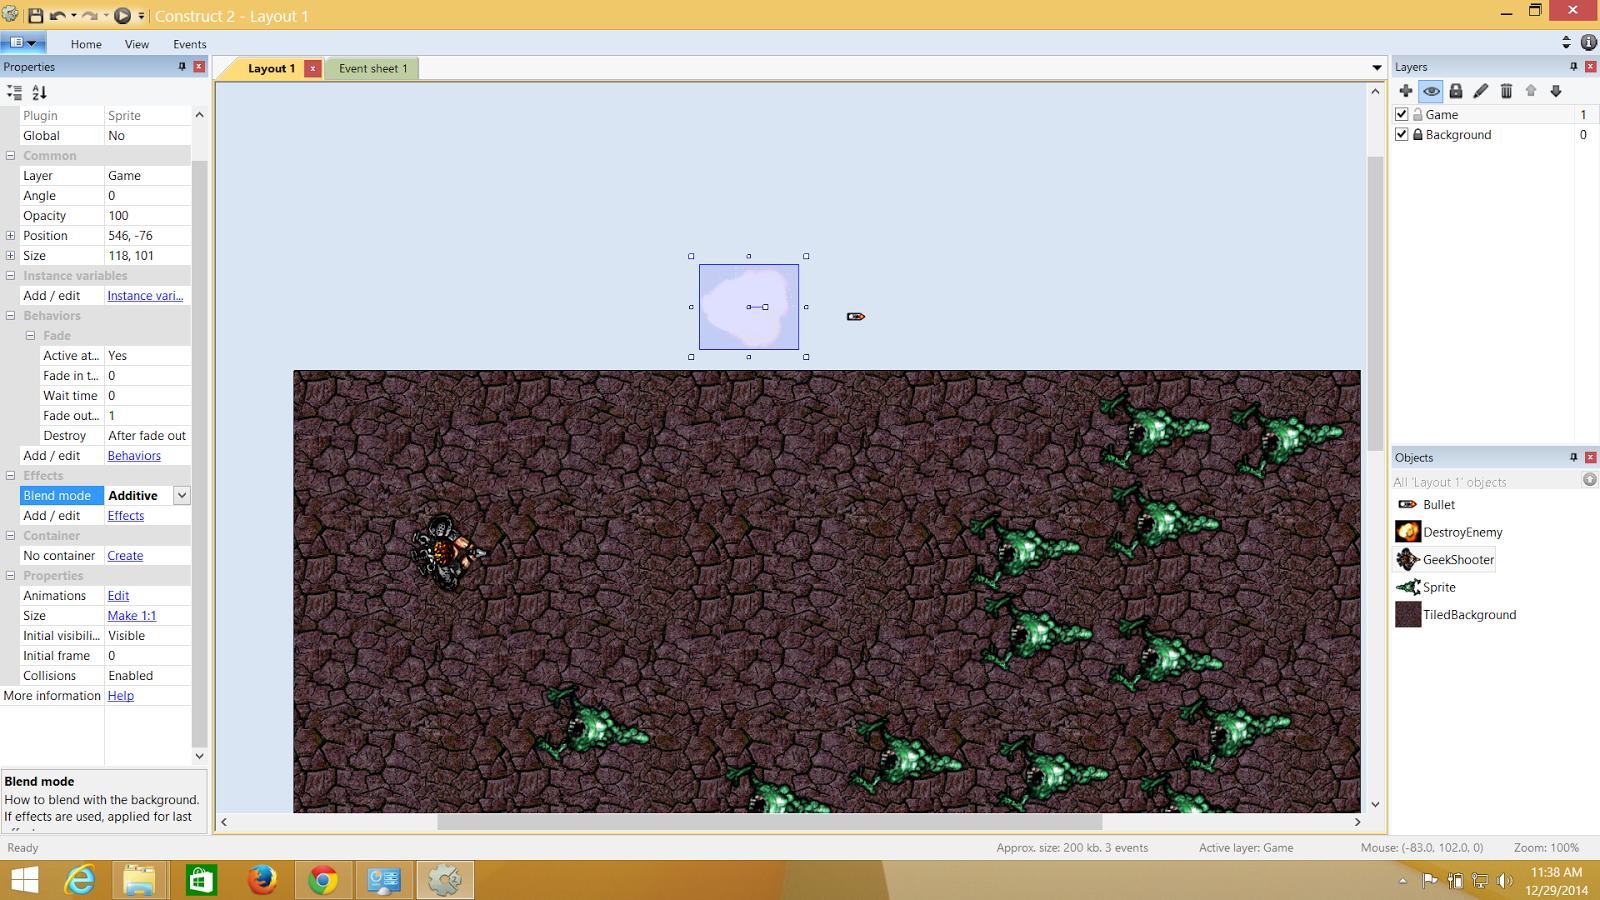
**just a tip: since my explosion had a black background,what i did was changed the blend property of the explosion to "additive" and hence it gets rid of that black property.


Thtats the additive property after being changed from normal as blend value.
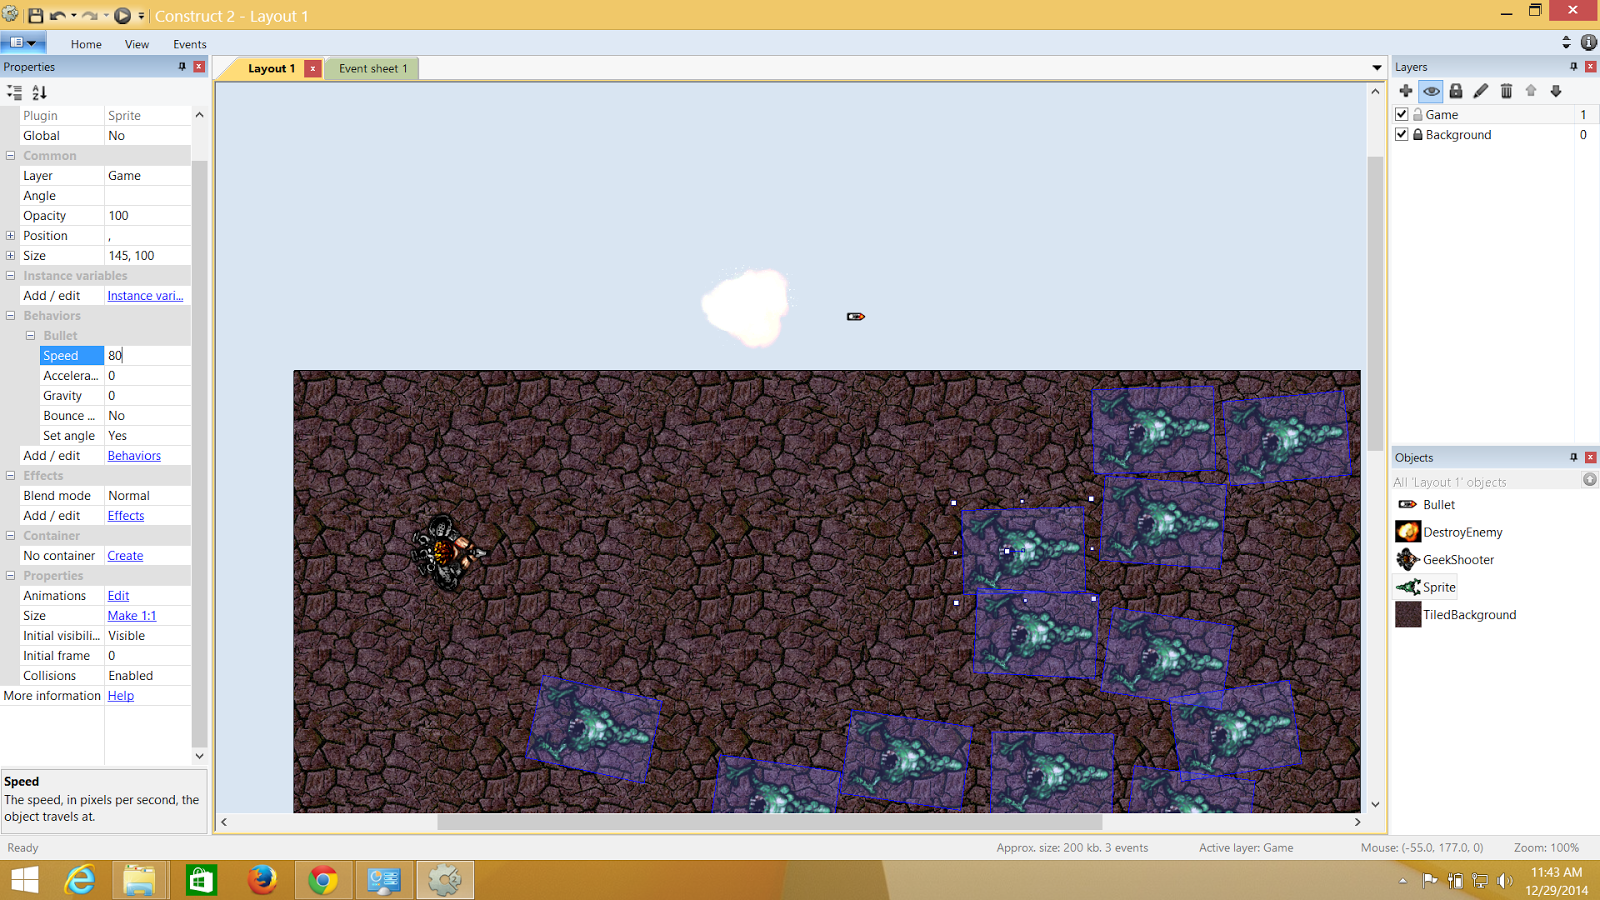
***Note:The monster's speed can be controlled by selecting them and lessening their speed

I have eventually changed the speed to 80 ..and maybe when i make level two.. I might wanna increase the speed to 100 and it will give a difficulty level for the player

Health and Instance Variables

The health of the player and the monster can be kept in check by initiating an instance variable. The instance variable has an initial value which is the health and we can keep an counter for it and when its equal to or less than zero we can destroy the monster or player.I have mapped the monsters heath here which is by initiating a initial value of 3 and which implies that only after 3 bullets the the monsters will die.For each time a bullet hits the monster the value of the instance variable drops by 1.Below are the Sreenshots of how to do it.


Keep Score

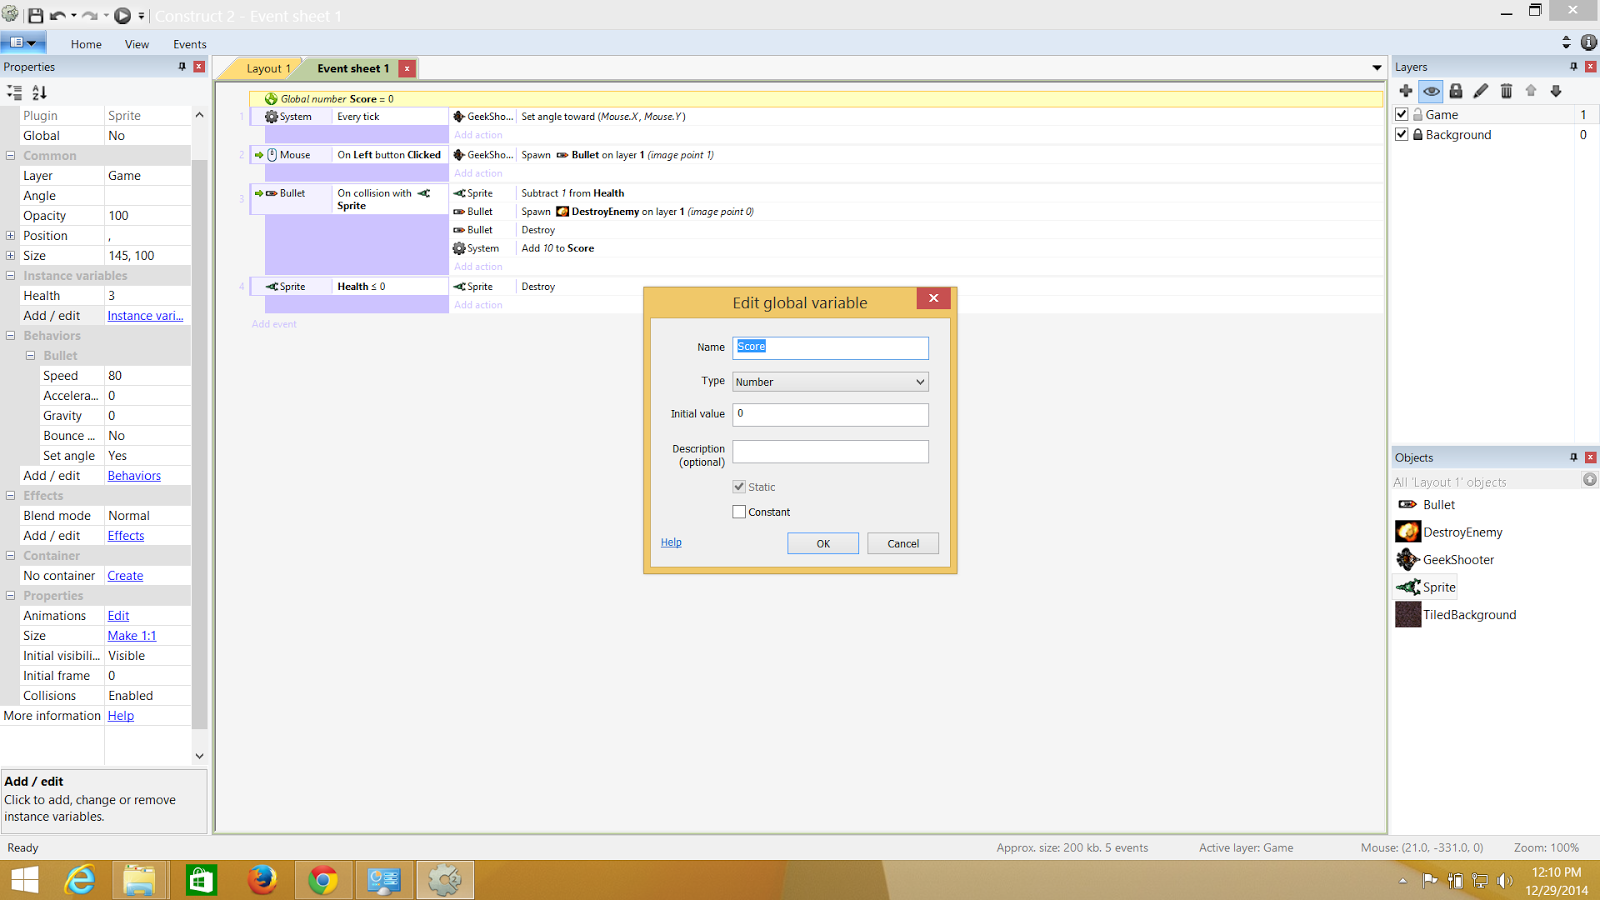
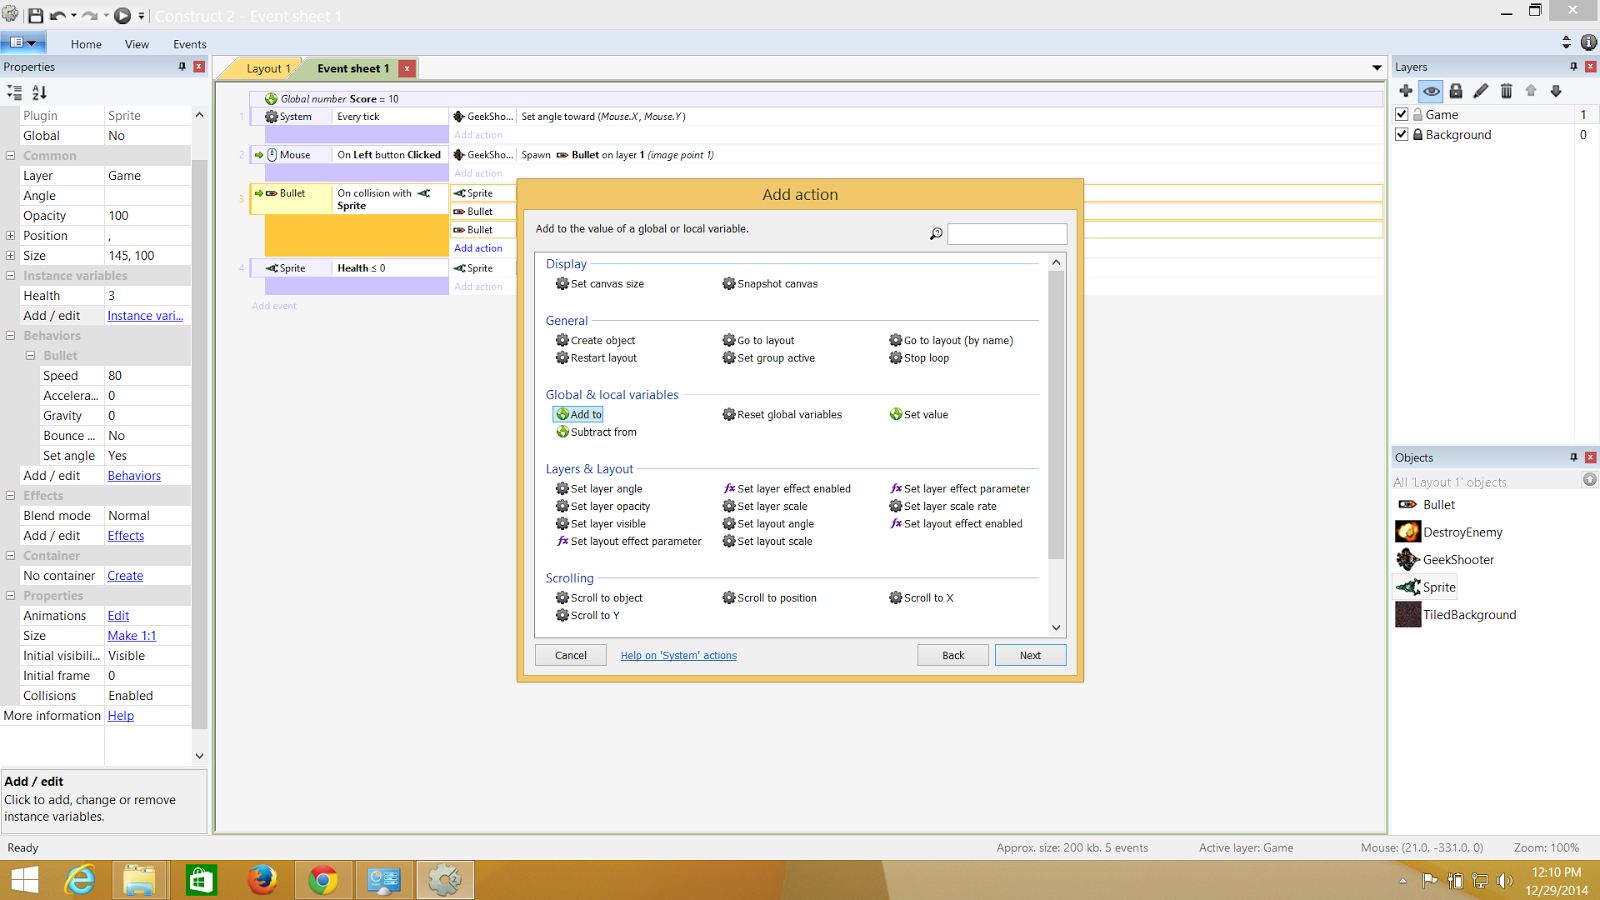
Score is going to be a global variable which is going to keep a count of how many monsters is hit or killed. So all I require is a global variable named "Score" on the event sheet with a initial value of 0 and mapped with "add to" when the bullet hits the monster.


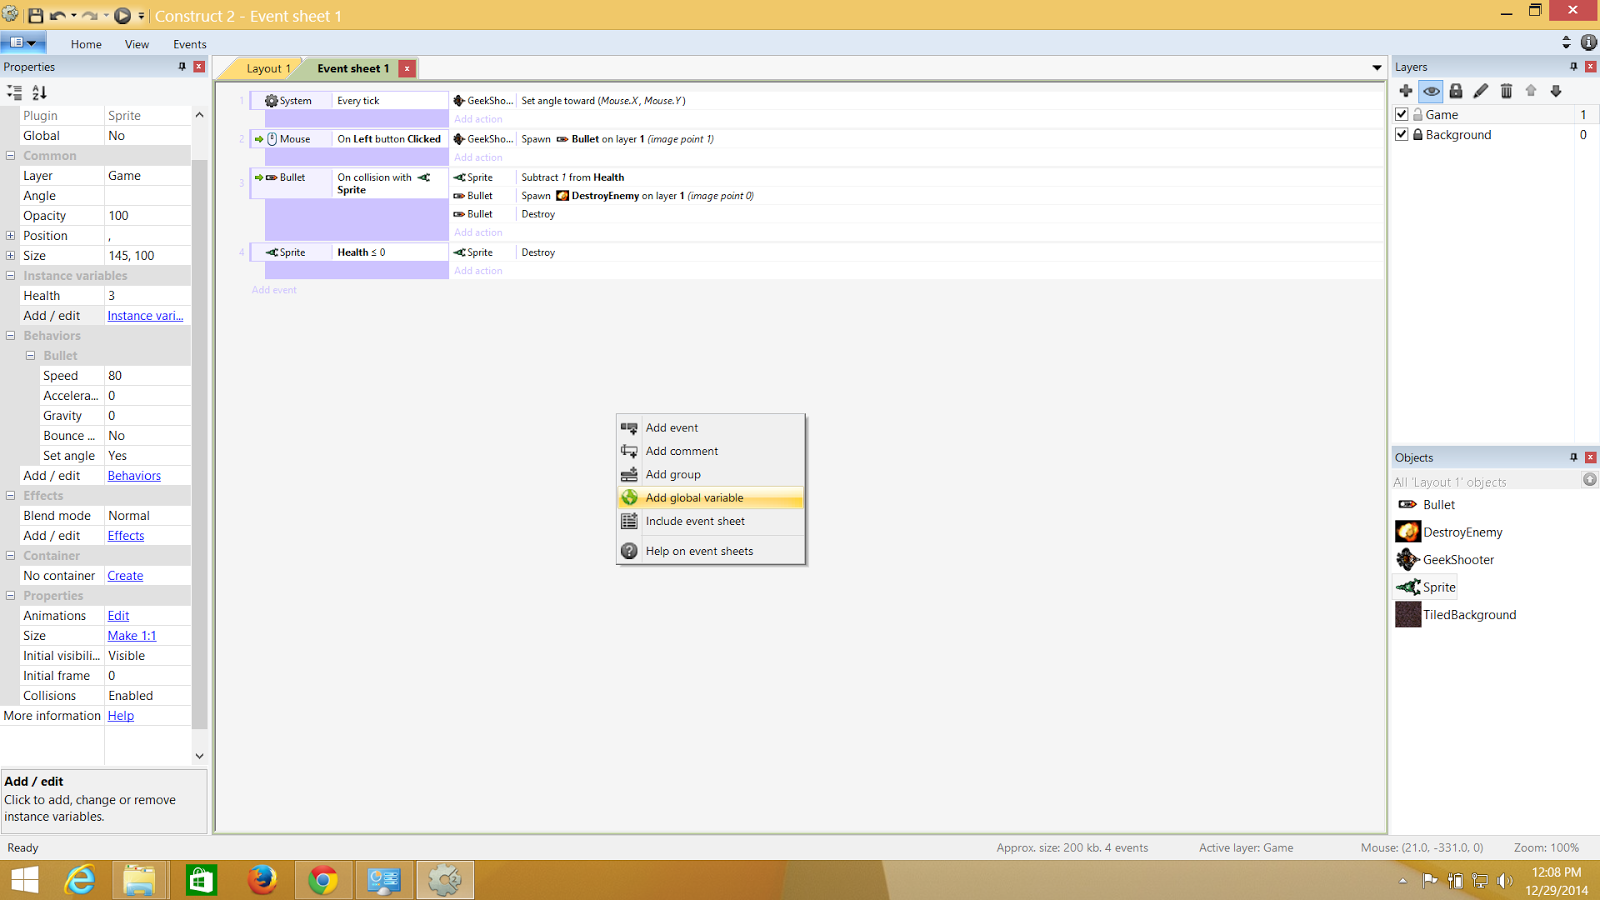
Adding a global Variable by right clicking on the event sheet
.


Adding the score variable with initial value of zero
Finally adding the score to my collison event when my bullet hits the monster.

The Heads Up Display AKA HUD

For this we create a new layer, and name it HUD . The new layer we add the object type "text" and name it as score.and it can be done by adding the sore variable with the score text.and disabling parallex so that the score doesnt move.


Regeneration of Monster and The player kill

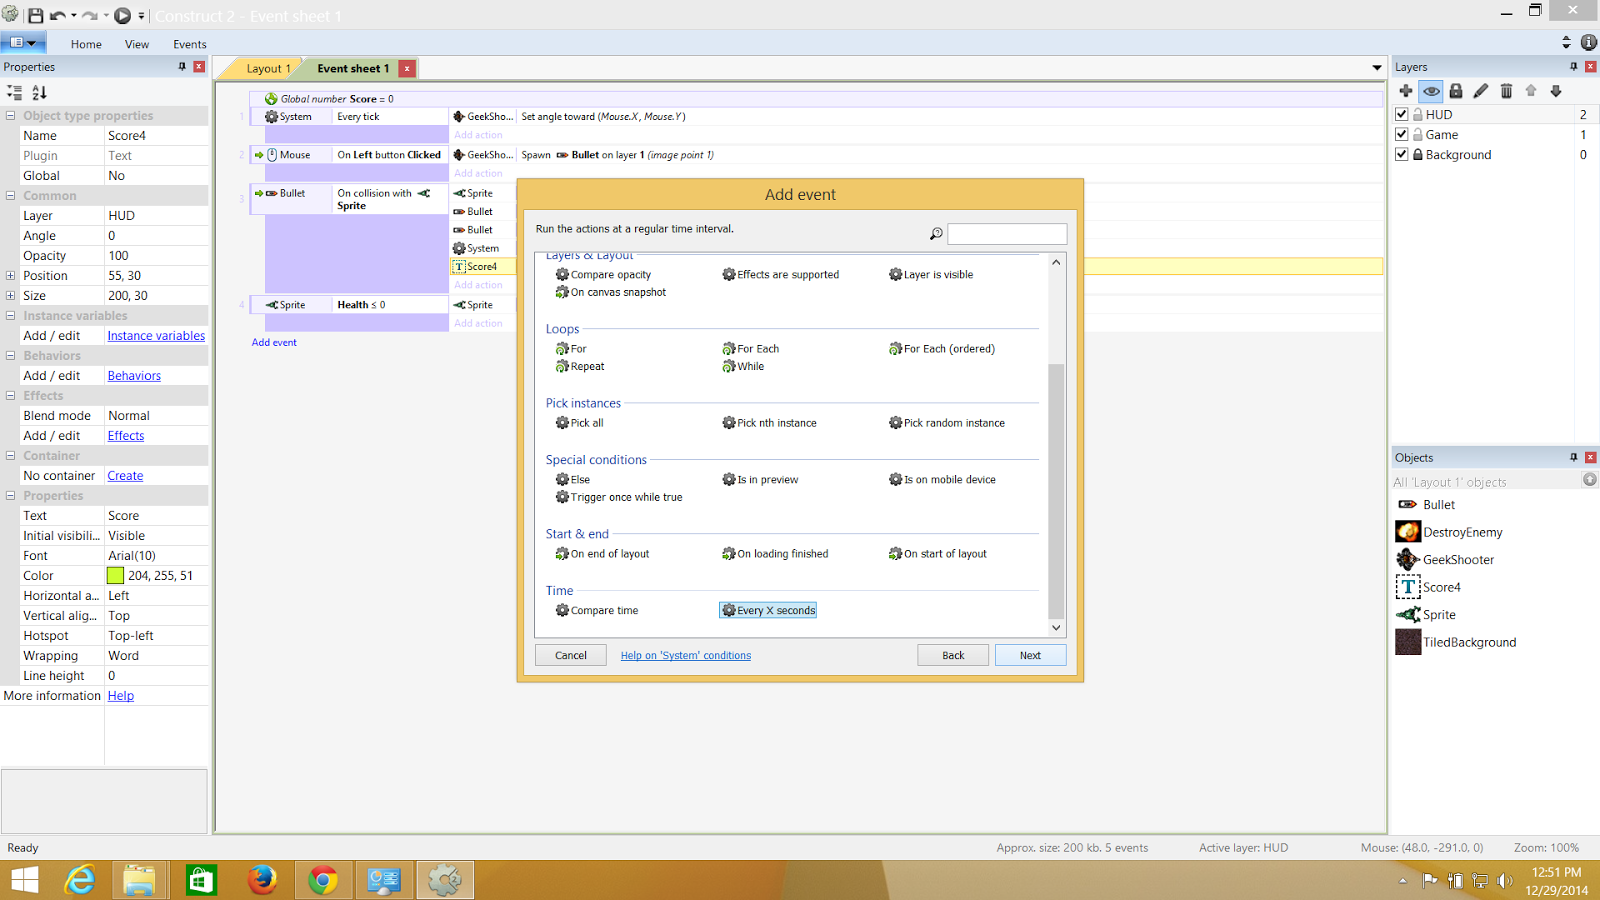
Here I will generate a monster in every 3 seconds and kill the player when the monster hits the player.So couple of more events, Firstly, we pick up a random width or height or height and width and repopulate the monster and finally have the player killed if the player is collides with any of the monster.

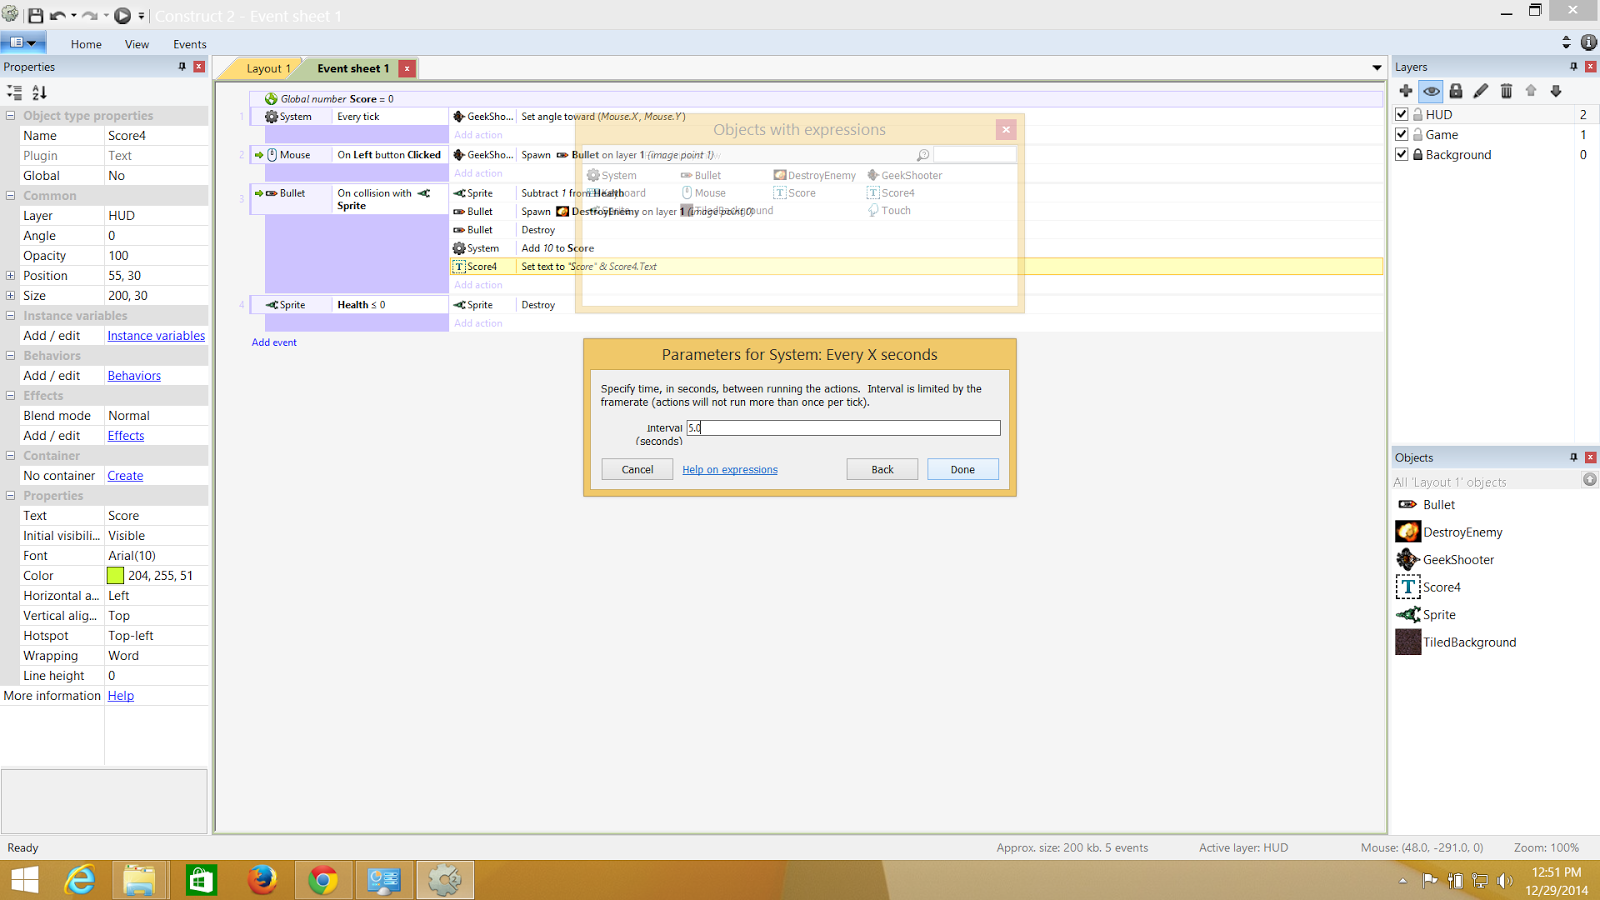
The X seconds can be specified to perform regeneration of monsters 

I have set it to 5secs

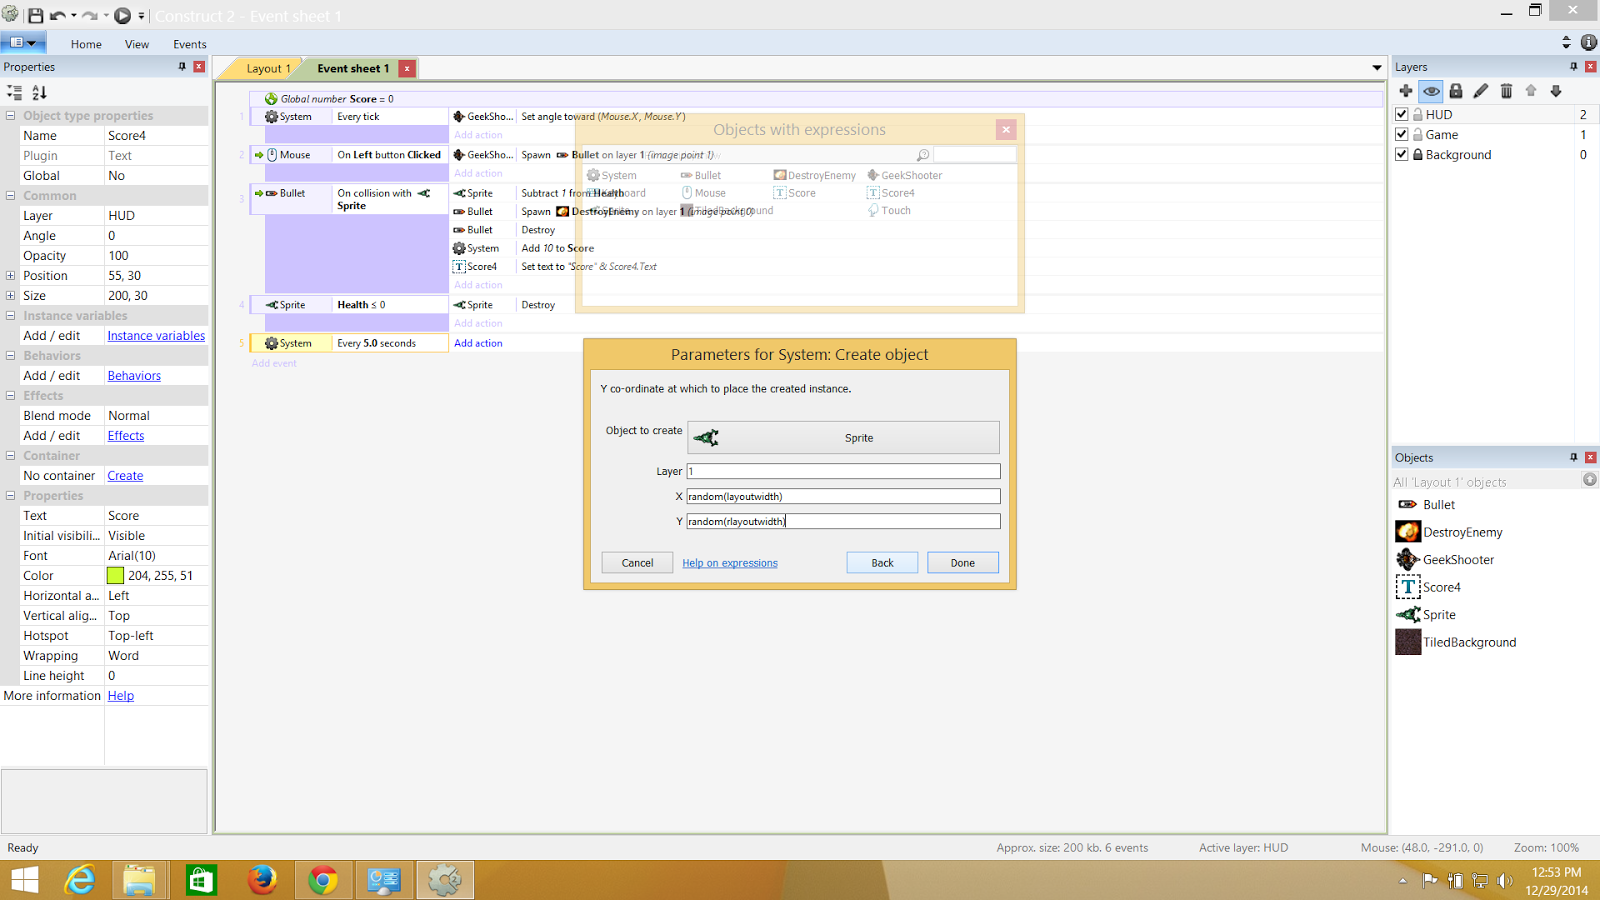
The regeneration of the monsters can happen from any random width and height of the layout


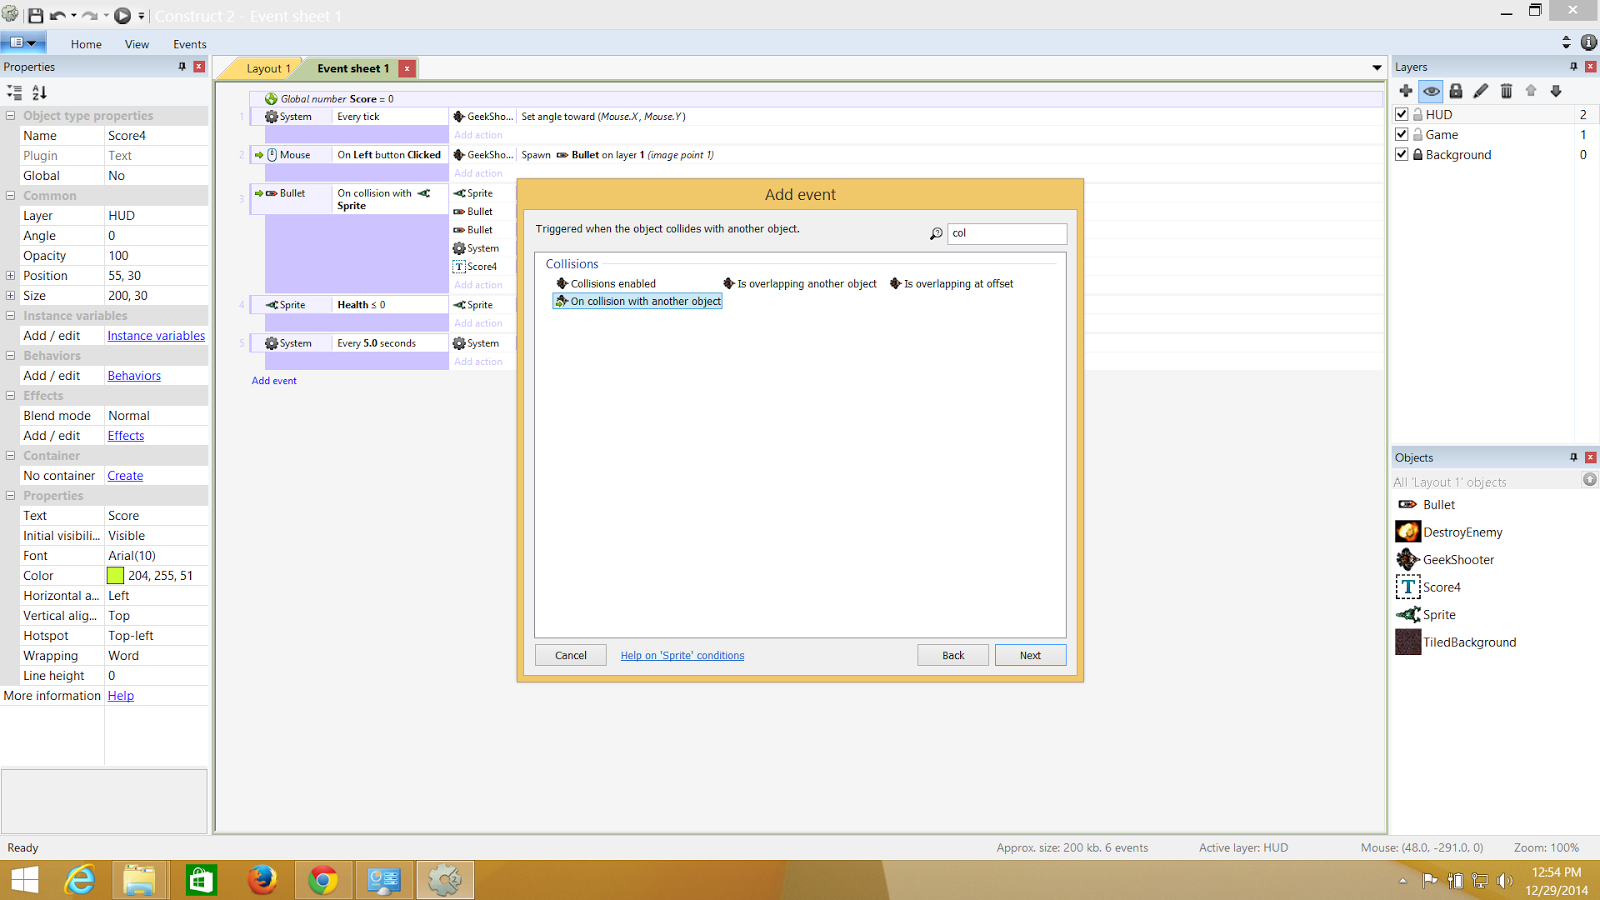
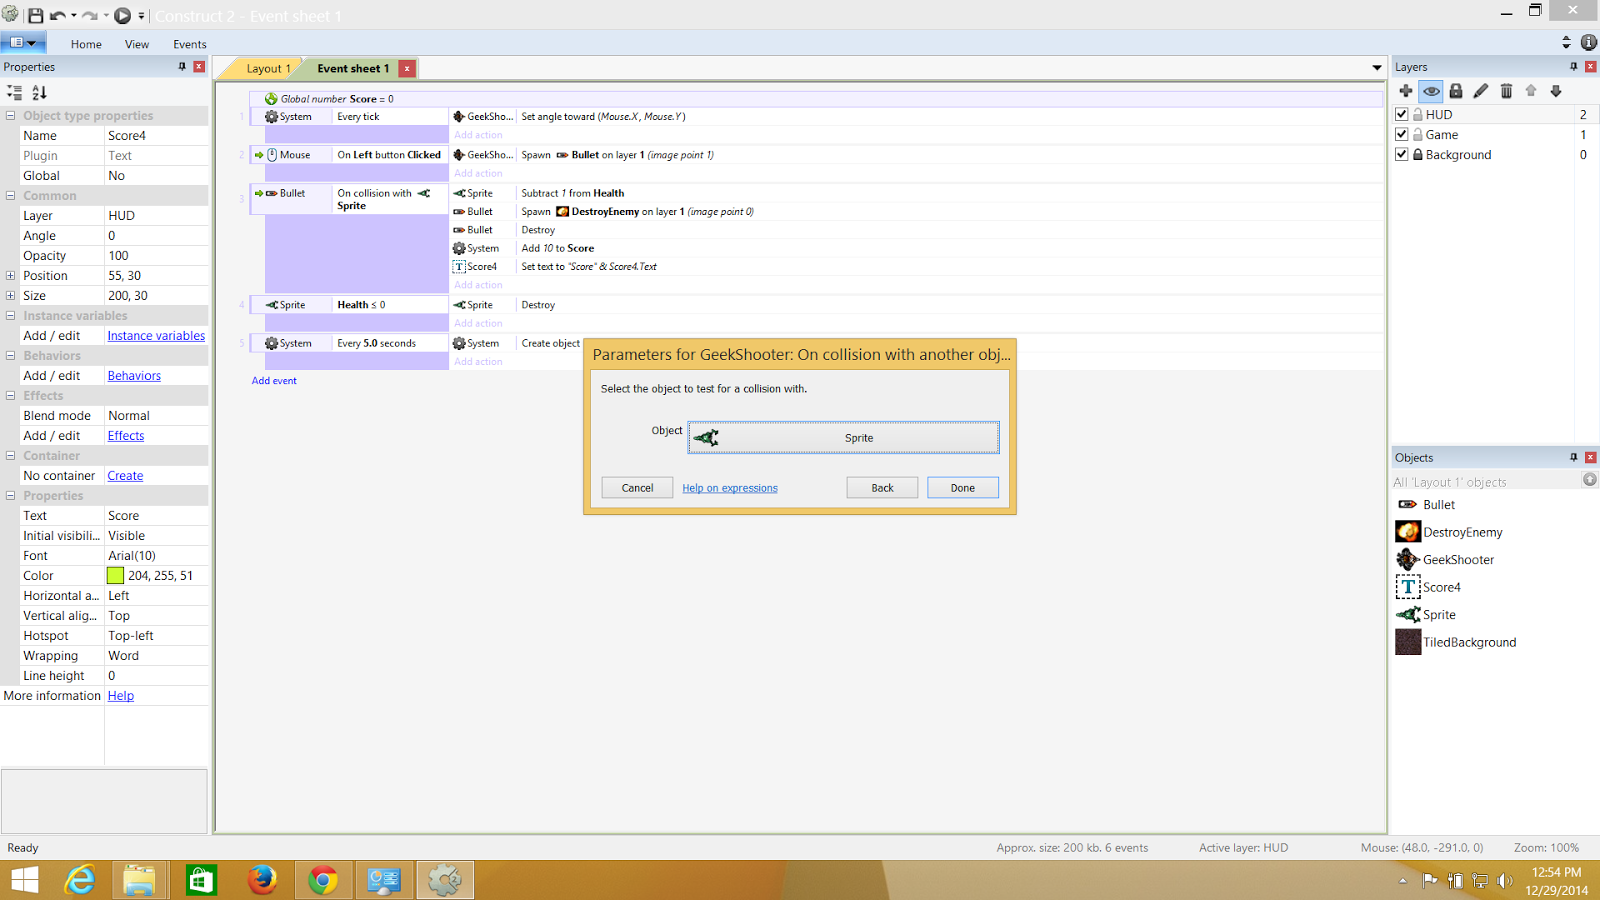
When my player collides with the monster it dies

The monster is selected from the menu of objects

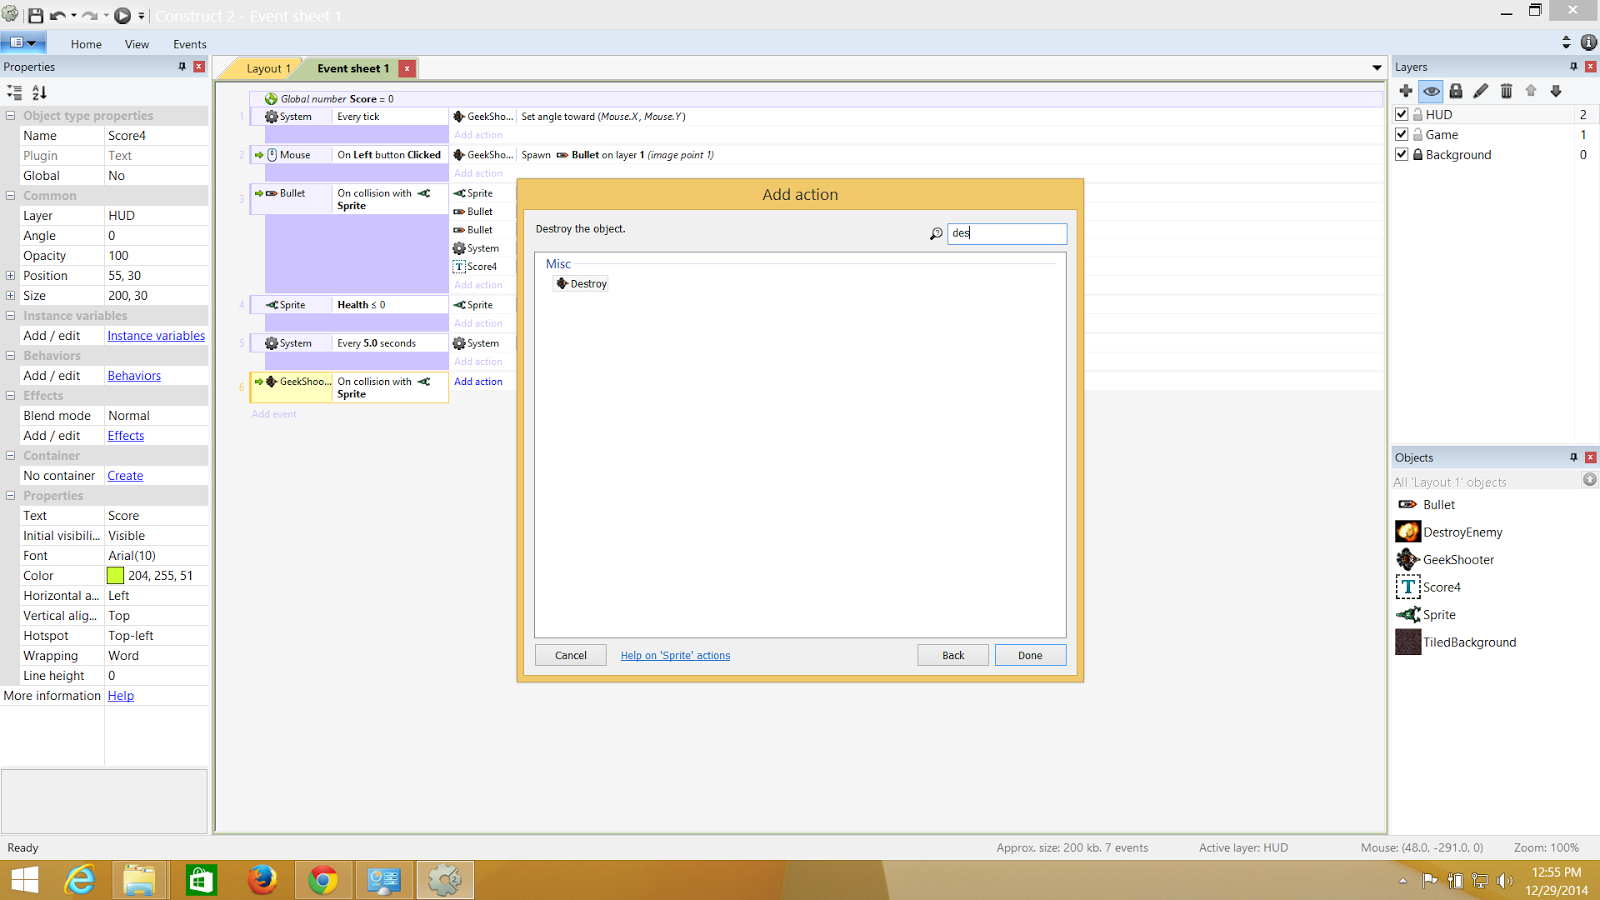
And this is where I destroy the player


And finally This is how your game will look like in Contruct 2


The final game!!

But yes, guys need to push it to store. So you will require to export this to Visual Studio where from you can package it and push it to the store.


Construct 2 gives this awesome feature to simply port your game to any platform.


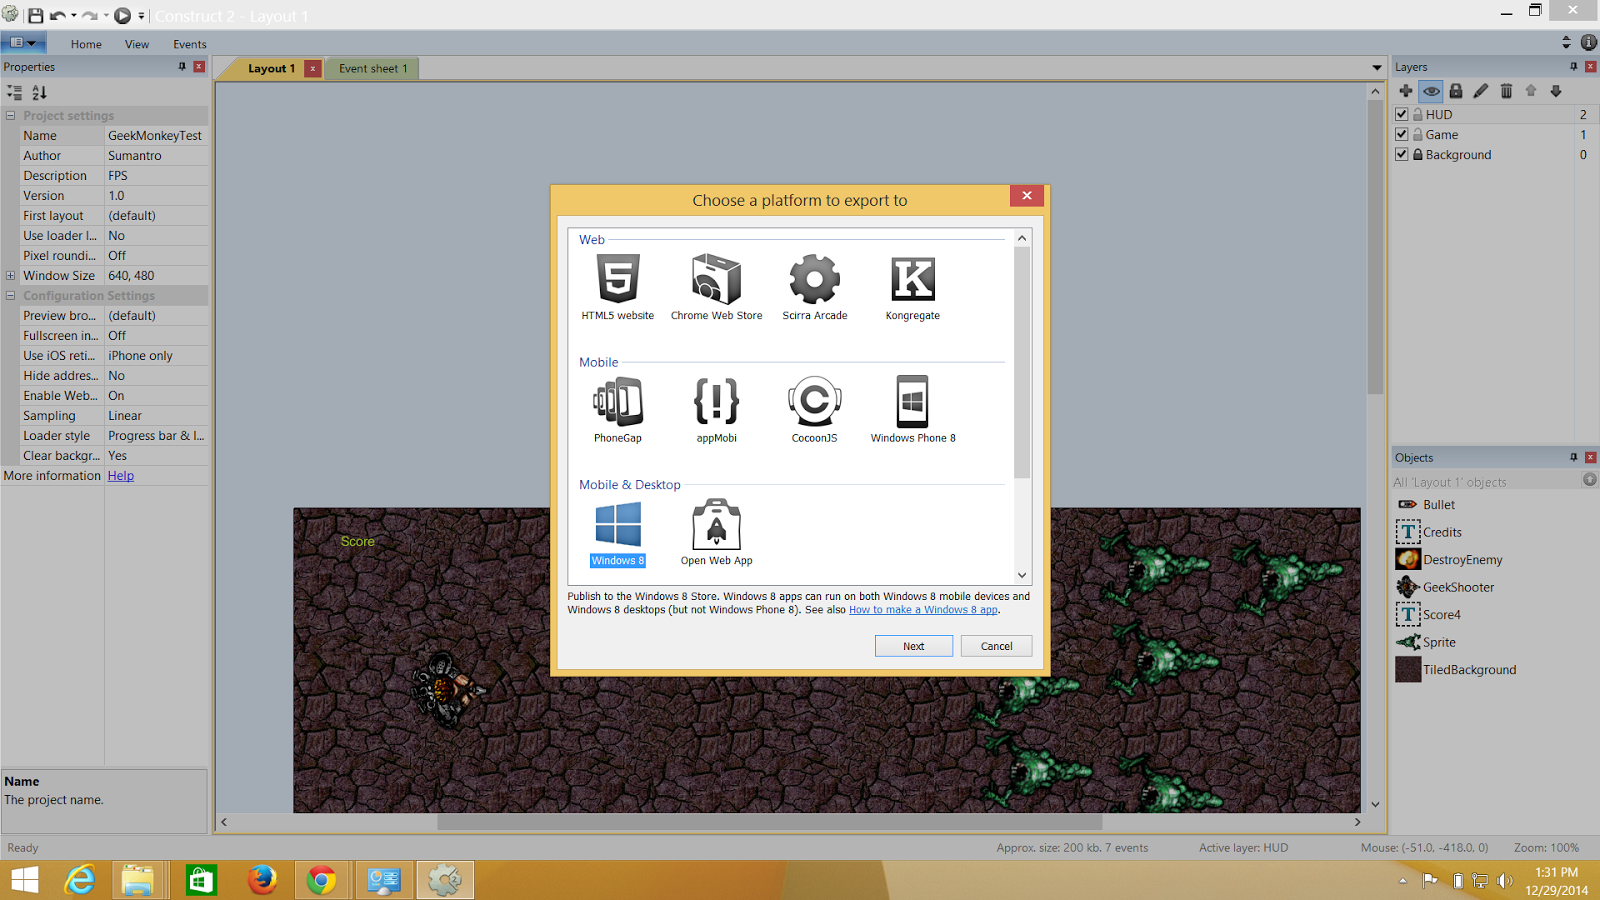
**NOTE: You need to fill the Project Name ,Author and Description Before exporting.


You can find the export option in the home tab of Construct 2


Soon after you hit Export and select the option your project will be exported to a desired folder with all the resources inside it!


Now I have all my resources and the .sln file ready for Visual Studio.


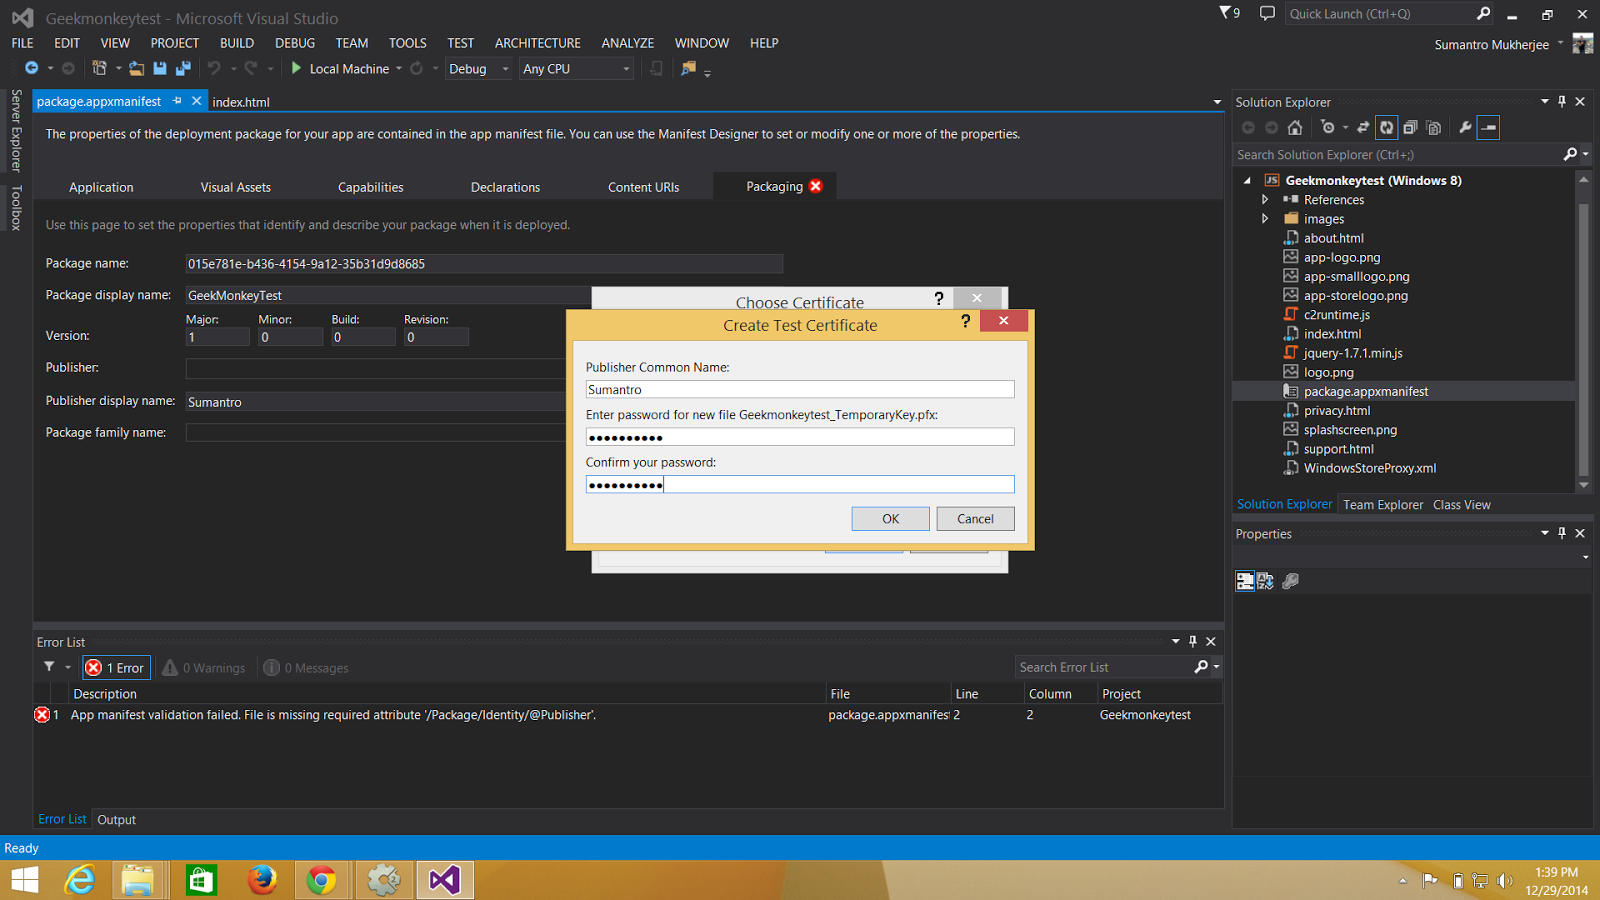
Now there is going to be a Problem and when you try to build it or run in your local machine.The problem is Contrcut 2 never signs the certificate and hence when you try to build it fails.Here is how you can give it a certificate and make your app store ready.


 SO ,this is the package.appxmanifest file where you need to give it a certificate. If you are new with game or app dev you can create your certificate the same way its shown below.

Fill the name and give it a passkey


This is how your game looks when deployed and if you have noticed it didnt take much time to make such a game!